

Pezhead
-
Posts
9,743 -
Joined
-
Last visited
-
Days Won
10 -
Feedback
100%
Content Type
Profiles
Forums
Events
Gallery
Media Demo
Store
Everything posted by Pezhead
-
Next Step - Hard Coat Since I will be fibreglassing over the top of the wood, I need to seal the wood up. I did this with a couple of coats of epoxy - the same epoxy I'm using for doing up the glass and carbon. In hindsight I should have just used some fibreglass layup resin - it would have set and dried faster. Apply several thick coats of epoxy The epoxy sets in about 45 minutes (meaning just turns thick and sticky). Apply the second coat during this phase of the first. Then leave both to fully cure overnight. Did a light wet sand the next day and a little polish to give a really smooth finish.
-
Next Step - MORE smoothing The paint also helps you out in another way. Anyone that's done any dent fixing knows that when you sand a painted surface high spots go through the paint and low spots stay colored. More Bog and sanding until surface is good and flat Believe it or not there was a whole another day in here getting the surface all flat and painted again. Looks good and smooth now
-
Thanks Mate! Lots of work, but I like seeing build posts like this. It's like time lapse photography seeing it all come together. That's why I've been snapping pics all along the build on this one. Hope it inspires some of you to try it too.
-
Next step - molding and smoothing So, next I used wood screws to fasten all of the parts together so they wouldn't move. Time to break out the Bog (auto body filler) and start filling and smoothing the transitions between the parts. Filling in gaps/transition points I really didn't take that many pictures here because of all the dust. This step took me a whole day. In fact this is about 2 full working days worth of work to get to this point. Wood is hard to see uneven spots, so I painted it gloss black (also cause I wanted to see the effect of the shape in dark color). Results from a full day's work Hard to see in this picture but there are lots of little imperfections that need to be fixed. Only visible once the paint went on.
-
Next Step - Shaping Working in 3D is a bit weird. Things that look good in your mind in 2D might not in 3D. I used a drill motor and drum sanding bits to rough shape the wood. Shaping the leading edge A whole lot of sanding and wood dust everywhere... but this is the shape Test Fit on Car Shaping Center Piece Mark & Cut to fit the bar Test fit
-
First Step - The Template First I had to make sure that this new LIP is going to fit my car perfectly. I made a template from cardboard that was rubbish. Wouldn't stay flat was a mess. So chucked that in the bin. Here I bought a 3 mm thick piece of MDF board and made a template of the bottom on the front bar. I left it on the car because I wanted to ensure the shape doesn't get distorted. Making a template I then played around with a number of shapes I liked. I didn't take any pictures of that process so sorry. Once I got the shape done then I started building the parts. Right away I noticed that this was going to be really big so I decided to do one layer in thick MDF and the other layer in 3 pieces. That allowed me to mate up to the bar easier as I wasn't always mucking about with a huge piece of wood. Constructing mating pieces for front bar. This is the basic shape and construction (cut larger than necessary to give extra material to "Play" with)
-
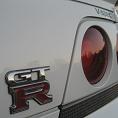
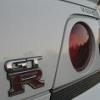
Since I'm finally nearing the completion of this stage of my project I thought I'd post it up here. PROJECT - Carbon 2 piece Front Lip / Part 1 (2nd piece yet to be built) I noticed that the plastic lip on my GTR takes a real beating. My car isn't even that low but my driveway is hell. I decided to build a 2 piece lip. The first part (that goes on the bottom of the front bar) is about 2/3 the normal height of the stock plastic lip. I plan to make a second piece that goes on the bottom of that for show days that will go lower than stock. I've been doing some researching around and decided I wanted to do this in fibreglass and then cover it in Carbon. There are a number of guys doing this on a few other forums with good success. (PS - anyone wanting to see some really cool work look at these Forums. I've learned a lot and picked up a few tricks from those folks. You have to register to see the posts). Anyone wanting to see the full build in pictures, I've uploaded them HERE. The Plan: Build a full scale model of the lip in wood. Then cover in Fibreglass x 3 layers then 1 layer of Carbon Fibre. Materials: - 3 Yards of 6 Oz Fibreglass Cloth - 3 Yards x 20 cm Carbon Cloth (MUST be a continuous piece) - Epoxy Resin & Hardener - PVA Mould Release (liquid that dries like a thin coat of cling wrap) - Sand Paper - lots of rubber gloves - Auto Body Filler (Bog) - Wood for construction - Acetone (cleans the epoxy) - plastic cups & popsicle sticks for mixing resin Lots of various tools: Jig Saw Sander Drill Drum Sanders Rotary Tool paint brushes Now, this actually took a lot longer than I thought it would to build. Most of the time goes into creating the model/mould. Also, in hindsight it was a bit ambitious to try a big part like this lip as my first carbon project, but I have done a little fibreglass work in my past so figured I'd give it a go. On with the build...
-
Like the others have said. I appreciate that you did the group buy and am happy to wait as long as they show up. I wouldn't be surprised if they had to manufacture them even though they committed to shipping stock immediately. Remember the US and UK got really hard hit during the financial crisis so wouldn't be surprised at all about service dropping just to stay in business. Hopefully they respond to you soon though. That is just poor customer service not to even respond to a paying customer.
-
I just noticed that the 13th is in the middle of the queen's b-day long weekend. I'm going to go for the 20th instead unless anyone objects.
-
A 265 isn't stretch on a 9 or 10 in wheel. 265 mm / 25.4 mm per Inch = 10.43 inches.
-
Yeah, I tried switching from Matrix to point. Problem was that a lot of the nature photos had Crocs behind a few leafs/twigs. I tried shooting a few shots with auto - all crap. Then went to manual and would take a few at slightly different focus - all looked ok through the view finder. Of course, generally all of them were a little off which is why I only posted some of the better shots on auto. I've still got a lot to learn
-
Go easy on me, I'm still learning the basics of my DSLR. Taken with Nikon D60 on our recent trip to Port Douglas and the Daintree. What I really learned was to take good shots I had to use the manual focus because all of the tree branches and stuff caused the autofocus to fritz. Here are a couple of ones that I thought were ok for an amateur. Croc was "Scar Face" on Daintree River Croc Cruises, Lizard was on a full day 4 WD tour (called Boyd's Dragon) and Golden Orb was freakishly huge - as big as my hand.
-
Thanks for this fellas. I've started to try to post picture links instead of attach. I've been using the member photos on this site and clicking the copy link address. But since Google's kind enough to host our pictures well all the better.
-
Be sure to save the receipt. I had one go bad and ended up having to get it replaced. It is a really good battery, but I do hear they have some QC issues. Was strange, when it went bad it simply acted like an open circuit. Wouldn't accept a charge - and actually read Wide open when I checked for resistance. Replacement has been running fine for about 9 months.
-
Sau:nsw Official Wakefield Trackday 2010 - Full
Pezhead replied to S13Deviat's topic in Events Archive
better make sure your sneakers pass tech inspection then - hehe. Other ideas Razor scooter, roller blades, push bike... I saw you sold your car - so cheap for a 300+ kw GTR. I was looking forward to running with ya. Good luck on the replacement. -
OK folks - so let's choose a date. May is already booked up and 6th June is Pizza cruise.... mmmmm... PIZZZA.... So, how about either June 13 or 20th? Post to vote.
-
spotted black R33 with a cage (and battery triangle on boot) on M2 last night around 4:30 pm. Also nice clean stock looking white R34 GTT on there too. At one point all three of us (me in my 33 GTR) were running single file. Looked like a mini cruise hehe.
-
R33 Battery Keeps Going Flat !
Pezhead replied to SerenaM's topic in R Series (R30, R31, R32, R33, R34)
I had the same problem with the light in the boot. I ended up putting my camera in there and recorded after I closed and sure enough - light didn't go out. If you have a multimeter (or friend with one) that reads a few amps you can see how much draw is occuring the next time you pull the battery cable. It goes "in-line" between the battery cable and the battery to read how many amps are being drawn. If there is much draw at all - like 1 amp or more, with everything off then you've got something wrong. Generally look for anything that is causing a drain on the power, alarms, lights etc. Try disconnecting them one by one or pulling the fuses that supply power. -
Darn, I can't get out of work to make the funeral. Approx. what time is the wake? I'd like to try to make that. Thanks.
-
Bought my tickets last night. Will try to find a date sometime in June.
-
Guys, deal will be that you have to buy your own "SCOUPON" Deal. Then I will arrange a date for those of use that have bought them to meet up on a SUNDAY, maybe a little cruise and go karting. My son is joining in so I think we have at least 5. I just got mine and is it really easy just enter you details and credit card. Looks like they send it electronically because it didn't ask for a mailing address. Everybody, this deal is a Go. Make sure you buy your tickets before the deal expires at noon tomorrow.
-
ok, we'll make it a sunday in maybe a month or so. We need a commitment folks.
-
Very near airport. Contact Details: Address: 40 - 50 Arncliffe St Wolli Creek, Sydney NSW, 2205 Phone: (02) 9597 7077
-
I saw this and thought - Hey, why not organise a Go Kart Cruise with discounted tickets! So - today there is a Scoupon deal for 50% off 2 go kart sessions. I've never been to this place before but at 1/2 price why not give it a go. If you are IN then place a post here. The deal is only good for 24 hours - so till about noon tomorrow. As long as we get at least 5 people today, I'll then coordinate a date and we'll cruise and go-kart. I'll post here if it is a GO then go buy your tickets. Otherwise I guess you can buy 'em and go on your own if you like. details: Scoupon Deal Kartatak web site (From the Scoupon deal) Only $24 for 2 heart-pumping Go Kart sessions, normally $48! The Fine Print Valid Sunday to Friday Valid from 12 May 2010 from 12 November 2010 Valid photo ID required for racers 18 and up Racers under 18 must be accompanied by an adult Highlights Sydney's hottest indoor go kart track You receive two 10 minute sessions on their awesome track! Each Kart has a remote timing system to accurately time your best lap down to 1/100th of a second Race against your friends and compare lap times - the winner gets bragging rights! Power slide through corners on Kartatak's awesome "skid car" track No bookings needed, just rock up!
-
Tyre Arrived on Friday! Great Service Guys. Many thanks. Now I just have to wait for my new rims.
