


ylwgtr2
-
Posts
3,200 -
Joined
-
Last visited
-
Feedback
100%
Content Type
Profiles
Forums
Events
Gallery
Media Demo
Store
Everything posted by ylwgtr2
-
From the album: ylwgtr2's Gallery
© © Copyright www.skylinesaustralia.com and respective owner
-

Mazda Rx3Gt Restoration
ylwgtr2 replied to ylwgtr2's topic in Members Cars, Project Overhauls & Restorations
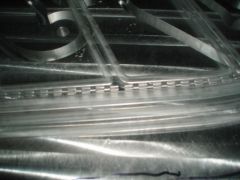
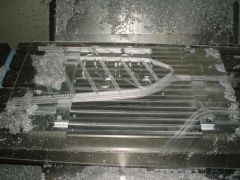
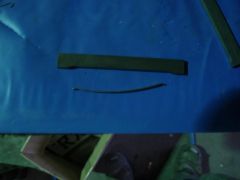
here is the proof test in plastic for the door trim stamp dies.....these are the reverse of the pattern thats embossed into the door trim....they will be milled into a 10mm plate of alloy then heated and stamped onto vinyl to reproduce the door trims.....you can see the detail in the last pic.....these were made by my 14 year old nephew -
From the album: ylwgtr2's Gallery
© © Copyright www.skylinesaustralia.com and respective owner
-
From the album: ylwgtr2's Gallery
© © Copyright www.skylinesaustralia.com and respective owner
-
ever thought of sending it to a place that does motorbike shocks?crooz tune are awesome with bike shocks and there are much more technical bits of gear
-
praise and thanks gets put in the back pocket on payday my friend ....im sure the women thanked you anyway
-
From the album: ylwgtr2's Gallery
© © Copyright www.skylinesaustralia.com and respective owner
-

From the album: ylwgtr2's Gallery
© © Copyright www.skylinesaustralia.com and respective owner
-

From the album: ylwgtr2's Gallery
© © Copyright www.skylinesaustralia.com and respective owner
-
rustang
-
we do it all the time with motorbike parts...its not really anything special,we paint them with an adhesion promoter(like dupont 222S) then clear it
-
Rb26 2000Rpm Idle And Intermittent Hunt
ylwgtr2 replied to GTR260's topic in Engines & Forced Induction
sound like injector cut is coming in....the ecu sees via throttle sensor that the throttle is closed and its seeing the rpm exceeding what it deems to be a normal idle speed so it pulls the power to the injectors.....you have a vac leak or BAC valve is letting too much air past -
Mazda Rx3Gt Restoration
ylwgtr2 replied to ylwgtr2's topic in Members Cars, Project Overhauls & Restorations
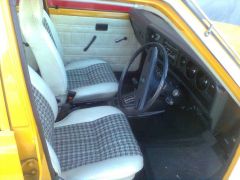
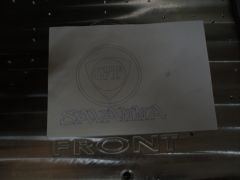
ok so ive been a bit busy at work but ive had some small progress none the less....ive got hold of some original Rx/808 seats for the car(as the ones that were in it were incorrect)So i need to get them trimmed...but problem is the GT's had a symbol embossed in the headrest...Lucky for me i have a CNC machine centre so now i have to make some branding dies....getting hold of a picture of the symbol seems to be impossible....so i borrowed a japanese brochure off a mate.It had an angle shot of the front seats....so ive roughed it out in CAD and put a pen in the chuck and drawn a 2D picture....I still need to do some fine tuning/resizing and reverse the image then i will machine up the branding die -
From the album: ylwgtr2's Gallery
© © Copyright www.skylinesaustralia.com and respective owner
-
Mazda Rx3Gt Restoration
ylwgtr2 replied to ylwgtr2's topic in Members Cars, Project Overhauls & Restorations
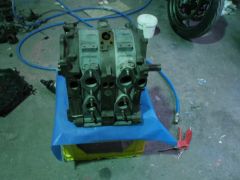
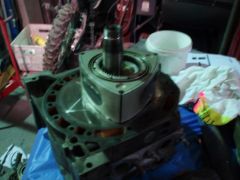
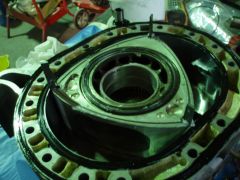
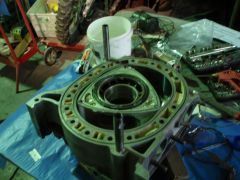
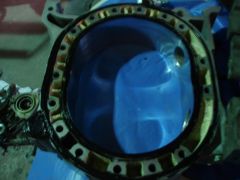
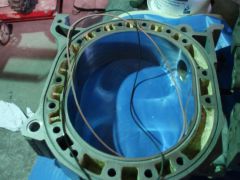
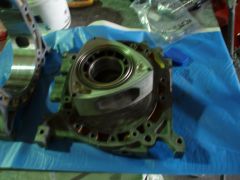
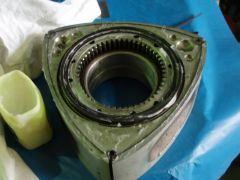
ok here is the rotors,as you can see the side seals come longer so you can file them back to the clearance you want....this takes ages,my view this is the part that can make or break the engines reliability(not just side seals but all the clearances as there are many others) these are the oil control rings that stops the oil that flows through the centre of the rotor entering the combustion chamber,the oil lubes the centre bearing and cools the rotor itself.The oil control ring is metal with an o ring that fits inside the outer ring and inside the inside ring rotaries get built from the front to the back so we start with the front plate,fit the stationary gear(which has also been carefully clearanced) aftre being bent over from both nissan and mazda i have lots of vaseline left so coat the front plate with it then prep up the front of the first rotor by fitting all the seals and springs,the corner seals have tiny springs under them,as do the side seals and oil control rings here is the front rotor covered is vas ready to be dropped onto the front plate then fit the backside of the front rotor with all the same gear and your ready for the housing,these rubber bands are a sort of head gasket.The inner one is made of some strange heat proof material as the combustion heat and gas give it a hard time the join part of it goes near the intake i like to use threebond in the groove then drop the housing on and fit the dowls in this is the apex seal and sring and slide them down the corner of the rotor next drop on the centre plate,insert e shaft/rotor housing and build up the next rotor then rear housing/tension bolts and the core is finished -
From the album: ylwgtr2's Gallery
© © Copyright www.skylinesaustralia.com and respective owner
-
From the album: ylwgtr2's Gallery
© © Copyright www.skylinesaustralia.com and respective owner
-
From the album: ylwgtr2's Gallery
© © Copyright www.skylinesaustralia.com and respective owner
-
From the album: ylwgtr2's Gallery
© © Copyright www.skylinesaustralia.com and respective owner
-
From the album: ylwgtr2's Gallery
© © Copyright www.skylinesaustralia.com and respective owner
-
From the album: ylwgtr2's Gallery
© © Copyright www.skylinesaustralia.com and respective owner
-

From the album: ylwgtr2's Gallery
© © Copyright www.skylinesaustralia.com and respective owner
-
From the album: ylwgtr2's Gallery
© © Copyright www.skylinesaustralia.com and respective owner
-
From the album: ylwgtr2's Gallery
© © Copyright www.skylinesaustralia.com and respective owner
-
From the album: ylwgtr2's Gallery
© © Copyright www.skylinesaustralia.com and respective owner


