

R31 drift pig
-
Posts
857 -
Joined
-
Last visited
-
Feedback
100%
Content Type
Profiles
Forums
Events
Gallery
Media Demo
Store
Everything posted by R31 drift pig
-

Rb25 Neo Setup & Modification Advice Ideas
R31 drift pig replied to Ke55pig's topic in Engines & Forced Induction
who's tuning? -
Rb25 Neo Setup & Modification Advice Ideas
R31 drift pig replied to Ke55pig's topic in Engines & Forced Induction
I reckon you'll still scoot through with the pump. My tuner recommended 360-odd on a single 044 (what I have done with my 33), but said that 400 can be done. -
best of both worlds..... registered race car. I do have a D40 navvy as a daily though.
-
I really, really like this car. One of the few cars that inspires me to make my 33 better. Keep it up!
-
I should clarify I'm using the peirberg pump in a R33
-
200 LPH at free flow, 130 @ 3.5 psi. About half what a single 044 does at full noise - mine will be 280 lph @ 65-70 psi.
-
I am using a peirberg in tank lift pump (part number 721.088.62) direct fit into cradle, e85/methanol safe, into a surge and a 044. 044 will be fine with e85.
-
Rb25 Neo Setup & Modification Advice Ideas
R31 drift pig replied to Ke55pig's topic in Engines & Forced Induction
I have a L2 20G 10cm. I was hopeful of around 330-340 with the cams Ive put in, camtech 264/268 9mm's. Cant seem to find a lot about the l2 20g on a 25 for some reason, mostly the 25g/t67. Ive been in a r34 with a t67 25g 10cm, and less engine work done (Injectors/FMIC/Power FC/Z32/Nismo Pump/Exhaust and turbo kit) and it was pretty damn good on the road, made 300ish on 98, so I can only imagine how good yours'll be with the extra gear on e85. -
Rb25 Neo Setup & Modification Advice Ideas
R31 drift pig replied to Ke55pig's topic in Engines & Forced Induction
Out of interest, what do you reckon a 20G will make on e85 on a 25? Believe they both retain VCT. If you keep the drum off the ground with some wood or bricks, it'll be fine for 12 months. I do the same thing, but liberty Main nth road is 5 mins away from home. Maybe switch to e85 first and see what it makes, if you run out of injector switch to some 1000cc's, or 1200's, and add another pump if need be too. -
Rb25 Neo Setup & Modification Advice Ideas
R31 drift pig replied to Ke55pig's topic in Engines & Forced Induction
That plenum is where you'll find the most gains with the way your engine is setup. (keeping everything else the same that is) Shorter piping is no match for the midrange that the factory plenum provides. Well proven. And reckon you'll run out of pump around the same level as the injectors. (On e85 that is) My tuner advised me that safe level for single 044 on e85 with is around 360-380 kw. May have to add a 2nd 044, which is easy to do with your rail. -
Rb25 Neo Setup & Modification Advice Ideas
R31 drift pig replied to Ke55pig's topic in Engines & Forced Induction
Dont reckon you'll gain too much with a cam gear. Maybe a bit. Best bet is to piss off the GReddy plenum and go back to factory; will lose some peak power but gain heaps of midrange. Im aiming for around the power you have now, with a TD06L2 20G, and have kept the factory plenum for exactly that reason. Am using Plazmaman piping to keep clear of high mount turbo. Think injector size will be too small for e85, and possibly fuel pump. Can run on e85 and see what you get? Don't need to change cooler piping/exhaust/exhaust housing at all either. -
R33 Gtst Track Car - The "f**k Bitches, Get Money" Build
R31 drift pig replied to R31 drift pig's topic in Motorsport Builds
Interior is totally bare. Like, nothing atm. Getting a simple alloy sheetmetal dash bent up, and a new rear firewall for CAMS. Hopefully have it back this week. This is what it looked like while building the seat rails. this is when it was a street car... Ill take some pics when I get it back and I've painted the interior and started bolting stuff in. Ill be selling the RPF1's, if I can find something to take their place. -
R33 Gtst Track Car - The "f**k Bitches, Get Money" Build
R31 drift pig replied to R31 drift pig's topic in Motorsport Builds
yeah, its just re-assembly, wire up the body loom, wire up the haltech, and plumb in the fuel lines, and all the littler things that need to be buttoned up. Im a big fan of trust turbos as well, made 270 on 19 psi on 98 with a shit exhaust and no cams, now with straight pipes/cams/more boost and e85 I'm pretty keen to see the result. and after being at the adelaide motorsport festival all day today, I'm keen as a f**king bean to get it finished now. -
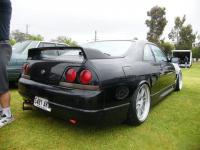
Owned this for 4-5 years now, served a couple of years daily/street skid duty, then pull it off the road with the purchase of my new D40 Navara, until I figured out what to do with it. I Did some circuit racing and some drifting, and mate drove it at the 2014 skyline nats while i was overseas in malaysia, so when I got back, I ripped the whole car apart and stripped it back to a bare hollow shell, and started building something that could survive anything I can put it through, and still be a blast to drive. And here we are today. specs Body Seam/Spot welded chassis Boostworx CAMS spec full weld in cage Type M Front bar/sideskirts/pods/wing Origin 25mm FRP front fenders Knight Racer 35mm GTR Full rear quarters S14 Ganador copy mirrors 8000K HID kit, Respray in factory black Interior Velo Viper seat in black, weld in floor mount rails, Velo Harness Sparco Steering wheel/Lifeline Detachable hub kit/Attain shift knob Racepak IQ3 Dash, Moroso Switch panel Aluminium sheetmetal dash and rear firewall, Lifeline Firebomb extinguisher system Engine / driveline Rebuilt RB25 motor - CP Pistons/Spool Rods/ARP Hardware/Greddy Metal Head Gasket/Camtech 264/268 9mm cams, HKS cam gear, Performance Springs valve springs K+N Pod, Trust TD06SL2-20G 10cm turbo/GReddy High-mount Stainless Manifold/Tial MV44 Wastegate Plazmaman FMIC And piping 1 piece dump/front/3 inch straight pipe, Jun BL Blast pipe Pierberg lift pump, Surge Tank, Bosch 044, XSpurt 1000cc Injectors, Aeroflow Fuel Rail, Aeroflow Regulator, E85 Fuel Haltech PS2000 ECU, Haltech Wideband Nismo GMAX twin plate clutch/Braided clutch line/urethane gearbox mount/Nismo pivot ball, Attain Solid Shifter Nismo 2 way LSD, alloy diff mounts Alloy radiator/Silicone Hoses/Nismo Thermostat/N1 water pump/GKTech fan HKS oil cooler kit with filter relocation Derale Power Steering Cooler Optima Dry Cell Battery Wheel and Tyres Enkei RPF1 wheels in silver, 18x9.5 +15 (-5 with 25mm spacer) and 18x10.5 +15 (-20 with 35mm spacer) 215/40 and 235/40 Tyres Suspension/Brake setup - FRONT Cusco Comp S coilovers – 10kg Cusco Adj. Upper arms Cusco Adj. tension Rods Cusco Tension Rod Brace Nismo Tower Bar w/master cyl. brace Kids Heart Free-dom Knuckles KTS Tie rod Ends Ikeya Formula Tie rods DMAX Lock spacers RDA Slotted rotors ABC Braided Lines Project MU HC+Pads Suspesion/Brake setup - REAR Cusco Comp S Coilovers – 8kg Cusco Rear upper arms with eccentric lockouts Cusco Traction Rods Cusco Drag Links (HICAS Remval) Solid Cradle Bushes GKTech Subframe bracing kit RDA Slotted rotors ABC Braided Lines Project MU HC+Pads Project MU Handbrake drum shoes Car is currently sitting waiting to have dash finished, then just paint interior, fully rewire car, wire in haltech and tune. Car is just running a basic loom of headlights/taillights/brakelights/single speed wiper/indicators/power windows and hazards. Haltech is being wired up in full stand alone, there is no factory wiring left at all. Also seriously needs an alignment, paint needs to be wet sanded and buffed, all the glass put back in, and 1000 other small things. Don't need to buy anything for it though. Right now, its covered in an inch of dust, and I haven't worked on it in 3 months, but now I'm motivated again, so when I get it back Ill screw it together and see what happens. Im currently looking around at some new wheels and tyres, some 18x10's and 18x12's, and switching to semi's at a minimum I don't know exactly what Ill use it for, but looking at doing hillclimbs, some circuit racing, maybe some more drifting. It'll still see some street duties from time to time, but not too often. so yeah, not reinventing the wheel, just something super fun to drive that I haven't spent the national debt building.
-
I replaced my clutch slave recently, and from (my very) vague recollection, the top fitting goes into the slave.
-
Suspension And Wheel Issue
R31 drift pig replied to SargeRX8's topic in Suspension, braking, tyres and drivetrain
Exactly as described above.Hard to tell if theres any damage by looking at the pics. I have however been through the exact same scenario in my old 180sx and I ended up replacing both LCA's, the crossmember itself, the castor arms, a tie rod and both rod ends at the end of it all. Plus had to reweld the radiator support etc back on. T'was a moderately big hit. Check the LCA and the crossmember with known quantities before you do anything else. Then deal with the hub/upright issue. I think that'll either be a rooted kingpin or the hub itself. I don't think you can fix any of this by adjusting arms. Comment with your alignment was referring to your alignment sheet. I would run more camber and castor just as a rule, even on the street. No point having adjustable arms and then hamstringing it with a shit alignment. -
Suspension And Wheel Issue
R31 drift pig replied to SargeRX8's topic in Suspension, braking, tyres and drivetrain
It's not your wheels. Reckon RHS has taken the hit as well, think you'll find the control arm bent backwards a bit. Would also explain the movement in the hub assembly, may have elongated the hole for the kingpin. Look at replacing the lower control arm, but you may have bent or elongated the holes in the crossmember and you may need to repair/replace that. And the upright may also be damaged. As for the alignment, add some more castor. Id add some more camber too. -
Wheel Sizes & Offsets For Skylines
R31 drift pig replied to Sydneykid's topic in Suspension, braking, tyres and drivetrain
And you forgot the part where he says it doesn't have camber arms etc, so some camber and suddenly they're not sticking out. 2.5 - 3 degrees up front and a smidge in the back and done. Dynamic camber will take care of the rest. Be pretty silly to put them on and not put in a decent alignment. -
Wheel Sizes & Offsets For Skylines
R31 drift pig replied to Sydneykid's topic in Suspension, braking, tyres and drivetrain
Found this... 18x9.5 +15 Not what i'd call a "dick load", some camber and you'd get em under. Depends what you're after exactly. RPF1's are the shit though, and worth the effort. They look good on anything. Theres more here in this thread. http://www.sau.com.au/forums/topic/372204-r32-gtst-fitment-pics-please/ -
Help! Enkei Rpf1 On R33 Skyline
R31 drift pig replied to georgekappa's topic in Suspension, braking, tyres and drivetrain
It was Obvious. But a blanket statement of "it won't fit" is incorrect. And I'm not trying to tell him he SHOULD do it, but rather that there are other solutions. -
Help! Enkei Rpf1 On R33 Skyline
R31 drift pig replied to georgekappa's topic in Suspension, braking, tyres and drivetrain
They would have gone on with a bit of work. $1700 -$1800 is the going rate new here in aus. I bought mine in from the us for under $1500 delivered, but the dollar was better. And mine are the widest RPF1's available. I have 18x9.5+15 WITH a 25mm spacer up front, and 18x10.5 +15 rear, now has a 35mm rear spacer. with 25mm front and 35mm rear fenders. But ran it as a street car like that for a couple of years. they WILL fit on a GTST. You just need to mod the guards. I ran rolled flared OEM Metal for a while, and then when to origin +25mm FRP Fenders. Your wheel alignment also plays a major part in it. Also tyre sizing. Fact 3 is incorrect. The spokes taper differently as they get wider. Many brands of wheels do this. Commonly referred to as a "FACE" Offset is a part of the equation, but not all of it. My 9.5's and 10.5's taper differently. I Previously ran Enkei ABC Exclusive wheels in 18x9.5 +35 and 18x10.5 +35. I actually still have them. They run a more concave face, therefore allowing more calliper clearance. There are plenty of people running wider and lower offset wheels than what you're suggesting. You really need to consider all of the following, not just a width and offset and thats it. - Width - Offset - Wheel Face tyre - some offer more or less room on the face for calliper clearance. Enkeis are generally pretty good with clearance, - Tyre Size - Alignment - Ride Height - Spring Rates TBH, you could have just gone with a 10mm longer wheel stud and a 10mm slip on, or a 15mm bolt on, or a 20 and more camber, for every degree of negative camber you run, the too of the wheel moves in 5mm (Generally) -
Thoughts On Nismo Solid Shifter?
R31 drift pig replied to GSX-R35's topic in Suspension, braking, tyres and drivetrain
yeah, funny how a sub-$150 part can change a major part of the car like that. -
Thoughts On Nismo Solid Shifter?
R31 drift pig replied to GSX-R35's topic in Suspension, braking, tyres and drivetrain
it is a track car now, but it wasn't when I did it. Didn't really notice any noise from the bush, but I had solid mounted cradle/solid diff bushes, urethane gearbox mount and Nismo engine mounts, so there was plenty of NVH coming from other areas. I also don't really mind a little NVH though, so didnt bother me either way. Depends if the inside of your car is like a library or not. -
Thoughts On Nismo Solid Shifter?
R31 drift pig replied to GSX-R35's topic in Suspension, braking, tyres and drivetrain
I have an Attain solid shifter... MUCH better than the Nismo one IMO, better quality too. I Had the Nismo one previously, and A/B ing them the Attain was much nicer to use. And comes with a solid shift knob, and it's cheaper than the Nismo. With the spare change I changed the plastic bush for a GKTech brass one. I also have the upgraded spring kit int he box, and it feels pretty damn awesome. I also have a urethane gearbox mount. http://www.rhdjapan.com/attain-solid-shifter-ecr33-rb25det.html Just needs a close ratio gear set and Im golden. -
Ya know, add an oil temp gauge if you can and you should be right for the day. May as well add a coolant temp gauge while you're at it. But you could probably suffice without it, just run a cool down lap every second lap. You could also add a seat and a harness to the list, but once you start... its hard to stop. Do what you can before the day, and go out and have some fun. Remember to use a TYPE A coolant in the radiator. I use nulon red.

