

Owgasm
-
Posts
4,666 -
Joined
-
Last visited
-
Feedback
100%
Content Type
Profiles
Forums
Events
Gallery
Media Demo
Store
Everything posted by Owgasm
-
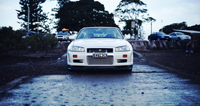
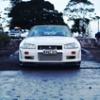
GTR?
-
 I considered doing it once, then remembered I had RACQ (Queensland road assist), poor fella. I always assumed two proper wheels on the front would be beneficial somehow, also my front brakes don't allow for the spare to fit over the caliper.
 -
Quite sure they are Volk GT-Ns
-
Disassembling Ganador Gd Super Mirrors - Side Mirrors
Owgasm posted a topic in Tutorials / DIY / FAQ
Hi, Recently purchased some second hand Ganador Mirrors. They are currently silver and my car is pearl pink white. Since matching my car is difficult, I'll most likely paint them black as wrapping them in carbon turned out to be too expensive. I searched around online for a guide to disassemble the mirrors but there was nothing, just other people asking. So I disassembled one and then took photos for the second one as a guide for myself to put back together and might as well put a guide up for others. Tools: Pointy tip pliers Phillips head screw driver Flat head screw driver 7mm spanner Guide: 1. Temporarily fit the power connector to your door and adjust the mirror lens horizontally inwards until it can't anymore. The lens is on a pivotal ball with two rubber screws that are threaded into the motors. This way the rubber screw is completely out of one socket. Then carefully seperate the lens from the pivot ball (be gentle as the other screw is still threaded and are very weak). Once it has popped off, adjust the mirror upwards (iirc) to get the lens completely detached. This is the lens detached (after I decided to take photos of the process) 2. You can do the following steps unplugged from the car. Behind the lens is the motor held onto a backing plate by 4 screws. 3 of which are easily enough to screw out but the 4th has a nut behind it which you can't get to just yet. 3. Remove the 2 screws holding the backing plate to the housing. 4. Pull the whole part out, it should come out with a bit of force as the spring is holding it in, so just move it until it holds itself ajar. 5. Here you'll be able to see the 7mm nut, use the spanner to hold it and close the gap a bit until you can use your screw driver on the outside. The motor should come off the backing plate now. 6. Now that the plate is by itself, the only things holding it there are the two springs which are hooked onto holes. Push the plate back in and try to get the plate back out from the opposite end (opposite to where it is hooked) this will remove the resistance from the springs. Then just unhook the two springs from the plate. 7. The housing can be separated partially now. 8. The parts of the housing aren't actually attached anymore but the motor power cable is threaded through and bolted down on the adapter plate(?). Undo the screw (on the left) that is on the casing not the one on the circuit board. The circuit board holder will now come off. 9. Thread the holder through the whole where the wires are. Your Ganadors will be two parts now. 10. Now I didn't test if the bracket would fit through the hole of the lens holder but I didn't want to chance the squeeze and just undid the screw. After you undo the screw, you'll have to carefully pry the circuit board off the bracket (its stuck). 11. Thread that through the hole and pull the motor out and....... 12. You're done. Ganador Mirror into pieces. Obviously probably could be worded better and done another way but yeah, this is what I did. Hopefully it'll help someone out there. Cheers Simon -
Bolted and some sort of silicone.
-
Oh shit. Someone stole your wheels......? Madness.
-
FARK! ADS!
-
Fs: R33 Gtr Slimline Weathershields
Owgasm replied to Mclarenmercman's topic in For Sale (Private Car Parts and Accessories)
Do you just doublesided sticky tape these ones or do you use the factory rail? -
$450 I'll keep badge and side plate mount. Or $500 for the lot.
-
Held this for two weeks and tried to contact buyer, no go it seems. BUMP
-
All turbos back up for sale. Buyer pulled out.
-
Noooo 4 stud. Would also question brake clearance.
-
How long will it take from the deposit/payment until arrival? Prices of all the new R34 parts would be good thanks Ricky.
-
From what I know Terry. The R34 one has a bigger/wider gap for the radiator. So the R34 one fits over the R33 radiator but no the other way around.
-
Sorry to hear mate. Like I said, keep track of the classifieds all over the Internet. You'll find some parts pop up here an there. Ones that don't normally come up. The wheels are a big sign, they don't come up often. They'll want to move stuff quickly for cash.
-
Free Express Delivery. $600. Direct bolt in to standard rail and plugs.
-
R32 GTR Front Bar SOLD R34 Rear wing SOLD Headlight - $150 Gasket kit - $350 + postage R33 Front guard - $25 R32 Guards - $50 - Now $50 as a trailer was backed over part of it, can be pushed out.
-
Just an update. ARCBOX sold R32 GTR Airbox sold R32 Nismo Turbos - $450 Ported R32 GTR Manifolds - $150 R32 GTR Turbos + Dump Pipes + Shields - $175 R33 GTR Airbox + snorkel - $250
-
Wheel Repair In Sydney. Places? Recommendations? R34 Gtr Rims.
Owgasm replied to iwanta34gtr's topic in New South Wales
Have you considered buying a excellent condition set? Will be a cheaper option. And then selling yours for similar money anyways. -
Just what I wanted to hear. I saw a video of that fatgtr.. way too long to spool. btw, did you change your tail lights back?
-
I should mention, 1995 model
-
Hi guys. Finally decides after all these years to change out my tape deck for some better tunes. I'm just wondering which wiring harness I need to buy. That goes from the standard harness to ISO adaptor/connector. There are two online I've found but not 100% sure. PC2-13-4 Or PC2-76-4 From there it will go iso to headunit(another harness) I'm aware I could run my own wiring. But I don't want to cut into factory stuff and then when the headunit is outdated. Cut into it again and again. Thanks in advance for the help.
-
The ztune bonnet with standard front bar is funny looking haha. The standard bar is too round for the jagged bonnet. Nice pics Dan. Did you beat most things at the meet?
-
Have you for pods and trying to enclose it? Standard airbox is the way to go if you don't have heaps of power or chasing it. Coincidentally Have a box and snorkel for a r33 Gtr for sale
-
Oh didn't Even realise they were 19s. Yikes. Tiny with the step lip. What offset? Width?

