


lwells
-
Posts
3,532 -
Joined
-
Last visited
-
Feedback
100%
Content Type
Profiles
Forums
Events
Gallery
Media Demo
Store
Everything posted by lwells
-
All fixed for you LW.
-
From the album: lwells's Gallery
-
Try the wanted forum LW.
-
Mark, Could you email me the PDF? I think you have my email address Cheers, Lucien.
-

Rim colour change, have a look!
lwells replied to Mr_G's topic in Suspension, braking, tyres and drivetrain
Out of interest, does anyone know how much professional powder coating / colour changing costs? I am thinking of going the other way: dark blackish grey to a shadow chrome. Mr G: Any chance of some closer pics? Not sure if its the lighting, but it looks like there is a slight "peel" effect in the paint? LW. -
Hmmm.. I have to say I didn't have that problem with Geoff: he stayed communicative throughout. Because he is obviously busy, I found it best to just send very short emails with direct (but polite) questions. Long rambling emails = long delay Also, don't forget that sometimes picking up the phone is a good thing: people are able to ignore emails in a way they can't when you actually call them. Finally -- to state the obvious -- try not to fly off the handle. If you are angry, try to remain calm when you explain your frustrations: let your words explain, not your tone or volume. People tend to get very defensive if you are loud and aggressive (not that I am saying you are!) Lucien.
-
As promised: http://www.skylinesaustralia.com/forums/sh...ead.php?t=67730 LW.
-
Tutorial: R32 Gt-r Radiator Removal And Coolant Flush
lwells replied to lwells's topic in Tutorials / DIY / FAQ
Assuming everything is A-OK... Reinstall exhaust: As I noted above, you should get your hands on appropriate gaskets so you can replace them at this stage. Unfortunately for me, that wasn't possible. Instead I cleaned up the existing gaskets with a light sand and applied a thin coat of a quality manifold cement. Lucky for me this seemed to hold (no leaks), but if you plan in advance get the gaskets... 1. Replace gaskets on the turbo dump pipes and cat. 2. Reinstall the rear turbo support bar: do up the nuts at either end then the middle nut that holds the turbo line. 3. Reinstall the front pipes by attaching them to the dump pipes. Place the nuts on the thread, and do them up a turn or two so that they grab and hold but still give you plenty of wiggle room. 4. Attach the cat end of the dump pipe to the rear exhaust section: you will need to wiggle things around to get them in place. Put the nuts on the threads, but don't do up very tightly. 5. Do up the nuts on the turbo dump --> front pipe flanges. Try to get a nice flush fit by torquing each bolt a bit at a time (like you would when torquing down a head, for instance), doing a couple of circuits before a final tighten. 6. Do up the nuts on the cat --> rear exhaust flange. Again, try and get a nice flush fit. 7. Place the exhaust back on the bracket (just in front of the cat, on the drivers side) and tighten bolts (you want these suckers tight to stop the exhaust rattling). 8. Replace cat shield. Do it up tightly, otherwise it will rattle like a mofo (very irritating!). Conclusion All done! Now just sit back and wonder where the hell your weekend just went! Some other observations: 1. I didn't bother replacing my thermostat as it seemed to be working fine. If you have any doubts though, during the radiator removal is the best time to check and if necessary replace it. PranK's guide contains instruction on how to remove the themostat. 2. Unless your exhaust is stainless steel, tiny bits of rust will fall everywhere. Wear some protective glasses, or be prepared to spend 20 minutes removing rust from your eyes (like me ). Cheers, Lucien. -
Tutorial: R32 Gt-r Radiator Removal And Coolant Flush
lwells replied to lwells's topic in Tutorials / DIY / FAQ
Engine coolant drop: Dropping the coolant out of the radiator only gets about half the coolant in the system: the rest remains in the engine block. Perhaps the ease with which I was able to remove the radiator lulled me in to a false sense of security, but dropping the coolant from the block is undoubtedly the single (physically) hardest car task I have completed. Be warned: I needed the better part of a day working solidly. The hardest part is actually getting to, and then undoing, the drain plug. You will need to remove the front (Y) pipes and cat, have the dexterity of Gumby, and the patience of an angel (or have neighbors who don't mind a constant stream of profanities ). You should also probably get a set of new gaskets for the turbo dump --> front pipe joint, and cat --> exhaust joint. Due to time constraints, difficulty locating the gaskets, and specialist shops not being open, I had to settle with cleaning up the original gaskets and using a very light application of manifold cement. 1) Follow the front pipes up to where they join the dump pipes (sorry, no pics, couldn't get a decent shot). You will see two nuts per flange: undo the nuts a bit (although leave them on so the exhaust doesn't latter drop on your head ). 2) Remove the shield that covers the catalytic converter. Where the cat flange joins the rear exhaust flange you will see two nuts: again, loosen them but leave them on for now. 3) Just in front of the cat is a bracket that holds the exhaust in place. Undo and remove the nuts. 4) Undo the exhaust temperature sensor. Do not cut it. It is stainless steel and can't be soldered, and will have to be completely replaced if damaged. I couldn't get mine undermine so just left it in place. 5) Now remove the nuts from the cat --> rear exhaust section and wiggle the sections apart. Remove the nuts from the dump pipe --> front pipe flanges, and wiggle the front pipes off. Because I couldn't get my exhaust sensor undone, I had to take a bit of care to lay the front pipes down in such a way that there was slack in the cord for the exhaust temperature sensor. 6) Reposition yourself back towards the engine and try and spot the engine plug (ha, good luck!). When you finally see it, wonder how the f#ck you’re ever going to get to it, and what Nissan's designers were thinking. 7) You will need to remove the rear turbo support bar. First undo the turbo coolant line (the middle screw) and move the bracket out of the way, then undo the two bolts holding the support bar in place. Remove. 8) Again wonder how you're going to get at the drain plug. Without doubt this is the most difficult bit. A ring spinner will probably not be long enough, a ratchet + socket will foul on the turbo heatshield (as will most other tools). I ended up having to use most of the sidchrome collection, namely this concoction: My ratchet + extension + universal joint + socket + bar to extend the handle a bit. Even though I bent the turbo heat shield back a little and used the above concoction, it took me about an hour to get the f#cker undone. I just can't describe how difficult it was... When (if!?!) you get it undone, grab a 5 litre bucket/tray, try and position then remove the drain plug. Your likely to get covered in coolant as it comes out very quickly and there are a number of obstacles it hits on the way down. 9) Clean up the drain plug. Once the coolant has finished dropping, replace the drain plug. I found this just as difficult as getting it off. The workshop manual says to use some sort of thread lock: I didn't have any so tried one very thin layer of teflon tape but had to remove it because I was having such difficulty getting the plug to do up. After about an hour I finally got it on as tightly as I (and my father, combined, yanking on the ratchet) could manage. For now, do not reassemble the turbo support, front pipes or exhaust in case the drain plug isn't seated properly and you have a leak. Reinstall radiator and preparing for the new coolant: 1. Place fan shroud on radiator and do up the screw. 2. Reinstall the radiator. Make sure the two rubber mounts on the bottom of the radiator remain in place. 3. Reinstall the coolant reservoir. 4. Reattach the top and bottom radiator hoses, making sure to tighten them sufficiently (but not too much otherwise you will crack the plastic!). Ensure the radiator drain plug is done up. 5. Reattach the lower section of the fan shroud. Give the fan a spin to make sure it doesn't hit anything. 6. Plug in the thermostat sensor wire. 7. Turn the ignition on (but not the engine) and set the heater to max (32 degrees). Adding the new coolant: Adding the new coolant is quite a laborious and repetitive task, but extremely important given that air pockets in the coolant system is likely to cause sharp spikes in engine temperature. If your coolant is pre-mixed you can go ahead. If, like me, your coolant needs to be mixed with water, obviously work out the required proportions and combine (if you don't have a big enough container, do about 2L at a time. Small variations in the mixture won't matter, but try to be accurate). Below is the procedure described in the R33 workshop manual (its a little clearer than the R32 workshop manual) with my comments/correction/suggestions in []'s: As I noted, I had to 'top up --> turn on car --> race engine --> cool down car' about four times before the levels stabilised. Be careful when opening the radiator cap after cooling the car: the coolant can be surprisingly hot. -
Tutorial: R32 Gt-r Radiator Removal And Coolant Flush
lwells posted a topic in Tutorials / DIY / FAQ
The purpose of this tutorial is as a step-by-step guide for R32 GT-R owners who wish to remove their radiator for flushing, and to completely remove and replenish all coolant within their car's system. Given the number of R32 GT-Rs that have recently been imported and their often unknown service history this is an important piece of maintenance for owners who wish to avoid the possibly catastrophic consequences of blocked water galleries, overheating, corrosive and impure coolant. Whilst the radiator removal process is quite well documented, the complete flushing of coolant -- including from the engine block -- is not, hence this tutorial. Whilst researching the correct procedure/s I found the following resources very helpful (I suggest you at least glance at them): 1. PranK's R33 radiator replacement guide. 2. R33 (I assume? Or is it R34?) radiator removal and filling procedures. 3. R32 GT-R workshop manual coolant filling procedures. 4. R32 GT-R workshop manual radiator parts breakdown. 5. R32 GT-R workshop manual exhaust parts breakdown. 6. R32 GT-R workshop manual air drain plug diagram. In terms of tools and equipment, you will need access to the underbody of your car, a good ratchet and socket set (in particular, sockets 12mm through 16mm). Depending on the size of your tools, your mileage will vary: as you will see, I had to use a number of items from my sidchrome set when it came time to remove the engine drain plug. In terms of time, the radiator removal is a very quick process and should take no longer than 30-60 minutes. Removing the rest of the coolant is a much harder job for the home mechanic due to the location of the plug and will, if my experience is any indication, take a whole day. Finally, remember when working under a suspended car to take necessary precautions to ensure that, should your jack or stands fail, that you will not be injured. Removing the radiator: This proved to be easier than I had imagined -- about a 1 out of 10 on the difficulty scale and quite quick (~30 minutes of solid work). 1. Turn the ignition on and set the climate control to max heat (32 degrees). The R32 GT-R workshop manual actually says to "remove the external sensor connector" once the ignition is on, but later manuals (for R33/34) say just to set the heater to max (which is what I did). Apparently this is meant to release any fluid in the heater. 2. Remove the undertray. (No pictures, sorry. If you can't work this out you shouldn't even be attempting this at all ) 3. Remove the coolant reservoir tube. 4. Unplug the thermoswitch sensor wiring. You will need a small screw driver to get the clip integrated into the plug to let go. 5. Place a 5L bucket/tray under the drain plug. Open the drain plug (on the bottom right of the radiator, looking front on) and remove the radiator cap. The coolant should start to gush out of the radiator. Here is a picture of the drain plug on the (removed) radiator: 6. Undo the hose clamps for the top radiator hose (it can be useful to do both ends so you have more play in the hose) on the left of the radiator, and wiggle the hose off. Don't be too violent: old plastic and rubber doesn't necessarily like being disturbed. 7. When the coolant has completely drained (unless you are like my dad who got covered in coolant because he was impatient), undo the clamps holding the bottom hose (bottom left of the radiator) in place and wiggle the hose off. 8. Remove the two screws along the top edge of the radiator (closest to the windscreen) that hold the fan shroud in place then remove the lower section of the fan shroud: it just clips in place. Below you can see some pictures of the shroud when removed: it should give you a good idea of how the lower section clips on. 9. Undo the nuts that hold the radiator mounting brackets in place; remove the brackets. 10. Very carefully wiggle the radiator a bit and lift it out of the engine bay. Its extremely easy to damage the fins so be patient. Thankfully the radiator is quite light and easy to handle. Be careful not to loose the mounting rubbers on the bottom of the radiator. 11. My fan shroud was still held on by one screw (I don't know if this is normal). Simply remove the screw, lift the sides of the shroud and wiggle it off the radiator. 12. Unscrew the coolant reservoir bottle: the two screws at the bottom on either side of the bottle. Dump the coolant from the bottle. You now have a bare radiator in all its glory and a nice space in the engine bay. Woo! How easy was that? Have a look at the coolant from your system as it will give an indication of the health of your cooling system: the coolant that came out of my system was in surprisingly good condition. Radiator flush: At this stage it was off to radiator shop to have the radiator professionally flushed. There are two types of radiator flush: a simple air flush, and a more complex 'power flush' which seems to involve removing the end tanks and slotting a cleaning tool down the fins. I opted for the standard flush which involved submerging the radiator in a big tank of water and ramming a stupidly huge amount of air through it (in the reverse direction, i.e. from bottom to top), causing a nice wave that splashed over yours truly This should blow at any crud that has accumulated over the years. In my case, it was all very good news: very little came out from the flushing and the radiator guy said it was the best radiator he had even seen and was rather amazed when I said it was 15 years old. In his words, "obviously the previous owner maintained the car!". For reference, flushing cost me only $20. Even though my radiator proved to be in excellent condition, the peace of mind alone is well worth the very cheap cost. While at the radiator shop I purchased some coolant: the guy recommended a mix of 2:3 coolant:water (i.e. 40% coolant). Given that the GT-R takes about 8 litres of water/coolant, that meant 3.2l of coolant which set me back $30. I also purchased a 5l bottle of distilled water for about $4 at Woolworths (make sure it actually says distilled on the label, not just pure/fresh/spring). Some people are happy with tap water but given the crud that comes out of our taps I would strongly recommend you don't skimp on a couple of bucks and stick water with who-knows-what minerals, metals and contaminants in to your cooling system. -
Richard, Are the ARC airbox filters the same size as the standard filters? LW.
-
Is that Moanie inside the new issue of SPEED
lwells replied to Ashy Larry's topic in New South Wales
Yeah man, you better watch it. Here she is flexing: LW -
Troy (ylwgtr2) may have what your after (at least for the GT-R) in hardcopy. Give him a bell. LW.
-
In my opinion -- and I am a little biased since my R32 GT-R has a wing -- the R32 GT-R wing looks tough rather than ricey and improves the looks of the GT-R. The GTS-t wing, however, is a different story. Lw.
-
From the album: lwells's Gallery
-

From the album: lwells's Gallery
-
From the album: lwells's Gallery
-
R32 Headlights Customising
lwells replied to funkymonkey's topic in R Series (R30, R31, R32, R33, R34)
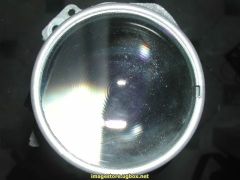
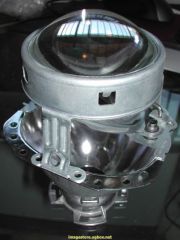
I think you need a set of these Shan Mercedes E55 Bi-Xenon projectors. Will be trying to retrofit them into the GT-R light assemblies I bought through you ages ago. Should mean I don't have any nasty shadow issues... Interested to see how this project ends up. BTW, anyone know where you can buy JB Weld (its an adhesive) in Australia? LW. -
I had to use manifold cement: no auto shops has appropriate gaskets, and no exhaust shops were open. If I didn't get it back together it would have been in parts for 2+ weeks (ie. not an option). I used good stuff (good to 300 degress), cleaned up the original gaskets, and used the cement very sparingly (not great globs like most people). Seems to have held together. I would have preferred new gaskets but sometimes you can't do what you want Given its fairly easy to replace the gaskets, I can always do it later if there is a problem. Lucien.
-
Banned IP addresses? Why?
lwells replied to Abo Bob's topic in Site discussion - including Ideas/Feedback & Bugs
Working again (Telstra Bigpond Cable in Sydney). Thanks LW. -
Banned IP addresses? Why?
lwells replied to Abo Bob's topic in Site discussion - including Ideas/Feedback & Bugs
If it was a firewall or an htaccess file setting, you (and I) would be blocked before we saw a VBulletin page: ie. not webpage would be served. We are being served the page which suggests its a setting within VB. LW. -
Banned IP addresses? Why?
lwells replied to Abo Bob's topic in Site discussion - including Ideas/Feedback & Bugs
Exactly. I have nothing to do with Westnet -- I am on Telstra Bigpond Cable in NSW -- and my IP address has been banned. I should point out I can (obviously) log in to my account from other IP addresses, hence the ban is not connected to accounts but to IP addresses. I'm guessing a moderator/admin banned (either wittingly or unwittingly) an entire range of IP addresses. Either way, it would be nice if someone could actually look in to this *hint hint*. LW. -
Banned IP addresses? Why?
lwells replied to Abo Bob's topic in Site discussion - including Ideas/Feedback & Bugs
I am on Telstra Bigpond Cable (ie. not TPG) and I am getting the banned IP message. Its extremely irritating, especially since no one seems to be answering the @skylineaustralia email address LW. -
Banned IP addresses? Why?
lwells replied to Abo Bob's topic in Site discussion - including Ideas/Feedback & Bugs
Abo Bob: the link doesn't work. My home computers IP address seems to have been banned for no reason I can fathom, so I would like to know what's going on LW. -
Righto, I am one sore customer tonight. Removing the radiator was dead simple and took 30 minutes. Draining the block is the most difficult thing I have ever done: talk about a *terrible* position to put the plug! Just to confirm what SteveL said, you will need to remove the 2-into-1 front pipes and cat so you can at least see the drain plug. I had to remove the rear turbo support and bend the heat shield a little so I could get at the plug. I ended up having to use almost the entire sidchrome collection: rachet + extension + uni joint + socket + additional bar for leverage. Because the plug is quite high up a spanner/rachet probably won't reach, nor was there enough room for a rachet + socket combo without hitting the turbos heatshield. Even with the aforementioned sidchrome connoction it was almost impossible. The front pipes and cat were also a massive pain as they were original parts: 15 years of rust and constant metal expansion/contraction means the bolts were not overly helpful. Not sure whether to bother with new gaskets. My old man is of the opinion that we should just use some manifold cement stuff and be done with it: thoughts? Thanks for your help guys. I took lots of photos of the whole process, so when I get time I will do a howto thingo. Lucien.


