Jump to content
SAU Community

Recommended Posts

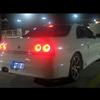
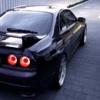
Just want to post about my results after the install. It was a justjap Type 1 R33 kit

Mr_G did a great job installing it and took 3.5 hours flat. he even put my stock bov back on, what a champ.

Just got back from driving it, testing on full boost for short periods, after 120kms no hoses have flown off.

Some things I've noticed is boost maxes out at around 9, maybe a bit over where it used to be 10 (on the turbotech bleed valve)

When driving normally the car doesnt feel much different, dont even feel any lagier. Except I can't take off in 2nd gear anymore, thats when I feel the lag, used to do that when I'm lazy hehe

Its when driving hard that I notice it going to redline more easily

Also without my bov it sounds alot different. It sounds kind of like wooooosh-Sheeeeee, using the stock bov

Anyway I'm very happy with the install

The metal bar behind the bumper was cut, 3" hole under the washer bottle and fan fins trimmed

Highly recommend Mr_G :P

If you want to buy my old bov, look here. Thorpe says its fully sick.

http://www.skylinesaustralia.com/forums/in...howtopic=106251

post-20821-1140179975.jpg

post-20821-1140180037.jpg

post-20821-1140180061.jpg

post-20821-1140180123.jpg

Link to comment
https://www.sau.com.au/forums/topic/106274-got-my-fmic-installed/
Share on other sites

Gengis:

Glad to hear your happy with the install. I actually saw you driving through Auburn crossing Parramatta rd around 7:30 yesterday evening as I was in a mates car on the way home after dropping mine off to get re-tuned.

The FMIC looks good, and your bar is pretty stealth in terms of hiding hte FMIC abit... hehe.. :)

^^ No worries, let me know whenever, my hours are pretty flexible as im a uni student so during the week I usually have a few hours to spare here and there...

Gengis: Didnt see the supra... Also the picture of the car in the shade with the cooler behind the bar, the cooler looks quite straight in that pic to be honest. I dont think its wonky by that much in terms of your front bar sitting against how the core looks.

^^ Very small world, I was in my friends Series 2 (Silver) stock stock looking...

Who knows, might see you when I go to collect the car on monday? LOL... Car looked nice cruising along

heheh that would be me in the stock lookin s2.. hmm come on its not that stock lookin is it.. hmm would anyone like to donate some buddy P1s to make my car look better..

yup Mr_G does a superb job.. have seen him do it on other cars.. great pics as well.. enjoy the car!!

Now, you just need to cut out some of that front bar to allow a tad more air flow to the core... :( and allow some air through to your radiator, and surely the FMIC may be blocking a large amount of what was coming through??

Edited by QUIKBLADE

Cheers Sid :rolleyes:

Quickblade : I kind of like it how it is now, understated and not fully exposed. Thought about the radiator thing too especially with the radiator fan being trimmed, but I've kept an eye on the temp gauge and it hasn't really been any different than before (needle still a bit below half way)

Its still running the stock turbo pushed to 11psi anyway so the airflow to the intercooler isnt a big issue (I hope!) :)

^^ I like the installs, there fun!

As for airflow Gengis, your definately getting a huge amount more airflow than what the sidemount was getting!

With the fanblades being trimmed, ive ran my car like that for a year and abit now and no dramas with the water temp. If anything, my freinds car that runs a thermo fan rather than an engine driven one hits higher water temps than mine!!

Mine survived easily on that New years day of 40 deg +!!!

Create an account or sign in to comment

You need to be a member in order to leave a comment

Create an account

Sign up for a new account in our community. It's easy!

Register a new account

Sign in

Already have an account? Sign in here.

Sign In Now


  • Similar Content

  • Latest Posts

    • Any number of different ways. Have the coils draw sufficient current to provide contact wetting. Use different contacts in the switch, either by material or design, better suited to the low current drawn by a relay coil. Etc.
    • Hmm, how does the R34 manage to have headlight relays then without getting excessive carbon buildup on the headlight switch contacts?
    • Not R7R. Meant to type R&R, obviously enough.
    • Bugger "making it look stock". I put one conventional internally fused Hella relay behind each globe. I just pulled the plugs off the back of the globes and built new loom segments with male and female plug parts to match up to the original loom and the globe, and used the original power wires to each globe coming from the switch through the original loom plug to trigger the relays. Ran a big fat (also separately fused) power wire across the front of the car to feed all the relays. It's as ugly as f**k, but it is wedged down between the headlight and battery on the RHS and the airbox and headlight on the LHS, and no-one ever looks in my engine bay, and on the odd occasion that they do I simply give no f**ks for what they think. Fully reversible - not that you'd ever want to. For f**k's sake. It's a Skyline. They made million of the bloody things. We've been crashing them into roadside furniture for 30 years now. There is a negative side effect to putting relays on the headlights. The coil current is too little to properly clean the contacts in the switches and they get blacked up and you have to open them up every couple of years and clean them manually. I have 25 years of experience on this point.
    • I was poking through the R34 wiring diagrams vs R33 and noticed that the R34 has proper headlight relays while the R33 is like the R32 and sends full headlight power through the headlight switch. I'm not afraid of wiring but I really would like to do this in a way that looks OEM (clipping into open positions on the OEM relay box) and also unlike the factory wiring which interlocks the high beam and low beam on the halogen series 1 GTR headlights I want to make it such that turning on the high beams keeps the low beams on as well. Any advice on how to locate the specific connectors + crimp terminals + relays I need? I was thinking one NO relay for low beams and another for combined high + low running off the factory high beam headlight connector. I don't really want to splice into a crusty old probably discontinued factory harness so fully reversible is my goal here.
×
×
  • Create New...