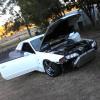
Painting and Powder coating rocker covers
Announcements
-
Similar Content
-
Latest Posts
-
Ok glad you clarified on the frenchy’s options , I was worried about if my oem hoses would fit the new compressor or not if I just bought the bracket/compressor kit , didn’t realize they also sold a larger full conversion kit. Hmm may just go oem in that case then to make it easy only because I plan to sell this car to upgrade to a 32 GTR or 34 GTT.
-
By sausagepianist · Posted
Right, here's a video of the basic operation at least. This is what you can expect day to day when you turn the car on and it boots from standby. The only thing from a media point of view I haven't gotten working is for it to autoplay plexamp when it turns on from standby (it works from cold boot) but that's more of a plexamp problem as it will autoplay other music players. Also attached is my one stray cable. It's part of the screen's wiring adapters but there's just nowhere for it to go in my car. I've just now done a bit of research and found a matching port on a 2010-2014 head unit with BOSE. Mine has no BOSE so that's that case pretty much closed I think. Plugging in the Infiniti AC panel basically did nothing for me, so that's a dead end as well. Next port of call is to mess with this CANBUS module and see what I can find from it. I found this resource containing the DBC files for a 2010+ G37 : https://github.com/icecube45/Dash_InfinitiG37/blob/master/InfinitiG37.dbc I'll now have something to go from when I try to extract my CANBUS data so I can see if the HVAC Mode, Fan Speed, Temperature, etc. match and also the gear shifter position. It's a pretty big assumption that it's just mismatched CAN signals but considering all the devices in the CAN network are talking to each other (AC can be fully adjusted just with no info on screen) it might be a safe one. I will report back WhatsApp Video 2025-02-26 at 12.49.10.mp4 -
By sausagepianist · Posted
Thanks for that Paul. Do you think if I posted a picture you'd be able to remember where it went? -
By sausagepianist · Posted
Sorry Duncan, I didn't get a notification for the replies. Thanks for responding! It's a full Android device, but does allow you to use CarPlay/AA as well. This is the one I bought from NaviRS on AliExpress: https://www.aliexpress.com/item/1005006368602668.html?spm=a2g0o.order_list.order_list_main.111.59aa1802JDzQ0E - the 2K 8G-256G CAM variant but it seems to have gone up by £170 since I bought it! My purchase was £307.14. It's not the fastest thing in the world but performs perfectly adequately. It stays on standby unless I disconnect the battery and let it power down, then it's just a fairly standard Android bootup time from cold. The DSP Equaliser is very nice and made the standard stereo system sound pretty decent compared to the stock screen. Perhaps I can take a video of it when I get a sec. It *allegedly* supports the reverse camera, but I'm yet to get that working. It has options for reverse cam (a camera unit can be bought separately) or 360 cameras (also bought separately). To be fair it doesn't seem to detect that the shifter was put into reverse but I'm working on a theory about this as well. At the moment I'm going without which is a bit annoying considering the car is an absolute canal barge but so far I haven't caused any damage I'll grab a picture of the wire I'm missing later today when I can get outside. My theory, by the by, is that not only is the head unit different, but the CANBUS network has different signals for the different years. I think this because I have a spare AC panel from a newer Infiniti G37 (as opposed to my Nissan panel) which wouldn't control anything except the volume when I had it wired up with the stock system. I'm going to throw it back in and see if the screen will respond to it. I've just ordered an arduino CANBUS module so I can have a look at the signals going around the car and see if I can spot anything. I'm thinking if I can work out what it's expecting vs what it's getting I might be able to translate and relay the signal back but so far just a theory anyway. I also found this on my travels, so far the only one that specifically matches my car: https://www.aliexpress.com/item/1005002822934280.html?spm=a2g0s.imconversation.0.0.33433e5fgttovi If you look at the picture of the before, it has the card reader slot, and the picture of the head unit is exactly the same as the one pictured in my original post. I asked if they sell the cables separately but sadly they won't. I didn't want to just buy this one because it's a super old Android version and only dual core - likely slow as hell. -
As above, you did refill the coolant and burp the system before running it again didn't you?
-


Recommended Posts
Create an account or sign in to comment
You need to be a member in order to leave a comment
Create an account
Sign up for a new account in our community. It's easy!
Register a new accountSign in
Already have an account? Sign in here.
Sign In Now