Jump to content
SAU Community

Recommended Posts

Hey Guys,

Car has been dyno'd... issues galore, but now am putting on my FMIC and all the parts I've gathered... And well, I've struck an issue...

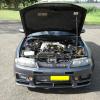
Anyone have a HOW TO pull off the CEfiro front bar, as I've hit a snag... can't get the lights out... nor proceed any further with them in...???????

Can someone help?

Thanks

Grant

Link to comment
https://www.sau.com.au/forums/topic/126399-pulling-off-cefiro-front-bar/
Share on other sites

Which lights ?

Headlights shouldnt need to come out for anything. As for the front bar I got all aggressive with mine and attacked it!

> One screw in each wheel arch

> One on each side attached to steel rod

> Lots of little 'stud' things that I cracked it with and just snapped off across the top. There may be a proper way to get them out but im not sure :banana:

Oh right... no I'm almost at that stange... but considering, I'm going to be putting it back on... I don't really want to F**k it... ya know?!... Hmmm, maybe I should do a "How to"... :wave: Just getting the Panadol and burbon out... :( and I'll shoot some pics and write a story... :D

Oh My God!... Ok... for all who want to know... the main screws holding on the front bar ARE: inside the front guard, directly under the blinkers about 2 inches down on both drivers side and passengers ALSO, the ones about 2 inches towards the wheel just inside the guard as konect said.

The screws are 10mm and aren't too bad if you open the guard up, with the wheels off. otherwise on the bottom would be 2 10mm... AND all the little clips inside the bar...

OH and on the drivers side... if your bar has never been removed, because it will usually break, there is a small white clip about 2 inches UP from that bastard 10mm bolt... Just punch it out. Hmmm now to figure out the FMIC piping install. Yay!... :blush: Bedtime... :yawn:

Oh My God!... Ok... for all who want to know... the main screws holding on the front bar ARE: inside the front guard, directly under the blinkers about 2 inches down on both drivers side and passengers ALSO, the ones about 2 inches towards the wheel just inside the guard as konect said.

The screws are 10mm and aren't too bad if you open the guard up, with the wheels off. otherwise on the bottom would be 2 10mm... AND all the little clips inside the bar...

OH and on the drivers side... if your bar has never been removed, because it will usually break, there is a small white clip about 2 inches UP from that bastard 10mm bolt... Just punch it out. Hmmm now to figure out the FMIC piping install. Yay!... :( Bedtime... :yawn:

oh yeh forgot about those ones under the indicators. My force broke those off nicely :P

Create an account or sign in to comment

You need to be a member in order to leave a comment

Create an account

Sign up for a new account in our community. It's easy!

Register a new account

Sign in

Already have an account? Sign in here.

Sign In Now


  • Similar Content

  • Latest Posts

    • Sharing results from recent Liberty Walk R35 GTR, since they are still considered as somesort of a V36 Skyline. We do them turbos too. This are high flowed SS-1 models with ball bearing conversion done.  Car have managed to pull 485awkws @ 20Psi so far pushing limitations of factory built engine. The build list for R35 GTR enthusiasts as follow : HyperGear high flowed stock turbos in SS1 (G25-660 specs) Custom titanium intake pipes. Vspec performance titanium front pipes. Vspec performance 4" titanium exhaust. Upgrade fuel pumps. 1200cc injectors. Ignition coilpacks Hks intake plenum. Hks intercooler piping. Greddy intercooler. Greddy bovs. Top-secret coolant reservoir. Emtron ecu. Straight E85. Built gear box.  
    • Nah no bearings, just slip fit.  Would be a reasonably challenging but not impossible job to modify it to run bearings but I'm hoping that's not necessary as I may have well built one myself if I end up spending hours modifying it!
    • Brumbys with good shells are bloody expensive, I've looked at 2 "cheaper" cars, and walked away from both,  plus after some research spare parts are fairly sparce I'm starting to think that I missed the boat on finding a clean one that is straight (ish) and without alot rust I'm starting to think about a old Hilux as panels and other parts are much more available as they sold tens of thousands of them I use to be indecisive but now I'm not sure
    • A Brumby would probably fit a big metal toolbox in the back... this is how it begins  
    • Picked up a new OEM boot seal for the MX5 today as the old one got ripped a bit by me being a idiot by seeing if I could fit a large metal tool box in it, it didn't fit, and ripped the seal with the corner of the tool box I am still waiting on time to get the cams and new balancer installed, as well as the repairs to the boot Time will not be an issue soon though
×
×
  • Create New...