Jump to content
SAU Community

Recommended Posts

I searched the site and found several thousand results, but not a simple explanation.

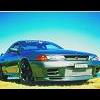
Ive seen a couple of R32 GTR's with the front corner indicators (next to the headlights) clear instead of the usual amber. Just curious wether you can buy these, make them and who you have to sleep with in order to find out. Also are they still legal in NSW?

Cheers boys....

Link to comment
https://www.sau.com.au/forums/topic/128717-r32-clear-indicators/
Share on other sites

because they sit in different brackets, are of different dimensions and mount up to different guards.

ie. they're not the same.

GTR indicators have a single piece moulded plastic cover, this was only available in orange from factory. Aftermarket clear ones are simply a clear version of this cover.

GTSt indicators were initially sold in clear with an orange bubble (ie a 2 piece cover), then in the second series R32, both pieces were made orange, so that they looked like the GTR ones. You can buy aftermarket ones that have both pieces clear, or buy a series 1 indicator and smash out the orange inside part and make yourself a clear indicator on the cheap... although the small bubble will still be orange.

Gtr ones have a different shape to match the fatter guards on the gtr

Cool cheers!

  • 1 year later...

Tools required:

Dremel

Hot Glue Gun

Clear plastic from an office Fluro tube cover (steal one if you have to)

Stock Indicator covers

How to DIY your own Clear Indicator Cover:

-Remove stock indicator cover and take to a new clean work bench.

-Use dremel to remove the crappy orange coloured cover of the original light.

-Now, with a clean lower bracket, you can measure the clear fluro cover.

-Using a dremel on the cover, cut a section to cover exactly the section that you have removed the coloured cover from

-Meassure the inside of the clear, and cut this out as well (the first section is for a spacer to make room for the globe).

-Once the lower section is made, glue it flat section down to the indicator light.

-At this point, test-insert the globe and make sure there is clearance, if not, do this process again to give you more clearence.

-If you have clearence, then the next section of clear plastic you dremel-cut will be dimple's down, and will need to meet with the section/sections already glued on the indicator light, then cut with dremel and hot glue-gun this down as well.

Allow time to set, then fit the globe, re-install and repeat for the other side.

I have seen this done on a Toyota Soarer and it looks the goods, also complimented with Phillips clear/silver look organge indicator globes, as they turn clear/silver when not illuminated.

So if you cant find your own clear-cover indicator lights, make your own :whistling:

B.

So if you cant find your own clear-cover indicator lights, make your own :thumbsup:

B.

that's great... as long as you don't have a GTR :D GTR indicators are single piece moulded plastic, and they're different in shape and fitment to GTS/GTSt ones which you can mod the way you've described.

Create an account or sign in to comment

You need to be a member in order to leave a comment

Create an account

Sign up for a new account in our community. It's easy!

Register a new account

Sign in

Already have an account? Sign in here.

Sign In Now


  • Similar Content

  • Latest Posts

    • It only looks tidy, as most of the stuff that was on the whole back wall, is now in the trailer to go to the tip, or has been shoved in my 2.2x2.4m "Spare parts room", and now I can't get to anything in there Ha ha ha I could definitely do with a bit more space, but I'd just end up with your problems I'm going to enclose the car port beside the garage, and move a lot of stuff into it I think. OR... It will be setup as a fabrication area, and the main garage will have parts storage in it. I'm not sure yet... Need some pictures of that big shed you've got with the bikes and Skyline in
    • No. I think it's gone. 😭 I think you can get body coloured ones on eBay so I think I'll get one of those... Or just hang a red ribbon from the hole and whack a TOW sticker next to it.
    • Can't say I've had a bad experience with one on my car, then again it only gets washed once or twice a year... The wheels on the other hand, get a good spray often due to my shitty dusty pads.
    • @MBS206 thats pretty neat and tidy to me!  I'll get a photo of mine when I'm out there next. It might require multiple photos to understand the scale of the atrocities though... In total I have 4 sheds of varying sizes and layouts. Main shed is 14x8, second shed is 3x8, third shed is 11x2.5, fourth shed is around 6x4.  All are pretty much full.   The main goal of my cleaning tsunami is to make the main shed predominantly car and motorbikes only. Second shed is my metal fab room (2 x bench grinders, drill press, bench belt sander, metal band saw, scrap metal storage and some of my garden tools.  3rd shed is more bigger garden stuff, storage for engine crane, jack stands, concrete grinder, concrete mixer, air compressor lives there, and it now has two 2mx2m pallet racking shelves with itemised boxes holding building stuff, electrical stuff, plumbing stuff, etc, etc.  The 4th shed is Ryobi electric ride on mower, mini boom sprayer, ancient Kubota tractor, more garden stuff!  I have got a lot of shit....  Then there's the pool house (8mx4m) and the pool pump shed (4mx4m).  I built all of the sheds over the 11 years we've been here.  The main shed was a Ranbuild kit, the rest are all custom made to fit the areas available. Building the main shed taught me a LOT as I had no idea about building anything prior to that!  I've still got one more in me. It will be my man cave which I poured the extra concrete for way back when I poured the concrete for the main shed. The idea is the Skyline will be a centre piece of the main cave once (if...) it's finished.  I told my now 14 year old son yesterday that I will 100% drive him to his year 10 formal in 2 years. Still a long way off but at least I now have a date to work towards! 🤣
    • Modern oils are amazing. Add tyres to that as well.
×
×
  • Create New...