
Announcements
-
Latest Posts
-

-

-

By nzstubbies · Posted
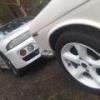
Hi All, I'm based in Sydney and want to get hold of 4 stock R34 GTT wheel caps as pictured. Cheers -
 Haha im flattered! Although my poor boat is collecting dust in the garage, as it hasn’t been driven in like 6 months. I forgot the to put the trickle charger on too, so the battery is likely toast now.. I have the frenchys kit. It is fantastic. My only gripe was that the hard lines from the firewall needed some tweaking, however, this was mainly due to my specific turbo and dump combo. The weight and size packaging is much nicer too. I think I have some pics on my build thread somewhere.. my justification for the kit was more “why not” I had gone to the trouble to modernise just about every other part of the car..
 -
 Actually, ethanol has probably never been cheaper, on a tax free basis, than petrol. With fuel excise being what it is, and only being levied on the hydocarbon component, not the ethanol component, and ethanol for non-drinking purposes not being subject to liquor excise - E85 was cheaper, but not because the combustible liquid itself was particularly cheaper.
-


Recommended Posts