Jump to content
SAU Community

Recommended Posts

  • Replies 98
  • Created
  • Last Reply

Top Posters In This Topic

If you cant be bothered or are totally useless (like my self) Visit www.aquadip.com.au

Dave

yeah looks nice but as you say i wonder about price.

The problem i have with painting anything if i will be happy with the colour i choose. My car is silver but im torn between keeping the interior black and probably add like a metal flake (im leaning towards this cause my nismo gear knob is black) or go a silver. and do everything in the eye of my drivers seat, gear boot, guage mounts etc.....

My question is if you go and paint the console silver does everyone have the cumpulsion to do everything to match it, or does silver and black make a good interior focal point? just wondering if anyone has gone with the half silver \ stock black scheme

Sweet, Sam!

As for aquadip, it might be a bit too fancy for what I want... gloss black.

Also, I never entrust a business with my money if they can't spell things correctly. (Venders???) ;o)

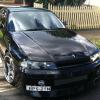
heres a couple of pics of were im at.... one with the parts in primer stage and one when the parts are painted, still have to do the clear coat tomorrow :O pics don't really show how good the parts really came up!!! :P

post-24878-1168092588.jpg

post-24878-1168092690.jpg

I hope you guys are using a plastic primer? If not in time it can come off pretty easy...Not really worth taking the risk. Make sure your using wax a grease remover - good shit! Apart from that i think the job looks tops! Excellent color choice, subtle but cleans it up :(

ok now the clear coat is gonna dry over night! then ill put everything back in and take pics :) as for the paint i just bought some random spray with the colour that read "siver" and thats how it came out, in the sunlight it is actually quit sparkly :)

on a side not i recently sprayed my stockies black until i get two legal tyres for my other rims, they actually came out pretty good i reckon, heres a couple pics :)

post-24878-1168175750.jpg

post-24878-1168175778.jpg

yeh i didnt wanna really do the drivers side arm :( dunno why tho lol, i kinda wish the silver was a little bit more on the darker side, although it is not as bright and in ya face when ya actually see it lol,

but yeh thanks to this thread it gave me the confidence to do it myself so cheers for that :D

sam

Nice work, Sam.

Now... something i've always wanted to do is: get rid of the orange lens on the front indicators. I can see you've done it... with perspex or something? Tell me how now, brown cow!

Sam,

Whats the exact brand and colour of the paint, clear coat, and primer you have used???

Thanks mate, great job

for the primer and clear coat i used "powerplus, professional touch up" comes in 350g spray cans and i got that from super cheap auto, the primer cost a little bit more than the clear coat. i was trying to get the colour made by "powerplus" aswell but they had no silvers left :whistling:

So for the spray, i used "whitekings" spray paint, the colour was called "metallic silver" that came in a 310g can so i got 2 of them. i made sure i asked the guys there if this kind of spray went with the primer and clear coat i purchased and they said yes :thumbsup:

regards

sam

Nice work, Sam.

Now... something i've always wanted to do is: get rid of the orange lens on the front indicators. I can see you've done it... with perspex or something? Tell me how now, brown cow!

ok this may sound confusing but i took the cover of the fog/indicator light off, i then put a sheet of grey plastic over the top of the orange light and also a bit of clear plastic over the top of that and made sure it was a bit bigger than the orange light so that when i put the cover back over it, the cover would secure it, and it turned out the way it did :thumbsup:

another member on this forum did a much better job of this, his method was to smash out the orange lens, and then replace it with a bit of acrylic, looks much better and more neat :cheers: i didnt do this because i didnt want to smash out the orange lens :whistling:

hope this helps although the way i explained it is confusing lol

sam

Cheers, Sam! I was looking into getting the foglight lenses and trying to use them on the indicators, but it appears to be a slightly different shape. You really have to smash them out to get them out? Yikes! =-/

sam, Did your old dash have the rubbery sort of paint? Mine does have that. Try to peel it off and it seems to take ages. Any quick way of taking it off? I wanted to use some paint strippers but the instruction said that not suitable for plastic. Dunno what to do now. Any help will be great.

Create an account or sign in to comment

You need to be a member in order to leave a comment

Create an account

Sign up for a new account in our community. It's easy!

Register a new account

Sign in

Already have an account? Sign in here.

Sign In Now


  • Similar Content

  • Latest Posts

    • Yep, pretty much what you said is a good summary. The aftermarket thing just attached to the rim, then has two lines out to valve stems, one to inner wheel, one to outer wheel. Some of the systems even start to air up as you head towards highway speed. IE, you're in the logging tracks, then as speeds increase it knows you're on tarmac and airs up so the driver doesn't even have to remember. I bet the ones that need driver intervention to air up end up seeing a lot more tyre wear from "forest pressures" in use on the highway!
    • Yes, but you need to do these type certifications for tuning parts. That is the absurd part here. Meaning tuning parts are very costly (generally speaking) as well as the technical test documentation for say a turbo swap with more power. It just makes modifying everything crazy expensive and complicated. That bracket has been lost in translation many years ago I assume, it was not there.
    • Hahaha, yeah.... not what you'd call a tamper-proof design.... but yes, with the truck setup, the lines are always connected, but typically they sit just inside the plane of the rear metal mudguards, so if you clear the guards you clear the lines as well. Not rogue 4WD tracks with tree branches and bushes everywhere, ready to hook-up an air hose. You can do it externally like a mod, but dedicated setups air-pressurize the undriven hubs, and on driven axles you can do the same thing, or pressurize the axles (lots of designs out there for this idea)... https://www.trtaustralia.com.au/traction-air-cti-system/  for example.... ..the trouble I've got here... wrt the bimmer ad... is the last bit...they don't want to show it spinning, do they.... give all the illusion that things are moving...but no...and what the hell tyre profile is that?...25??? ...far kernel, rims would be dead inside 10klms on most roads around here.... 😃
    • You're just describing how type certification works. Personally I would be shocked to discover that catalytic converter is not in the stock mounting position. Is there a bracket on the transfer case holding the catalytic converter and front pipe together? If so, it should be in stock position. 
    • You talking about the ones in the photo above? I guess that could make sense. Fixed (but flexible) line from the point up above down to the hubcap thingo, with a rotating air seal thingo. Then fixed (but also still likely flexible) line from the "other side" of the transfer in the hub cap thingo up to the valve stem on the rim. A horrible cludge, but something that could be done. I'd bet on the Unimog version being fed through from the back, as part of the axle assembly, without the need for the vulnerable lines out to the sides. It's amazing what you can do when you have an idea that is not quite impossible. Nearly impossible, but not quite.
×
×
  • Create New...