Jump to content
SAU Community

Recommended Posts

Hey all, My names Sam and ive been on SAU for a little while whilst searching for a sports car. Not knowing what I wanted I explored many options before falling head over heels for this mint, freshly imported and complied Dark Grey Pearl 1997 R33 S2 GTS25T Manual Sedan. Grade 4 at Auction in Japan it was pretty much stock except for Blitz Atmospheric BOV, Blitz turbo timer (now removed) and a 3" cat back exhaust, dark tinted rear windows and aftermarket CD player.

OWNER

Samuel

YEAR/MAKE/MODEL

1997 Nissan Skyline GTS25-T Sedan

ENGINE HARDWARE

Nissan RB25DET Twin Cam Turbocharged 2.5 In-line 6

ENGINE ACCESSORIES

Just Jap Front Mount Intercooler Kit

Blitz BOV

DRIVETRAIN HARDWARE

Nissan 5 Speed Manual

BRAKES & SUSPENSION

Front: Nissan(Sumitomo) 4 Pot Monoblock Calipers with Standard size RDA slotted rotors, Bendix Ultimate brake pads

Rear: Nissan (Sumitomo) 2 Pot Fixed Calipers with Stock size RDA slotted Rotors, Bendix Ultimate brake pads

Jaguar DOT4 Brake Fluid

Stock Suspension all round

ROLLING STOCK

17"x7.5" Nissan R34 GT-T 6 Spoke Alloys

225/45ZR17 91W Falken FK452 Rubber

BODYWORK

Standard Nissan Dark Grey Pearl

Front Bar modified to fit FMIC

INTERIOR

Stock Interior

Gran Turismo Front seat covers

Leather wrapped steering wheel

Nismo leather gear knob

Tom Tom Navigation unit

STEREO COMPONENTS

Pioneer Bluetooth CD Player with Ipod adaptor

Stock Front speakers with Fusion Tweeters :S

Pioneer 3 way 6x9's

PERFORMANCE

1/4 Mile 14.2@ 98mph @ WSID

143.3.3RWkW (using Dyno Dynamics Shootout mode)

FUTURE PLANS

Upgrade Stereo (Amp, Sub, etc)

Suspension upgrade (Coilovers or Whiteline springs and bilstien shocks)

Apexi Power FC

More Boost

Hi-flow turbo

1413016vk8.th.jpg 1413017gr0.th.jpg 1413018eo5.th.jpg 1413019fw4.th.jpg 1413020zw3.th.jpg

How I bought it in November 06 From Chris and Bettina at Southside Performance Imports Kirrawee. Many thanks to them No hesitation in recommending them to anyone.

img9619dk3.th.jpg img9623dn8.th.jpg img9630ot0.th.jpg img9638nc1.th.jpg img9629eq6.th.jpg

After purchase I added a Pioneer head unit and 6x9's, and 18x8.5 and 18x9.5 Starcorp Impul Deep Dish Rims Future plans include Just Jap FMIC Kit, Greddy Profec B Spec II boost controller adjustable coilover suspension and maybe a subtle body kit.

How it looks at the moment (poor light, n00b with my digi)

img9753wf9.th.jpg img9756zt0.th.jpg img9757tr3.th.jpg img9768uf3.th.jpg img9781qx4.th.jpg

I'll update as i go along. Hope you enjoy.

Link to comment
https://www.sau.com.au/forums/topic/149421-sams-r33-s2-sedan/
Share on other sites

Love rims with dish! and those have loads of it!

Thanks Jason, I reckon your Nismo rims look tougher!

That looks great sam, now, find yourself a nice kit

Thanks James, I like the way it is, might just go for side skirts and a front lip. See how i go.

Bit of an update. I have Fitted RDA rotors from the group buy and Maxistop Performance brake pads. With a trip to Wakefield Park Raceway I'm considering a set of EBC YellowStuff brakepads. In the attached pic I snapped a wheel stud and we had just replaced it.

Next set of attached pics are from the Front mount cooler install. Just Jap Cooling Pro FMIC kit.

post-32584-1168252162.jpg

post-32584-1168252214.jpg

post-32584-1168252261.jpg

post-32584-1168252307.jpg

post-32584-1168252339.jpg

post-32584-1168252381.jpg

  • 2 weeks later...
  • 3 weeks later...

Ok time for a small update.

Aussie day I went to Wakefield Park and had an awesome time learing how far I could push the car (which wasnt very much.) pics to come soon.

Wednesday past i went to WSID and pulled a PB of 14.525@94mph and 2.1 for the 60 foot. pics to come.

Today I went to a dyno day at Wollongong Motorsport Centre PB of 143.2rwkw or 192rwhp.

dynosheet1cm8.jpg

And some new pics taken by a mate of mine who wanted to have a play with my digi camera. (Stockers are still on from Wakefield Park track day and trip to WSID)

wtf33r2om1.jpg

wtf33rlu1.jpg

wtfr333fn3.jpg

wtfr334bw9.jpg

Gotta love those plates Sam :thumbsup:

post-46-1170587162.jpg

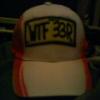
yes i do. the situation that inspired me to get them was the look on a young bloke (about 19 or so) in a 33 coupe looking at my car with the biggest WTF face I ever seen. and the fact that backwards it reads R33 For The Win!

You car looks sweet as, I have the same FMIC installed on mine and the washer bottle issue gave me the shits. I have the factory Nismo kit on mine, let me know if you want some pics and I'll see what I can do next week.

You car looks sweet as, I have the same FMIC installed on mine and the washer bottle issue gave me the shits. I have the factory Nismo kit on mine, let me know if you want some pics and I'll see what I can do next week.

cheres mickyb yous looks sweet love the rims. what did you do about the washer bottle?

cheres mickyb yous looks sweet love the rims. what did you do about the washer bottle?

My mechanic removed the rear washer bottle and put a repco replacement one to the side of where the hole needed to be. What about you?

My mechanic removed the rear washer bottle and put a repco replacement one to the side of where the hole needed to be. What about you?

theres one 1 washer bottle with 2 pumps and mine is currently out of the car. hmm i might look into getting a replacement bottle. reckon you can get me a pic? im guessing its just a generic bottle?

Create an account or sign in to comment

You need to be a member in order to leave a comment

Create an account

Sign up for a new account in our community. It's easy!

Register a new account

Sign in

Already have an account? Sign in here.

Sign In Now


  • Similar Content

  • Latest Posts

    • Thanks Duncan! Yeah it's street use for me only. Maybe occasional track day. Any difference in noise when running with the two pumps? I would expect the lift pump to be more quiet than the main pump so hopefully not? And yes, unfortunately quite a big price difference to the simple hanger setup. Though I'm usually willing to trade money for better reliability and future-proofing. Buy once, cry once and all that. I'd be very happy to never have to deal with fuel pump / wiring issues again  
    • The old manifold was quite under the GTR strut brace.  The new manifold is quite [unknown] the GTR strut brace. The GTR strut brace was needed to clear the bonnet vents. The Old strut brace will almost certainly clear the new manifold, but not the bonnet vents. The old strut brace will almost certainly clear the new manifold, and the new bonnet without vents. But I am hoping the GTR strut brace clears the new manifold :p
    • On the bright side, at least you knew that it happened and remedied before anything happened. A friend of mine just took his Fiat 124 to a shop for an oil change and they didn't tighten the oil filter housing properly. 4.5 quarts spewed out and even after refilling + tightening the cap the engine has a tick now.
    • So, more pain. The FAST manifold is a little larger than the stocker. This is problematic because there really wasn't much clearance to begin with, so going from 'barely enough' well into 'no' is sad based on the external dimensions of the thing, even though where it bolts to the head is the same. Result is the fuel rails sit a good 25mm higher, and this is a bit of an issue with the wiring that runs behind the motor, and the fuel lines, and everything else. When pushing the manifold on, it required a huge amount of force to crush wiring looms to fit it, sensors like the MAP sensor are about 1mm from the firewall, and the FPR just has to bend ABS lines to be forced into place. After some brainstorming and some sad drinking, the loom for some reason ran from the grommet behind the ABS sensor, then to the driver side head, then back to the passenger side head. So all of this was pulled back and stripped, a few wires cut and rejoined, so that the 'branch' was now on the passenger side's head as below: Before you basically couldn't see anything behind the driver head. This is much improved! The MAP sensor is now pointing up (instead of at the firewall) Brackets have been made up for the rail. The rails are for a LS1, the manifold is designed around a LS2 as it's base. Which of course has slightly different bracketry and water pump clearance, hence the mods people need to do. Should be hopefully mounted tonight. I spent money on a new FPR that is slightly more compact than my Turbosmart FPR1200. The gauge has also been moved to the rail. There's also apparently an ORB to AN Union instead of the adapter, because the ~25mm of the current adapter is going to make the difference. Provided this all goes together and arrives today, it'll be the totally not stressful attempt to start it.
×
×
  • Create New...