Jump to content
SAU Community

Recommended Posts

Hi Guys

This is actually my first ever post on this forum.

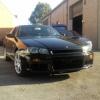
I have just bought a 1998 R34 GT-T.

This is my first car since I wrote off my S15 13 months ago. Ended up losing my license for 12 months because of the crash.... Anyways, I am finally back in the driving seat.

Decided to go with a R34 as opposed to another S15, mainly to try something new and also because insurance on another S15 with my now "bad" driving record was ridiculous.

The R34 is completely stock standard. I have been driving it for less than 3 days now and have already decided that i could do with some more power and / or sports suspension support. They handle so bad compared to the S15.

My question is.... kepping in mind that I have $4000 to burn on mods right now, what do you guys think the money should be spent on to get the most out of my engine? Would love to get a bit more power out, (maybe just exhaust, air filter for now) does that addition make much of a difference on the R34?

Thanks heaps fellas

Link to comment
https://www.sau.com.au/forums/topic/149664-bad-handling-on-my-r34-gt-t/
Share on other sites

sorry, I forgot to ask my main question.

I don't know much about suspension, how do i minimise the body roll on my Skyline? I figured I need sports suspension of some kind.

Any ideas?

The car is all over the place....

See the group buy section for the SydneyKid suspension package, get the sway bars as well.

So stock for stock the R34 GTT handles worse than the S15?

Yeah mate the S15 handled so much better, the S15 even felt like it went harder too, think that comes down to the weight difference.

As for this "Sydney Kid" suspension package, where do I find that? Like I said I am new here, could you send me the link to send me straight to it?

Thanks champ

For $4000 you should get at least twin dump pipe into hi flow cat with fulll stainless exhaust, pod filter with heat shield and a front mount, that will probably be at the turbos limit so If you have change try www.greenline.jp for some cheap goodies, pretty anything you need.

------------- remember kids smoke tyres not drugs ------------------

Sydneykid's Groupbuy

I would buy the whole package except the rear strut brace as it does nothing (Sydneykid will tell you this too). You just have to wait for the shocks to come back into stock. If you dont feel like getting everything, at least get swaybars, shocks, springs and castor bushes.

Rest of the money can go on exhaust, and front mount, that should have the R34 goin decently

If you want to stop the body roll, get some sway bars, i got some of sydneykid and they work great, i also got Tein coilovers, some ppl may tell you these are no good but i strongly dissagree

If you want to stop the body roll, get some sway bars, i got some of sydneykid and they work great, i also got Tein coilovers, some ppl may tell you these are no good but i strongly dissagree

How much did you lower your car with the coilovers? Is it a bumpy ride even with the Tein's?

I lowered a fair bit compaired to stock and can still go lower :PBJ: ive got Type Flex coilovers and its pretty bumpy but im not complaining, might be to much for some skirts :P

post-18661-11674429091258802402.jpg

Car wasnt built for comfort, the only problem at the moment is that i need ajustable upper rear control arms, there is a bit of camber in the rear but that is easily fixed, when the car is jacked up the springs are still compressed and the car is sitting on uneven ground in that pic but its sitting perfectly level. Handling is great, grip on the front and can let it slide in the rear when i want :)

I strongly advise you go for a run in a Skyline thats had the Kid treatment suspension , best way to describe the result is that you car suddenly feels smaller and far more nimble than it had . Cournering limits are amazing I suspect because the geometry keeps more of your tyres rubber on the road in most situations .

I would have Bilstein dampers over anything Japanese because they work and are rebuildable here .

Cheers A .

Edited by discopotato03

Create an account or sign in to comment

You need to be a member in order to leave a comment

Create an account

Sign up for a new account in our community. It's easy!

Register a new account

Sign in

Already have an account? Sign in here.

Sign In Now


  • Similar Content

  • Latest Posts

    • @dbm7 and @GTSBoy thank you both very much! will give that a shot!
    • Sounds good. Provided the panel is flat/level I'd be happy to start the painting process.  While you are learning, for sure you could do this. Its only paint, you can always sand it all back and start again. Its only your time and money on materials, but while you're learning, really its time and money spent on your education.  Once you know how to do this bodywork and painting, you won't want to waste your time and money on frivolous activities lol. 
    • Yep I will use a guide coat after putting filler, I will do it on the whole panel as I'm a beginner so chances I've made quite a few errors. In that photo, I think that was a low spot, I just for example said to pretend it's flat but I will put filler + guide coat after to assess where I'm at. Yep with that picture, the panel is wet as it rained when I took the photo. But all those scratches are completely smooth, I went over it with 240 grit and can't feel it, even with my nail digging into it. I was legit thinking to buy a 2k can and spray primer to see how it turns out but then thought to myself it's going to be a mess doing it haha. Good mention there. Thanks for all that info I think I know what to do next.
    • Prior to laying down the primer, you need to make sure the surface is completely level. For example, based on this picture, I strongly suspect that the areas marked in blue are higher then the area marked in green.  If you spray primer over this entire area, then paint and clear it, the finished result will 100% show the low area. It will stick out like dogs balls. Unfortunately the paint won't magically level out the low areas as you lay it down.  Without seeing it in person, I expect that the green area will need to be filled, then use a guide coat and check that the entire repair area is level with a large sanding block.  With this picture, are you saying that even though you can see the scratches, the panel is in fact completely smooth and flat? If this is the case sure you could prep and paint it as it is.     The picture with the paint you described as blistering, it's hard for me to comment on from the photo alone. It looks like the panel is wet? Dunno, looks strange. Does the panel feel as smooth as glass when you run your hand over it? **** Going back to your question again, generally you would only sand the primer if you made a mistake while laying down the primer.  If the panel is prepped properly and you lay the primer down properly, you should not need to sand the primer.  This wouldn't work - Don't prep the panel. Spray primer and see how it turns out. Sand the areas where the issues appear. Spray more primer and see how it turns out. Sand the areas....... Yeah you'd go round and round in circles getting no where. 
    • That's sick, thanks for that, mine has much the same mods on a 400R. I just don't have the heat exchanger yet.   Might be worth a trip down the M1 to Syndey for a tune.
×
×
  • Create New...