Jump to content
SAU Community

Recommended Posts

  • Replies 55
  • Created
  • Last Reply

Top Posters In This Topic

Top Posters In This Topic

Posted Images

bonnet was/is the hardest bit for them. When i left they were still trying to alter it to look better. The guard sat a bit higher than bonnet so they were going to shave a bit off and try reshape it.

Also the gaps along the side are a little larger. As in the gap betwen the guard and the bonnet. It is a little uneven. Thats what i was most worried about, but im sure it will look ok once its painted.

yeh alot of the time (no matter what brand of front gaurd - genuine or copy) this is a common occurance......

ive left mine as is, it didnt work out too bad.....bonnets never, ever go back in place as they did when they come off the factory table, but like anything its trial and error

really keen to see how it all looks tho, keep me posted

bonnet was/is the hardest bit for them. When i left they were still trying to alter it to look better. The guard sat a bit higher than bonnet so they were going to shave a bit off and try reshape it.

Also the gaps along the side are a little larger. As in the gap betwen the guard and the bonnet. It is a little uneven. Thats what i was most worried about, but im sure it will look ok once its painted.

thanks flick keep us all posted... will be interested to see what the fitting bill comes out lik....

thought i would update this, for Adz2332 and anyone else interested.

Got the car back today finally, and can now happily say that i could recommend Viva garage. That said though, you would need a very patient crash repairer to fit the kit. My guards needed a bit of trimming here and there to make them fit nicely.

Im happy with the results on my guards, even if both sides are a little different, as in the gap at the top of one side is a little bigger than the other side, but you wouldnt really notice. One side fits nicely at the front, where the other side was a little bit of work..

so yeah, bit of work and patience and viva garage kits are ok

good girl flick - really great to hear, post some pics up if possible. id love to see how it looks now, besides your also advertising how good your crash repairers work is, so alot of good has come from this

thought i would update this, for Adz2332 and anyone else interested.

Got the car back today finally, and can now happily say that i could recommend Viva garage. That said though, you would need a very patient crash repairer to fit the kit. My guards needed a bit of trimming here and there to make them fit nicely.

so yeah, bit of work and patience and viva garage kits are ok

Flick just curious was this covered by insurance or out of pocket? Can't wait to see some pics though. :(
I got my trust frount bar,gtr wing,eye lids and soon getting my original fenders vented at Speed Dreamz very cheap and good service.

my mate had a very bad experience with them ordered a complete bodykit 1 year later still waiting on rear bar :( saying that i think the rest fitted alrite just kept geting messed around it was for his girlfriends car (civic) not sure if she got the rear bar in the end or not

Went to take pics today but batteries died on me! Will be putting pics up later today.

Most of it was covered by insurance. My crash repairer quoted $250 for 1 second hand panel, so i spent my own $250 and bought the vented guards, so therefor the $250 that was included in the quote was used to paint the second panel. I wouldve paid bout 250 to get the second guard painted, so in essence i did pay for the 2nd guard to be painted. Insurance covered the rest, labour etc, as usual. Cos they have to blend paint into the doors, they just did that anyway, no extra charge for the 2nd side which wasnt damaged in the crash. Pretty good of them, basically blended that side for free. Where i was lucky is the side of the damage, had a key scratch on that door, as part of the quote that door had to be repainted to be blended, so therefor key scratch fixed for free!

Hope that makes sense? lol

My crash repairer is awesome, i would only ever go to them. Tom howards crash repairs on the corner of marion rd/sir don bradman drive - highly recommended.

They went above and beyond, while it was there they fixed up a previous dent and a weakspot in my side skirt that had cracked and was only going to get worse for a very low price.

They also did alot of other little jobs, just cos.. like plastic welding the brackets on my indicators cos they were being held in by cable ties. They lightly glued down my rear bar to the side skirt, where before it was coming off a bit. They even cleaned my car inside and out for me to take home! No extra charge for either of those last things.

I think i saved alot of money and my car is looking better than ever!

So yeah, little off topic, but an update and recommendation for both viva and for tom howards crash repairs.

Pics to come later!

Edited by *flick*

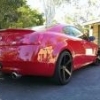
Some pics

IMG_5335.jpg

IMG_5333.jpg

Can notice the 'gap' between the door and guard here, bigger than it use to be with a standard guard. THis photo makes the colour on the bonnet look different too, but its just the angle of the sun/shade playing tricks.

IMG_5329.jpg

IMG_5328.jpg

Create an account or sign in to comment

You need to be a member in order to leave a comment

Create an account

Sign up for a new account in our community. It's easy!

Register a new account

Sign in

Already have an account? Sign in here.

Sign In Now


  • Similar Content

  • Latest Posts

    • Howdy friends, So another weird one today, I was looking into replacing some broken clips holding the front grille for the R32 GTR (part number 01553-03831), and noticed the brackets which are supposed to hold the grille in place were also missing 😑. I do recall seeing this issue many years ago, but didn't fix it at the time. A quick look on eBay and I was able to find the genuine brackets, along with all the screws which suited the headlights (part numbers 26042-08U05,26092-08U05). Happy days!....  Once they arrived however there was an extra nut in the packaging which implied that there should also be a bolt or a stud, and sure enough, after a bit of searching I found this thread from 2013, and @Ants clearly shows a stud should be present. Reading around a bit more, it's possible the headlights on my car are the "povo pack" headlights as mentioned by @funkymonkey in this thread way back in 2008. This could explain why the studs are missing on my set of headlights. Looking at the headlight diagram I wasn't able to see a suitable part number for the stud itself. The headlight did indeed have a recess that looked like it would accept a stud, but interestingly no thread or anything obvious how the stud would be affixed to the headlight, I suspect it may have been glued in, press fit, or melted into the plastic at the factory. Another member may be able to clarify if they happen to have a genuine set of N1 headlamps. The only thing we have to work with within the recess is a keyway which likely is there to prevent the stud from rotating within the recess. In any case, back to 3D printing, I put together a model which acts like a pug with a friction fit inside this recess, making use of the keyway so it doesn't rotate while tightening a bolt. Printing in TPU will allow it to slightly swell making a nice snug fit without cracking the part. I've designed the adaptor it to accept an 20 mm M6 bolt (stainless with a cap head in my case), as opposed to the standard M5 stud and I made use of the standard galvanised split washer that came with the genuine brackets from Nissan. Once the bolt and screws were all in place, giving the bracket a gentle shake gave the classic "shaking the car" feeling, very solid, which gives me confidence this is going to be able to hold on much better than the janky solution which seems to have been here for the past decade or so. Overall I'm really pleased with how this turned out and maybe there are more people out there running these headlights without a centre stud at all! Link to the freely available model on Printables: Click here Regards, Sean  
    • Hey everyone, This is my first post apart of the introduction. I tried searching a bit on the forum but couldn't really get a straight answer. I got the car to my mechanic as I felt it being weak. It seems that it was missing on two cylinders due to the injectors. I had all my injectors clean and the car runs much better. The mechanic also confirmed my suspicions that the cat is clogged and needs to be tackled asap. The cat rattles a bit and the hot exhaust warning frequently lights up when driving after getting the injectors clean. In my introduction I was asked about what modification I might be interested in and mentioned a cat delete. From what I was told, this is not really beneficial on the RB20DE and there are more cons than pros.  Could perhaps anyone give some suggestions on what the best course of action would be since the current cat is toast and needs to be removed/replaced anyway? I can also sometimes smell a strong smell of fuel, but I'm not sure if this is related.
    • Hope the cans went down well at least 
    • 255 can't go wrong with the price.
    • When I was replacing my pump due to being stranded in the wrong state, I went with the Deatschwerks 320lph kit. It is a direct plug in to the stock wires, harness, everything. It comes with a plug... but you can plug the OEM plug directly into this thing. https://justjap.com/products/deatschwerks-dw300-fuel-pump-nissan-s13-silvia-r32-r33-r34-skyline-c34-stagea?currency=AUD Downside: Won't actually flow that much on boost if you want to push it on E85, but it's comparable to the 040/255 etc. Little more actually.
×
×
  • Create New...