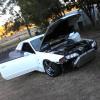
Shitty Series 1 R34 Interior Plastic Paint
Announcements
-
Similar Content
-
Latest Posts
-
Rotisserie is fully assembled apart from centre connector which obviously isn't required until the car is on it. It packs away fairly neatly and doesn't take up too much room. (Now that I actually have some room after my clean up!) Overall very happy with the quality of it. Assembly was a piece of piss. The only thing I didn't like was that the pins that lock the rotation lock wheels in place were a bit of a dick in a bucket scenario. It allowed the arms to rotate a significant amount even when locked in place. To fix that i measured up the hole and went and grabbed a couple of 18mm fully threaded bolts and a thread tap to suit. I ran the tap through top and bottom so it was threaded both ends. Then just threaded the bolt through both sides. It has made a massive difference which hopefully you can tell in the before and after video how much difference it made. 20250207_161431.mp4 20250207_161431.mp4 Hopefully back working on the car over the next few weeks. 20250207_162801.mp4
-
I think my main complaint with your idea is that there is a veneer of idealism spread across it. You want the simple numbers to make it easier, but all they will do is make it easier for someone to come to the wrong conclusion because the fine details will kick them in the nuts. As it is right now, the tiny bit of arithmetic is NOT the obstacle to understanding what will fit and what will not fit. The reality of trying it is what determines whether it will fit. If you had a "standard rule" that R34 GTT guards have that magic 100mm space from the hub face to whichever side you were worried about, and someone said "excellent, this wheel is only 98mm in that direction, I'll just go spend $4k on them and jam them on my sick ride".....they would just as likely find out that the "standard rule" is not true because the rear subframe is offset to one side by a fairly typical (but variable) 8mm on their car and they only have 92mm on one side and 108 on the other.
-
It still combines inches with mm, especially when you have .5 inches involved, and mm and inches that can go in either direction. This would give a clear idea on both sides of the rim, right away, with no arithmetic. Even better if somebody gives you the dimensions of the arch of multiple cars. i.e GTR may be 125mm, a A80 Supra may be 117mm, or something along those lines. Yes, you can 'know' that going from a 10in rim to a 10.5in rim with the same offset moves both sides about 6mm, but you still have to 'know' that and do the math. Often it's combined. People are going from 9.5 +27 to 10.5 +15. You may do the math to know it, but if it was going from (I had to go look it up to be sure) 241mm/2 - 27 - 93.5mm from the center line to (more math) 266/2 - 15 (118mm) from the center line. Versus 93mm vs 118mm. It's right there. If you know you have a GTT with 100mm guards you can see right away that one is close to flush and the other absolutely won't work. And when someone says "Oh the GTR is 120mm" suddenly you see that the 10.5 +15 is about perfect. (or you go and buy rims with approximately 118mm outward guard space) I think it's safe to say that given one of the most common questions in all modified cars is "How do offsets work" and "How do I know if wheels will fit on my car" that this would be much simpler... Of course, nothing will really change and nobody is going to remanufacture wheels and ditch inches and offset based on this conversation :p We'll all go "18x9+30 will line up pretty close to the guards for a R34 GTT (84mm)" but 'pretty close' is still not really defined (it is now!) and if you really care you still have go measure. Yes it depends on camber and height and dynamic movement, but so do all wheels no matter what you measure it for.
-
But offsets are simple numbers. 8" wheel? Call it 200mm, near enough. +35 offset? OK, so that means the hub face is that far out from the wheel centreline. Which is 2s of mental arithmetic to get to 65mm to outer edge and 135mm to inner. It's hardly any more effort for any other wheel width or offset. As I said, I just close my eyes and can see a picture of the wheel when given the width and offset. That wouldn't help me trust that a marginal fitment would actually go in and clear everything, any more than the supposedly simple numbers you're talking about. I dunno. Maybe I just automatically do numbers.
-


Recommended Posts
Create an account or sign in to comment
You need to be a member in order to leave a comment
Create an account
Sign up for a new account in our community. It's easy!
Register a new accountSign in
Already have an account? Sign in here.
Sign In Now