Jump to content
SAU Community

Recommended Posts

sounds awesome russ, I'm sure you will have a ball regardless of the result. I think it should suit you and mark pretty well considering you guys are very fast at wakefield. The new changes will make a massive difference too. best of luck!

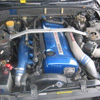
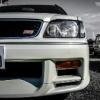
Here's my track car, it doesn't compare to a lot of the ones posted but i made the decision to buy it instead of an Evo 7 because i'm not worried about crashing it and repairs aren't quite as painful as my old GTR. Unfortunately i warped the head in April due to a blocked radiator but i'm finally back now. Mods are:

-SR20DET Manual: bottom end rebuilt 20k ago, fresh head rebuild

-SR20de Inlet Cam

-Modified combustion chamber

-Port matched inlet

-S15 Turbo w/ 360 degree thrust washer (handles high boost)

-S15 Injectors, RB20AFM

-S15 ECU w/ BikiRom USB Multiboard

-40mm aluminium radiator

-Cheapy FMIC

-Custom 3" exhaust

-Nismo 2way mechanical Differential

-5 stud conversion (s14 front, R32 rear)

-R32 GTST brakes all round

-Braided brake lines

-RDA Slotted rotors with Lucas Pads

-S15 rear subframe

-Adjustable Rear Upper arms

-Tein HR Coilovers Front/Rear

-Tein Caster Rods front

-Tein Tie Rods and Rod Ends

-No rear swaybar

-Braided clutch line

-Alloy steering shaft spacer

-Sparco PRO 2000 Bucket seat

-Volk 16x7.5" rims

-Dunlop DO1J 225/50/16 Tyres (not fitted in pics)

-Sunroof sealed for headroom

-Crap paint, shithouse interior, character dents

Tuned the other day making 180rwkw@15psi. I'd like to bump up boost a bit to get closer to 200rwkw. I've only driven it a few times in the past few months so i've still got a lot of learning to do. I want to use it mainly for sprints and maybe a few hillclimbs.

post-4038-1187485049_thumb.jpg

post-4038-1187485059_thumb.jpg

Edited by neil_se

awesome thread guys! inspiration to get stuck into mine again and get it up to spec!

Good luck in Japan Russ, would be great to watch time attack over there, let alone compete. and now the 32 will be going even quicker! :rolleyes: will be good to see it back out there in action.

hey mate

sound like your pretty close too!!

i reckon thats i good idea sticking the dry sump on his car first to make sure it works!!! hehe :laughing-smiley-014:

i will let ya know for sure, it will be blast!! thanks for your help too!

cheers russ seeya soon

hahahaha yeah like usual im the test dummy. Should be good though was planning on redoing the engine anyway so will be fun trying to destroy this one with the dry sump setup on it in the purpose of R & D. lol

post-17020-1187516415_thumb.jpg

hahahaha yeah like usual im the test dummy. Should be good though was planning on redoing the engine anyway so will be fun trying to destroy this one with the dry sump setup on it in the purpose of R & D. lol

haha

i thought you might like that!!

seeya soon

Where do you blokes get time to breath. The 32 racing its heart out, Building the 33, starting on the 34, and now revamping the 32, I am out of breath just typing it. :thumbsup:

hey mate

its pretty hard at work at the moment, lots to do!!

mark is working non stop on it after work every night and all weekend, and things dont always go as planned as you know.

r33_racer

as far as testing the dry sump setup , there are so many dry setup combinations , that if you get it wrong it will go bang, i have seen many engines with dry sumps shit the engine till they got the setup right.

(if you had no issues when you put yours together you did very well), that even comes down to how well the pump is mounted and aligned ,let alone crank vacum pressure and line syphoning and a myriad of other things.

cheers russ

how did you guys setup your dry sump systems? Shouldnt need to have a test dummy if its setup right from the start.

Thats right you shouldn't need a test dummy if set up correctly but as dry sump set up's for GTR's are not available off the shelf and just about everything has to be custom made you surely wouldnt want to take any risks with a big dollar engine. Although the basic set up is not overly complicated it doesn't take long to destroy a set of bearings So that explains why we would fit it to an older engine first for peace of mind. By all means feel free to enlighten us with some expert advice how is yours set up?.

how did you guys setup your dry sump systems? Shouldnt need to have a test dummy if its setup right from the start.

Just incase, we are doing everything from scratch including the modified sump (which hasnt been tested) so will just make sure everything is in order before building another expensive engine. Also we have a 5 stage pump so unsure of what crankcase pressures will be doing yet??

Sure it will be installed right but there will be allot of issues to sort out once its up and going

hahaha we all responded to that at the same time. awesome.

http://www.skylinesaustralia.com/forums/in...p;#entry3043612

2nd post (So how many engines have you blown??)

Edited by mathewg2509
Have a look at this video about 30 seconds in. Make sure the volume is up and then name the 'you will know what' :D

LOL...how cool i that link :thumbsup:

At first i thought the wine of the box was a supercharger of somw absolute beast. Instead it was the gearbox of an absolute beast

All the motors weve blown have all been due to incorrect bearing clearances, thats all sorted now. Nothing wrong with the dry sump system....has been working perfectly since we put it on.

Man you guys are almost over complicating the whole thing...believe me its a hell of alot easier then it sounds. There are no kits around for a gtst either, we had to custom fab everything ourselves also. Id love to see your setups to see how similiar or dissimiliar they are to ours. If its much the same as ours then i wouldnt see a reason why it wont work on your cars.

Just make sure you run the inline filters to the pump, then you wont get ball bearings cracking your gears lol. Learnt that the hard way haha.

Here's my track car, it doesn't compare to a lot of the ones posted but i made the decision to buy it instead of an Evo 7 because i'm not worried about crashing it and repairs aren't quite as painful as my old GTR. Unfortunately i warped the head in April due to a blocked radiator but i'm finally back now. Mods are:

-SR20DET Manual: bottom end rebuilt 20k ago, fresh head rebuild

-SR20de Inlet Cam

-Modified combustion chamber

-Port matched inlet

-S15 Turbo w/ 360 degree thrust washer (handles high boost)

-S15 Injectors, RB20AFM

-S15 ECU w/ BikiRom USB Multiboard

-40mm aluminium radiator

-Cheapy FMIC

-Custom 3" exhaust

-Nismo 2way mechanical Differential

-5 stud conversion (s14 front, R32 rear)

-R32 GTST brakes all round

-Braided brake lines

-RDA Slotted rotors with Lucas Pads

-S15 rear subframe

-Adjustable Rear Upper arms

-Tein HR Coilovers Front/Rear

-Tein Caster Rods front

-Tein Tie Rods and Rod Ends

-No rear swaybar

-Braided clutch line

-Alloy steering shaft spacer

-Sparco PRO 2000 Bucket seat

-Volk 16x7.5" rims

-Dunlop DO1J 225/50/16 Tyres (not fitted in pics)

-Sunroof sealed for headroom

-Crap paint, shithouse interior, character dents

Tuned the other day making 180rwkw@15psi. I'd like to bump up boost a bit to get closer to 200rwkw. I've only driven it a few times in the past few months so i've still got a lot of learning to do. I want to use it mainly for sprints and maybe a few hillclimbs.

Good to see another S13 ready to take on the Skylines at the track. Come and give me a hand, i need some support.

Michael(r 33 racer), took another 0.4 seconds off sprint track today and bit bit over 1 second on clubman. Great fun today, car much nicer/easier to drive after a few changes!

Think my brake master cylinder might be on the way out- vacuum not working very well, no leaks that i can find.

That's my last go for the year, off to US until Xmas with work. Building a 26/30 for the Sil80... might source dry sump pump for it while I'm there!

awesome work simon..

Yeh if you do..hit me up when you get back ill help you sort it all out. Next year you should hurry up and get a cage and come join us in the JDM class. We really need more cars in it.

Create an account or sign in to comment

You need to be a member in order to leave a comment

Create an account

Sign up for a new account in our community. It's easy!

Register a new account

Sign in

Already have an account? Sign in here.

Sign In Now


  • Similar Content

  • Latest Posts

    • You're not wrong, but more than a few times I've heard of people running into issues where their injector characterization isn't quite right and that approach works for that specific configuration but once they switch over to a new set they discover a whole bunch of stuff wasn't set up correctly. It's slightly more annoying to reverse engineer the OEM MAF transfer function but you already have the sensor wired up to the factory harness so keeping it around for a few weeks more while you figure out the tune is easy enough. I've seen GM also use a combination of both MAF + MAP in their ECUs before, MAF is for steady state and a calculation of the cylinder VE to correct the base VE table, then in transients it uses that calculated VE + raw MAP to determine cylinder filling somehow.
    • I know this one’s the BB one. My tuner did make mention about the actuator. I am curious about the VCT as well
    • Might also needs a stronger actuator with the right preloading. With older 2019 built bush G3 units, BB upgrade or 21U housing down size makes a pretty decent gain in response as well. 
    • Hey lads  so im finally putting together my rb30 forged bottom end and ran into an issue. I measured my main bearing clearance with arp main studs torqued to 60 ft-lbs using ACL H series STD size bearings and standard, un-ground crank shaft journals and got an oil clearance reading of about 1.3 thou measuring straight up and down and about 2.8 thou measuring at a 45 degree angle (just above and below the parting line). My machine shop said they measured the main tunnel and it was all within spec (they didnt say the actual measurement) and to go with a standard size bearing, which i have done and the clearance is too tight, I'm guessing because of the extra clamping force from the arp studs distorting the main tunnel. I was wanting to run about 2.5 thou main bearing clearance.  My questions are: 1. could i just use the HX extra 1 thou clearance ACL bearings? that would fix my straight up and down clearance making it about 2.3 thou, but then would the side to side clearance be too big at around 3.8 thou? 2. what actually is the recommended main bearing clearance for measuring near the parting line / side to side. i know its supposed to be bigger as the bearing has some eccentricity built into it but how much more clearance should there be compared to the straight up and down measurement? at the moment there is about 1.5thou difference, is that acceptable or should it be less? 3. If i took the engine block + girdle back to the machine shop and got them to line bore the main tunnel (like i told them to do the first time, but they said it didnt need it) what bearing size would i buy? the STD size bearing shells already slide in fairly easily with no real resistance, some even falling out if i tip the girdle up-side-down. If im taking material out of the main tunnel would i need a bearing with extra material on the back side to make up for it? this is probably confusing af to read so if something doesn't make sense let me know and ill try explaining in a different way. My machine shop doesn't come back from christmas break until mid January, hence why i'm asking these questions here. TIA for any help or info 
    • I bought the model back in Japan in Feb. I realised I could never build it, looked around for people who could build it, turns out there's some very skilled people out there that will make copies of 1:1 cars or near enough. I'm not really a photo guy... but people were dragging me in a group chat for the choice of bumper as someone else saw the car before it was finished as they are also a customer of that shop. I took the photo in the above post because I was pretty confident that the lip would work wonders for it. Here's some more in-progress and almost-done pics. It gives a good enough idea as to what the rear looks like!   I have also booked in a track day at the end of January. Lets all hope that is nothing but pure fun and games. If it's not pure fun and games, well, I've already got half an engine spare in the cupboard 
×
×
  • Create New...