Jump to content
SAU Community

M35 Info


Brazen

Recommended Posts

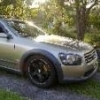
Does anyone know if there is a replacement offset bush kit to correct camber fir the front upper control arms?

I Need to correct the front passenger arm as it now has 2deg neg camber from lowering it compared to the drivers side having 1.2deg neg.

that doesn't sound right but......is this what you are looking for though.

http://www.superpro.com.au/superpro-parts?id=SPF3297K

there is also the strut to chassis arm bush's that fix pull to the left.....these are one of the exchange sets I am offering...http://www.superpro.com.au/superpro-parts?id=SPF2848K

Link to comment
Share on other sites

What is involved with putting the M35 into RWD mode?

Can you simply pull a fuse or does a wire need to be cut? Once the new wheels go on, in theory the space saver will be the wrong size for the Atessa system, so I figure I could pull the fuse and shouldn't have any problems.. correct?

incorrect. pull the front shaft out

Link to comment
Share on other sites

incorrect. pull the front shaft out

Hard job?

The space saver would be trouble with the different wheels, wouldn't it? Think it would be alright to limp it to the next major town (could be 200km?) on a long drive to get the tyre fixed/replaced?

Link to comment
Share on other sites

nah not a massive deal

4 x 6mm allen key bolts to the diff, then its a little tricky to get the shaft out, but you can loosen the gearbox mount to give you a little more room to play with.

Link to comment
Share on other sites

I would just drill it out to 1.5 mm if you plan to keep the stock turbo, 2.5 mm if hou go for a bushed core.

The banjo threads into the block just in front of the passenger front drive shaft.

Just following up on this, does anyone have suggestions for a banjo bolt that is already the right size? I don't have a drill press and it could be a while until I get to one. Seems like a sketchy thing to do without one (I don't even have a vice at the moment!)..

Link to comment
Share on other sites

For the guys looking for more suspension adjustment on there M35:

http://infinitihelp.com/diy/gcoupe/projects/infiniti_g35_rear_camber_kit_installation.htm

I came across this vid of installation of rear arms in a G35, the only bit I found a little disturbing was when they decided to slot the rear arm hole in the cradle and use an offset washer... thoughts?

I believe there is an off set bush available but i have never seen anything like this...

Link to comment
Share on other sites

For the guys looking for more suspension adjustment on there M35:

http://infinitihelp....nstallation.htm

I came across this vid of installation of rear arms in a G35, the only bit I found a little disturbing was when they decided to slot the rear arm hole in the cradle and use an offset washer... thoughts?

I believe there is an off set bush available but i have never seen anything like this...

Considering the rear arm already uses an eccentric bolt set up; I don't really see the issue.

This method of adjustment is commonplace; many cars use it without issue, and the slotting that they do in this instance is to add MORE adjustment to the existing range available.thumbsup.gif

Link to comment
Share on other sites

Considering the rear arm already uses an eccentric bolt set up; I don't really see the issue.

This method of adjustment is commonplace; many cars use it without issue, and the slotting that they do in this instance is to add MORE adjustment to the existing range available.thumbsup.gif

Does it really, I didn't know that... WOW that came of a little sarcastic.

The outside bolt is not correct? I only ask this as when i dropped the rear arm in mine I took out the bolt that attaches it to the hub on the outside is just a normal bolt, did not touch the inner one. Has the stock inner bold have much adjustment?

Mike.

Link to comment
Share on other sites

For the guys looking for more suspension adjustment on there M35:

http://infinitihelp....nstallation.htm

I came across this vid of installation of rear arms in a G35, the only bit I found a little disturbing was when they decided to slot the rear arm hole in the cradle and use an offset washer... thoughts?

I believe there is an off set bush available but i have never seen anything like this...

Mike, this was the reason for my reply. Naturally, I assumed you hadn't looked at the subframe & seen the factory adjustment is exactly that. No sarcasm.thumbsup.gif

Does it really, I didn't know that... WOW that came of a little sarcastic.

The outside bolt is not correct? I only ask this as when i dropped the rear arm in mine I took out the bolt that attaches it to the hub on the outside is just a normal bolt, did not touch the inner one. Has the stock inner bold have much adjustment?

Mike.

No, the bolt in the hub is not eccentric, and it's actually bushed in the hub too. The back arm is a toe adjustment arm. For anything up to around 2" lowered the OEM eccentric will likely suffice.

Depending on how low you drop the car; the toe can end up being so far out that you cannot use the OEM eccentric bolt to adjust. This is normally at stupid "fitment' and "stance" brah ride heights.rolleyes.gif

For normal people; a more "eccentric" (more adjustment) eccentric will do. This is why they slot the hole in the subfame out a little more.

If that's not enough; you can move to the length adjustable arm; as per the dolts in that video who seem intent on using a power driver to undo every bolt, regardless of whether it saves any time, or is actually any easier.

With length adjustable arms; I have no idea why these guys feel the need to ALSO fit eccentric bolts; if it were me, I'd set the eccentric in the centre of its range, and finetune the arm length on a wheel aligner. Then you can make small + or - adjustments with the eccentric.

But hey; I don't use a power driver on pre loosened bolts either...cheers.gif

Edited by Daleo
Link to comment
Share on other sites

Thanks bud, going to drop the stag in for a wheel alignment now... I wasn't going to as I didn't think there would be any adjustment in the back and if they couldn't adjust anything then I didn't want to waste any $$ for no reason.

Mike.

Link to comment
Share on other sites

Create an account or sign in to comment

You need to be a member in order to leave a comment

Create an account

Sign up for a new account in our community. It's easy!

Register a new account

Sign in

Already have an account? Sign in here.

Sign In Now


  • Similar Content

  • Latest Posts

    • Harness update time have had great fun and learnt so much already so far with this project. I started off making both the ignition and injector sub harnesses in the hope any mistakes i made here aren't as hard to undo and learn from as the main harness.  A cool comparison of the old harness using presumably TXL wire and the new which is using Tezel. Also opted to use DTM plugs to keep the whole setup as neat and tidy as possible and tucked the wiring under the coil bracket to try and keep it all from sticking out too much. Although the injector harness, I'm not overly happy with as I'm still using the rubber boots that are supplied with the type of plugs it just looks ugly and sticks out like a sore thumb with the white identifiers so a slight redesign may be done.   Then it was main harness time and most importantly trying to route it nice and away from the heat it will use the OEM heater hose routing which is no longer present to keep the harness up high and secure. it's amazing how much smaller this harness is able to be compared to the old one. plugged everything into the emtron and with the help of the tuner again attempted to start it up and instantly fired up and running smoothly on all 6 which was a big shock to myself. So still some routing and adjusting to be done for the final fit up and installing a knock sensor harness plug which is in the post all has gone surprisingly well.     The old harness for shits and giggles.
    • They do that at random every now and then, with almost no detectable cause. Mine has done it a couple of times (over 25 years!!). Never worked out why.
    • I don't post on here and have been lurking for some time now. Many of the topics have helped me out more times than i can count. I was racing yesterday (11/9) and blew a front right CV shaft. I have spares so I popped a new one in. A thread i read previously said to check the engine mounts if you blow a front CV. Upon inspection, the front right mount was completely separated from the upper plate. This discovery saved me time and money, because i would have blown another CV if i went back out. Just wanted to thank you guys and wish everyone luck with with their builds. (Now if we could only come up with a solution for my power steering belt flying off after hitting the rev limiter, lol)
    • Either way he still need those style of spacer to go into the manifold because the photo he currently has is not going to work 
    • You can just get the injector bosses, which allows top feeds to fit. He can use the same injectors without issue, like these (another option): https://rocketindustries.com.au/af59-2210-rb25-fuel-injector-inserts     The Racework ones look a bit better: https://www.nzefi.com/product/raceworks-lower-injector-mounting-boss-kit-for-r33-rb25det-s14-s15-sr20det/   You could also just get a similar kit like the Radium one by Plazmaman: https://plazmaman.com/product/nissan-rb25det-r33-billet-fuel-rail/?srsltid=AfmBOoogfYq49X0fu2Wdbf8yOf6zt9egyPAif_gn3Qr3G8hzAphhTgOkO70  
×
×
  • Create New...