Jump to content
SAU Community

M35 Info


Brazen

Recommended Posts

cam you were right. might end up with PWR

I know, why would I steer you wrong :P

install it yourself. its not that hard

Correct.

In fact, very correct.

when cam comes on he'll be able to tell you all about it. he already has one!

Aaron, no need to have them use your stock radiator, I have a spare one sitting in my garage.

Or are you using Scott's old one?

Ryan, Race Radiators use a Griffin Racing core SEE HERE and is triple pass if I recall correctly.

The core is 42 or 48mm thick (can't remember) and I think Race Radiators use the same core for custom R33 radiators.

Their work is quite impressive and I had them put the OEM trans regulator in mine, but they normally use PWR in tank "coolers".

I needed to cut a little of the fibreglass support, but very, very little when compared to the Mishimoto unit!

Link to comment
Share on other sites

NM35 Radiator Filling.

Thought I'd put this Radiator fill guide in here; seems like there's a fair bit of stress in doing this job, and that in turn scares people away from doing relatively simple jobs.

Stolen from V-Series forum; http://www.skylinesaustralia.com/forums/topic/374349-v35-oem-aluminium-to-aftermarket-alumiunum-radiator/

Well done Nate, hopefully this de-mystifies the procedure a little and the post title will hopefully make it easy to find.

Yeah over heating can be a pain when u dont get all the air out, so get it done right the first time. Here is what you have to do for a correct V35/350GT/G35 coolant flush with no air bubbles (my post on g35driver)Well i got it, ended up doing this, which should be done from step 1:

1. Wait till car is cooled down

2. Jack up front or park on step incline

3. remove rear bleed valve from heater hose

4. remove rad drain plug with bucket under it

5. remove rad cap

6. remove and wash out overflow

ONCE DRAINED

1. Put rad drain plug back in

2. put bleed plug back in

3. put over flow container back in

4. get a long funnel or water bottle or non spill funnel and put tape about 1" from the tip of funnel or on the thread of the bottle until its thick enough to fit snug in the rad neck

5. with car off fill the overflow to minimum.

6. with car off slowly poor mixture into funnel wedged in rad with your premixed mixture (i used distilled and water wetter)

7. Once you see it no longer draining from the funnel grab the lower rad hose and compress and let go a few times and see if anymore drains out, top it up if it all goes

8. Start the car and slowly keep at least a bit of fluid so that the funnel is at no point completely empty

9. As you see it no longer draining and staying where it is rev car to 1500-2000 for 30sec and then let idle. Repeat a few times

10. As soon as you see fluid rise up the funnel and overflow container full turn car OFF

11. Let rest of the fluid drain, if none is left very slowly poor more in until you cant fit any more in.

12: You should put rad cap back on, start car again and turn fans on with A/C off and temp as high as it can go and fans on high

13. Make sure you can feel hot air, that means coolant is circulating and passing hot air out, cold air = air bubble = slightly opening the bleed valve and letting air out until just water comes out.

14. one you confirm hot air and/or no air from bleed valve turn car OFF

15. If jacked up put it down and go for a drive, if all good then put under tray back on!

16. Keep and eye on overflow tank for next week and make sure its at minimum

Link to comment
Share on other sites

Hey Fellas,

Last night I've realised that my left main headlight is not working I think it must be just a globe.

Does anyone know what the code is for globe. This is the bright white light or top headlight globe looking from the front.

My other bottom part is still working.

Can I source this at any parts shop like Autobarn or is this nissan only thing?

Thanks

David :action-smiley-069:

Link to comment
Share on other sites

if its been complied 'correctly' its an H1

if it still has the HIDs its a D2R 4300k.

generually you should replace both HIDs at the same time due to colour difference as they get older.

or go on ebay and get a set of chinese HID burners for about $40 delivered.

Link to comment
Share on other sites

from factory they are a D2R HID burner.

with compliance they must be removed and they retro fit an H1 into the D2R socket.

it just depends if your car has been complied 'correctly'

take a photo of the headight so we can see the globe. take it from the front of the car looking into the glass. probably side on a bit

I see, not sure if I can get the photo as I'm at work and cars at home.

Thanks for reply, you don't think I can get the HID's with H1 at any parts shop?

Dave :cheers:

Link to comment
Share on other sites

you can get H1 HID conversion kits. but you can just put D2Rs into your current headlights. even if you use an aftermarket ballast unit.

anyway, take a photo first and we can probably tell whats in your car

Link to comment
Share on other sites

Apart from superficial differences (bodywork & wheels) is the AXIS that different to the rx and rs models? I know it has a lower suspension but does it make any difference (for those that have driven both). I also read somewhere the leather in the axis was different and of better quality? I only ask because they're generally a bit more than the rs & rx models but for what? a different look?

I'm on the verge of importing one that's all. Excuse my ignorance but has anyone imported one with a screwed turbo or is it replaced at compliance. I know they go between 60-100ks but who's to say that hasn't already happened in Japan and been replaced?

any help would be much appreciated

Link to comment
Share on other sites

It won't have been replaced in Japan, they would be buying a new turbo from Nissan most likely and it would cost more than the car is worth to fit. Any turbo noise and they would ship it off to auction straight away IMO. Just leave a few grand aside just in case, and flush the engine/clean the turbos banjo restrictor as soon as it arrives.

Link to comment
Share on other sites

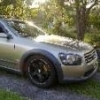
So as far as I can tell, the M35's come with three different wheel/tyre combos.

205/65r16

215/55r17

225/55r18

While I know that it's hard to match a tyre between rim sizes, which one is the most accurate? I'm looking for tyres for my new wheels but don't know which is the best "baseline" size to pick my new tyres from.

Use the calculator here:

http://www.miata.net...e/tirecalc.html

I'm guessing all those tyre sizes would have the same rolling diameter...

well maybe not the 18's...I think the recommended 18" size is 245/45/18

Edited by ironpaw
Link to comment
Share on other sites

Use the calculator here:

http://www.miata.net...e/tirecalc.html

I'm guessing all those tyre sizes would have the same rolling diameter...

well maybe not the 18's...I think the recommended 18" size is 245/45/18

Yeah I've been using that. They are close, but not as close as I'd thought. I've found 5 supposedly stock tyre sizes now. Don't know which are genuine or if they are just the cheapest option for the importers to whack on to sell their cars off..

Link to comment
Share on other sites

Use the calculator here:

http://www.miata.net...e/tirecalc.html

I'm guessing all those tyre sizes would have the same rolling diameter...

well maybe not the 18's...I think the recommended 18" size is 245/45/18

This is what I run; it gives around 3% error (100km/h indicated= 97km/h actual) against my GPS. thumbsup.gif

Link to comment
Share on other sites

Create an account or sign in to comment

You need to be a member in order to leave a comment

Create an account

Sign up for a new account in our community. It's easy!

Register a new account

Sign in

Already have an account? Sign in here.

Sign In Now


  • Similar Content

  • Latest Posts

    • Harness update time have had great fun and learnt so much already so far with this project. I started off making both the ignition and injector sub harnesses in the hope any mistakes i made here aren't as hard to undo and learn from as the main harness.  A cool comparison of the old harness using presumably TXL wire and the new which is using Tezel. Also opted to use DTM plugs to keep the whole setup as neat and tidy as possible and tucked the wiring under the coil bracket to try and keep it all from sticking out too much. Although the injector harness, I'm not overly happy with as I'm still using the rubber boots that are supplied with the type of plugs it just looks ugly and sticks out like a sore thumb with the white identifiers so a slight redesign may be done.   Then it was main harness time and most importantly trying to route it nice and away from the heat it will use the OEM heater hose routing which is no longer present to keep the harness up high and secure. it's amazing how much smaller this harness is able to be compared to the old one. plugged everything into the emtron and with the help of the tuner again attempted to start it up and instantly fired up and running smoothly on all 6 which was a big shock to myself. So still some routing and adjusting to be done for the final fit up and installing a knock sensor harness plug which is in the post all has gone surprisingly well.     The old harness for shits and giggles.
    • They do that at random every now and then, with almost no detectable cause. Mine has done it a couple of times (over 25 years!!). Never worked out why.
    • I don't post on here and have been lurking for some time now. Many of the topics have helped me out more times than i can count. I was racing yesterday (11/9) and blew a front right CV shaft. I have spares so I popped a new one in. A thread i read previously said to check the engine mounts if you blow a front CV. Upon inspection, the front right mount was completely separated from the upper plate. This discovery saved me time and money, because i would have blown another CV if i went back out. Just wanted to thank you guys and wish everyone luck with with their builds. (Now if we could only come up with a solution for my power steering belt flying off after hitting the rev limiter, lol)
    • Either way he still need those style of spacer to go into the manifold because the photo he currently has is not going to work 
    • You can just get the injector bosses, which allows top feeds to fit. He can use the same injectors without issue, like these (another option): https://rocketindustries.com.au/af59-2210-rb25-fuel-injector-inserts     The Racework ones look a bit better: https://www.nzefi.com/product/raceworks-lower-injector-mounting-boss-kit-for-r33-rb25det-s14-s15-sr20det/   You could also just get a similar kit like the Radium one by Plazmaman: https://plazmaman.com/product/nissan-rb25det-r33-billet-fuel-rail/?srsltid=AfmBOoogfYq49X0fu2Wdbf8yOf6zt9egyPAif_gn3Qr3G8hzAphhTgOkO70  
×
×
  • Create New...