Jump to content
SAU Community

Recommended Posts

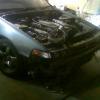
i have a 90 auto cefiro and swaped the parts out of a 32 skyline. please excuse all spelling mistakes.

1 disconnect battery

2 unclip gear stick surround and unbolt 4 bolts holding gear leaver to chassis, unplug all plugs. go underneath and unbolt and unclip where gear leaver mounts to gear box.

3 drain oil out of gear box

4 undo 2 top bolts holding trans to motor, difficult long 14m spanner helps, remove top bolt out of starter motor

5 jack car up, remove drive sharft, pipe which holds dip stick into trans. cut the two pipes which carry fluid from the trans to the bottom of the radiator. release all cable ties which hold the 3 cables which go to the trans and un plug from box behind battery.

6 undo rest of bolts holding motor to trans. support trans and unbolt cross member. jack up the front of the motor with a block of wood on the sump, spin trans slightly so that starter motor casting is facing down, pull trans off motor an onto floor

7 unbolt torque converter ( 3 14mm bolts on motor side of fly wheel ) and unbolt fly wheel.

8 remove old spigot bush, i drilled mine out with a small drill bit, and install new manual spigot bush with a hammer and a piece of wood. $20 from nissan. bolt on clutch. check oil level in manual gear box.

9 slide box on in much the same fasion as you slid the old one off. drill out cross member to fit mounting holes, apparenty a s14 manual one fits. bolt cross member up and onto box.

10 get drive shaft made to length, or un bolt the 32 drive shaft at the centre universal and swap over flanges from your auto drive shaft. ( very hard to do, got a mechanic to do mine $20 ) bolt the front 32 drive shaft with the auto flange to the rear auto drive shaft. install whole drive shaft.

11 remove foot hand brake and bend air con duct out of the way, slip clutch peddal in and bolt up ( easy, not as every one says ) bend air con duct back. go to engine bay and bolt in clutch master cylinder. my doner car had hicas which interferes with the hydrolic line for the clutch, so i brought 2 14mm bolts and plugged up the holes in the block where the clutch lines goes through and used all skyline brackets and clutch lines. grind off brake peddal to sensible size. bleed clutch at master cylinder first and then at slave cylinder.

12 plug the cable back into the box behind the battery which has only 2 wires and join the 2 wire together, this is your inhibitor. connect back up battery. job done

i have not hooked up reverse lights yet or installed a hand brake. hope this has helped, any in put will be greatly appreciated. installing rb26 next, any diagrans on how a rd 20de computer is wired would be lovely, just lovely

Link to comment
https://www.sau.com.au/forums/topic/185916-how-to-make-a-cefiro-manual/
Share on other sites

Handbrake, use cefiro handbrake cables and joiner, use R32 lever and bracket (have to grind or drill off spot welds where the bracket attaches to R32 floorpan). Or if you can find it, A31/C33 lever and bracket. You can either chop up your center console to fit, or get a manual A31/C33 console. Switch on handbrake lever connect to plug above brake pedal (where the old footbrake switch used to connect to).

Reverse lights, there is a plug on the fuse box with 7 pins, one for each gear (1,2,D,N,R,P) and 12V+. Use a multimeter to find the 12V+ and a piece of wire to touch against the other pins, find the pin for the reverse lights/beeper. Connect the 2 wires from the reverse switch on the manual gearbox to these two wires.

just did this conversion the most annoying part in the handbrake lever ended up making a bracket and welding it to the floor. and the tailshaft front half of the r32 doesnt bolt to the rear half of the cefiro the splines are different unless there are a few different tailshafts.

lee

That is correct, the front half of the R32 tailshaft won't bolt onto the rear half of the A31/C33 because the hub diameters on the uni-joints are different size.

So after you have undone the 4 bolts on each tailshaft and you have them separated you will notice there is a giant nut on the inside of the hub. You need to undo that nut and swap the hubs over so that you end up with cefiro rear half, both cefiro joints and R32 front half.

Alternatively, source an A31/C33 manual tailshaft, have a custom 1 piece made up, have the R32 tailshaft lengthened.

Edited by daisu

just installed the hand brake, 32 leaver and cable joined cefiro set up where it splits to the two cables going down to each back brake. just had to shorten the crimp on the end of the 32 cable by about 2mm to fit into the cefiro braket., hard to explain but is pretty simple once you have one infront of you. it is even marked on the chassis where to pass the hand brake cable through. just have to weld 32 lever braket to trans tunnel, tig advised.

about the 32 drive shaft mating with the cefiro one. i did exactly what the other person said, but they just explained it better.

thank you very much to the other person who explained about the reverse light wire. do you know anything about ecu wiring for the rb20de? i have wired fuel injection before and probably will be able to work it out but a diagram is always helpful. cheers.

  • 1 year later...
  • 7 months later...

the front part of the drive shaft doesnt matter if it is 2 or 4 door, as long as it has the spline to fit into the manual gear box, and you use the back part of your drive shaft. works a treat. just a note, keep your auto gear box cross member, it fits the r33 rb25 gear box if you ever put one in. couldnt believe it when i found mine up in my roof and it fitted. if any one needs a a31/c33 manual cross member i have one for sale.

Cheers mate. Read that a s13 sr20 or ca18 gearbox x member will fit so that shouldn't be too hard. But can you pm the price your chasing and where you're located. Cheers for the help.

the front part of the drive shaft doesnt matter if it is 2 or 4 door, as long as it has the spline to fit into the manual gear box, and you use the back part of your drive shaft. works a treat. just a note, keep your auto gear box cross member, it fits the r33 rb25 gear box if you ever put one in. couldnt believe it when i found mine up in my roof and it fitted. if any one needs a a31/c33 manual cross member i have one for sale.

Create an account or sign in to comment

You need to be a member in order to leave a comment

Create an account

Sign up for a new account in our community. It's easy!

Register a new account

Sign in

Already have an account? Sign in here.

Sign In Now


  • Similar Content

  • Latest Posts

    • I would paint match the whole thing to avoid unwanted attention  I had a similar bonnet, paint matched, on my old R33 GTST, but mine was a fibreglass jobbie made by Blitz in QLD, they work extremely well for radiator efficiency and under bonnet temps
    • Does anyone run this kit with factory plenum? Does the adapter and bosch tb fit under factory strut brace? I wanted to get this setup before going forward facing manifold. Thanks
    • small update time, after always wanting a "cool" looking bonnet for my car and always struggling to find one for the series 2 that i liked and wasn't an insane amount of money. Saw one i liked on RHDjapan from D-speed in Japan the price was very good for a carbon bonnet so good infact i was a little unsure how much i trusted it, decided to bite the bullet and with the help of jesse streeter in not long at all it was at my door. Once it was delivered i ran in from work and quickly unboxed it and to my surprise the quality was actually pretty good i quickly removed the old bonnet and placed on the new one to test it out and even the fitment wasnt too bad at all. Then decided to paint the little grille in the bonnet black to stop it sticking out so much.   I decided to not mess around with the hood latch and just install some aero catch hood pins, having never installed them before did some YouTube university classes and i was good to go. fair to say it is not a fun job at all from making brackets so the pins sit nicely and actually cutting through the bonnet but also being very scared of cutting the holes too big it took wayyyy longer than i would like to admit but finally got it there. Then it was time for a quick test drive to ensure the latches actually worked and thankfully the bonnet looked very stable. I still think paint matching the bonnet and leaving just the part that sticks up as carbon would help make it all look alot neater as im not sure how i feel about all that carbon on a very fridge white car but will leave it as is and see how i feel with time.  
    • I think it's bound to happen, you finally get it all perfect, and bam, something will happen. I took a while to get a Commodore rear quarter repaired where a P Plater clipped it. Two days after getting it back, Sarah wiped it out on a concrete pillar in an underground car park... This is why I take forever to repair them, it stretches how long until it gets bent again... 😛
    • Nah, not really responsible for that little fiasco, but I'm still pissed at myself for writing off my 86, or when I reversed my VX into a pole just before selling it, but, meh, 5hit happens to stuff, all it takes is a slight distraction, and life is full of distractions, and "dooh" moments   
×
×
  • Create New...