Jump to content
SAU Community

Recommended Posts

  • Replies 241
  • Created
  • Last Reply

Top Posters In This Topic

Top Posters In This Topic

Posted Images

  • 2 months later...

hope everyone can see the amount of hours and recreation is needed to come close to a decent fit.

1 of a kind...

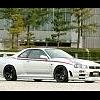
Rims are on.. and No spacers sitting right now.. maybe a 10mm or 15mm is fine but sits decent to me.

the Panda style look wasnt intentional.

the front bumper is only there for test fitting.. I have an OEM front bumper for the final fitting then paint.

IMG_1381.jpg

IMG_1382.jpg

in these pics.. its the r34 trunk... with the R32 trunk section about 2 inches from the window.. it was needed to be modified since the r34 trunk fit contoured well, but didnt come close enough to press down against the trunk inner weather stripping seal. Oh well... I guess it has to be done properly and right the first time.. Right?

IMG_1383.jpg

IMG_1384.jpg

IMG_1385.jpg

IMG_1386.jpg

IMG_1387.jpg

IMG_1388.jpg

IMG_1389.jpg

IMG_1390.jpg

IMG_1391.jpg

or maybe im building a R34 Japan Cop car?

jcops1.jpg

  • 3 weeks later...
those rear lights aren't GTT lights are they? don't seem wide enough for the rear guards?

Im glad you asked:)

The white taillight covers were CLAIMED to be GTR taillights when i bought them from Ebay 12 months ago.. but oh well.

1 more piece to the puzzle.

Image227.jpg

Image225.jpg

IMGP9974_Large.jpg

Damn Yokohama Nissan, teasing me with Midnight Purple 2 painted R34 GTR taillight covers...

No more panda project now.

Stay tuned the next few weeks... it will be a work of art.

wow awesome thread, i will keep coming back here for updates :) my dad is in canada now for work, and he called me to say they are using r34 sedans as taxi but they look different, he quickly called me back to say its a chevie impala lol

looks great, and looking forward to seeing the finsihed art work :(

Create an account or sign in to comment

You need to be a member in order to leave a comment

Create an account

Sign up for a new account in our community. It's easy!

Register a new account

Sign in

Already have an account? Sign in here.

Sign In Now


  • Similar Content

  • Latest Posts

    • Fuel tank is out. Looks pretty bloody good under (ie above) the fuel tank.  Amazing how good the factory e-coat holds up in the hidden areas.  No where near as much body deadener to get rid of as the front but still not looking forward to it!  Shit of a job.  I'm thinking I might grab a needle scaler and give that a go before I attack it with the angle grinder and wire wheel which is how I did the front 2/3's of the car.  Feels good to be working on the car again but who knows how long it will last!  Hopefully I can get it further forward than where it was prior to this last block of work when I decided to go back 10 steps further down the rabbit hole from where i already was! The problem is, I'm realising how hard it will be to repair and paint the bumpers, which cannot be put back on the car, and have a good paint match. There are also areas where it would be VERY hard to hide the new paint where it transitions from old paint. Like this- There is only one way to do that perfectly and I really dont want to have to do what that means I would have to do... 🤦‍♂️
    • Pretty sure the factory assembly doesn't have any gasket at all, just RTV.
    • I will get a couple cans for sure thanks, I do have 2lt fish oil to spray around the car already.
    • Thought I’d post pics of the packages for those interested. The premium package is #16. Remote start, security with tilt sensor and remote and backup battery, auto fold mirrors and door illumination.    Can post up pics of all the factory options and images from the factory options brochure if people are interested. I have all the dealer books etc for all rv37 models. 
    • After its dried out Penetrol is you friend to treat rust and seal up those seams 
×
×
  • Create New...