

Announcements
-
Similar Content
-
-
Latest Posts
-
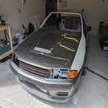 Very slightly as there are bars connecting both sides of the ramp. The only difficulty that I had was doing the gearbox, everything else so far has been ok
 -
 Hey, mike has that RB25DE non VCT might be applicable to your need. I would advice to email him for pictures if you're still interested. I suggest email him because he his yet to upload pics to the forum which give me assurance that he hasn't sold it..markettrading1002 at aol dot com tell him from daniel
 -
Hey, mike has that Auto GTS4/Stagea transfer case might be applicable to your need. I would advice to email him for pictures if you're still interested. I suggest email him because he his yet to upload pics to the forum which give me assurance that he hasn't sold it..markettrading1002 at aol dot com tell him from daniel
-
Hey, mike has that R34 GTR boot battery bracket might be applicable to your need. I would advice to email him for pictures if you're still interested. I suggest email him because he his yet to upload pics to the forum which give me assurance that he hasn't sold it..markettrading1002 at aol dot com tell him from daniel
-
Hey, mike has that V36 steering rack might be applicable to your need. I would advice to email him for pictures if you're still interested. I suggest email him because he his yet to upload pics to the forum which give me assurance that he hasn't sold it..markettrading1002 at aol dot com tell him from daniel
-


Recommended Posts
Create an account or sign in to comment
You need to be a member in order to leave a comment
Create an account
Sign up for a new account in our community. It's easy!
Register a new accountSign in
Already have an account? Sign in here.
Sign In Now