Jump to content
SAU Community

Recommended Posts

i want to share my first time experience with every body who wants to get a rb30 fitting with rb26 head into a bnr32

hope my taste floats ur boat.

actually i have the longest going project thread on GTRCanada.com, hope i can do that here as well :)

this project been going to almost 2 years march 2006.

got the car then 6 days later it blew up so i decided to do something i'll never regret doing so i went with the rb30 since not many ppl have done it here in canada.

with building a rb30/26 here is a list of problems i came across

-4wd adapter makes the holes to the tranny from engine block dont match

-cheap 4wd adapter requires the use of external oil pick up

-block is taller, which means turbo sticks out too high, hitting shock tower,

-block is taller, which means rad hose don't fit

-block is taller, which means all IC pipes + down pipe has to be extended.

-have to use RB30 timing belt

-have to extend timing belt plastic cover

-i have greddy intake manifold + taller block height, making the manifold hit against the clutch master cylinder on bnr32 with clutch boosters

Engine

-RB30DET

-Greddy T78 single turbo

-Greddy intake manifold

-Greddy Exhaust manifold (braced)

-ACL forged pistons (ceramic coated)

-SPOOL forged rods

-balanced / polished crank

-N1 oil pump

-Keep Labs custom external oil pick up

-Keep Labs custom external oil return (turbo/head)

-OEM water pump

-Greddy racing BOV

-Greddy 50mm waste gate

-Electric fans

-F-win Rad

-ARC oil cooler (grill mounted)

-Greddy oil cooler (Vmounted)

-Removed ABS, Custom brake lines (hidden)

-Trust 100mm intercooler

-Areomotive FPR

-HKS 280L fuel pump X2

-Nismo 275L fuel pump x1

-Powerflow fuel filter (x2)

-Black Stainless lines

-Sard surge tank + Stainless fittings

-Earles stainless lines

-Grex 272 cams

-SARD 1000CC injectors

-ARC Ti cooling plate

-Trust coolant breather tank

-Custom Ti exhaust (KTS)

-ACL bearings

-ARP Bolts

-Tomei Type B Head Kit

-Tomei head shim kit 1.7mm

-Tomei sump baffle

-Nismo engine mounts

-Greddy catch can

-Custom rad overflow tank

-Racing Battery relocated to behind passenger seat

-Gates RB30 timing belt

-Tomei 1.8mm 87”metal head gasket

-custom anodized earls fittings

-Greddy intake manifold

-Greddy 100mm intercooler pipes

-HKS turbo bell mouth

-Greddy over size pully kit

-ATI crank dampener

-Billion rad hose

-Split fire coil pack

-Custom 4wd sump adapter plate

-Billion Power Steering fluids cooler

DriveTrain

-6spd trust dog box H pattern

-Push Pulled conversion

-OS Giken triple plate clutch

-Push to pull type Conversion kit

-Essential strengthen clutch piston kit

-Cusco front 1.5 way type MZ lsd

-Tomei T-trax rear 2 way lsd

-Nismo Steering rack bushing

-TEC Metal Steering rod spacer

Interior

-KTS 7pt Rollcage (custom padding)

-recarpeted rear floors

-Bride Zeta3 (L) bucket (driver)

-Bride Gias Carbon Kevlar (passenger)

-AC unit relocated to Glove box

-HKS Boost controller

-Defi Link Water temp. guage

-Defi Link Boost guage

-Defi Link oil Temp guage

-Defi Link oil Press guage

-Defi Link Ex temp

-Defi VSD-X

-Defi 80mm Tach 11000rpm (white face)

-Defi Link indicator II

-Custom carbon center glove box

-Toggles switches / led lamp

-Power FC Controller

-Carbon Kevlar cluster

Exterior

-Greddy rear skirts

-Nismo f-bumper

-Custom Carbon bumper Lip

-Custom Carbom N1 side skirts

-Custom Carbon hood lip

-Custom Carbon N1 ducts

-Custom Made Angel Eye N1 headlights

-D-Max Carbon Hood

-Custom LED rear License plate lamps

-Sard GT Spec M Fuji 1700mm wing stands 1210mm (Carbon Kevlar)

-Custom CNC Wing Stands

-Grams Light 57s-pro 19X10 +0

-Blitz I-Spark headlight blinker

Brakes / Suspension

-Cusco Tension rods

-Cusco rear camber arms

-KTS front camber arms

-VTTR Front 6pot 2pc rotor racing brakes

-VTTR rear 6pot Racing brakes

-HKS Hyper Max coilovers

-Metal sub frame spacer

-Cusco front & rear sway bar

-Custom over size Endlinks

-KTS lug nuts

-ALL Nismo hard bushings through out

-Seem welded suspension tower

here are some pictures

i hope to get the car running by the end of jan 08

IMGP1235-1.jpg

IMGP1250.jpg

IMG_0855.jpg

IMG_0859.jpg

cusco front diff

IMG_0757.jpg

custom brake lines, all hidden

IMGP1205.jpg

oil pan modded to fit rb30

IMGP1190.jpg

greddy intake manifold

IMG_0721.jpg

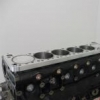
block with head studs arp

IMG_0686.jpg

ATI ATI ATI ATI ATI ATI ATI

IMGP0972.jpg

hks turbo mouth

IMGP1093.jpg

my seats bride gias carbon kevlar

1.jpg

greddy t78 33d

DSC07616.jpg

DSC07621.jpg

sparkly engine bay

IMGP0725.jpg

sparkly trunk

IMGP0661-1.jpg

IMGP0669.jpg

IMGP0671.jpg

IMGP0652-1.jpg

black stainless lines

IMGP0662.jpg

fuel system stuff ( getting them anodize polish silver )

IMGP0654.jpg

welded shock tower

DSC07498.jpg

ported head

IMGP0568.jpg

IMGP0583.jpg

1000cc sard injectors

IMG_1646.jpg

vttr brakes

P1040808.jpg

P1040803.jpg

Imgp5086.jpg

pink engine cover

IMGP5349.jpg

ti exhaust

DSCF6666.jpg

Edited by felixy69
Link to comment
https://www.sau.com.au/forums/topic/213503-my-rb3026-bnr32-build-project-horny/
Share on other sites

  • Replies 110
  • Created
  • Last Reply

Top Posters In This Topic

UPDATES

the motor is IN !

but more problems

for those who think RB30 is a direct bolt on..u are wrongin, as the rb30 block being taller, with my Larger greddy intake manifold, the back it of HITs the clutch master cyclinder, we end up moving the master cyclinder higher up

for those who think RB30 is a direct bolt on..u are wrong again, as the rb30 4wd requires sump plate, the sway bar came really really close to the sump. tho the sway bar isn't connected to the shocks yet so we won't know what will happen under final adjestment.

and it hits the NEW brake lines we made so we had to make new brake lines the 3rd time.

enjoy the pictures

i'll take more with a real camera once the tranny is in today !!!

pics taken with cherry picker still has it's tension, wthout it the engine will tilt back hitting the above listed items.

i really hope when the tranny is in. these problems will not happen !

IMG_0198.jpg

IMG_0201.jpg

IMG_0202.jpg

so i had another problem today

it was when i bolt the tranny to the engine it would engage the triple plate clutch,

turns out i have the wrong release bearing sleeve, what i have was the oem 16mm, i needed to 14mm one made for triple plate clutch,

well this was a japan part and no one in canada have it so i decided to make my own

here are the pictures

IMG_0232.jpg

also shorten the essential privot

IMG_0236.jpg

shorten the push rod on the slave

IMG_0233.jpg

IMG_0230.jpg

hope it can go back together tomorrow

also on another hand, i got rid of the small rubber bushing on the tranny mount, in replace i weled 2 steel plates, may be it can stiffen the tranny part.

IMG_0238.jpg

IMG_0237.jpg

also done was

due to the fact that rb30 make the engine taller, and the need of sump adapter to hold the 4wd sump, besides the fact that i have to make new holes on the bottom of the tranny

i also have the cut apart the housing so that this shaft won't hit

IMG_0214.jpg

IMG_0216.jpg

IMGP1190.jpg

IMGP1177.jpg

GREAT !

Another Problem.....are you excited ??

well this one is a small problem and is that the upper rad hose don't fit due to the extra block height :thumbsup:

IMG_0250.jpg

IMG_0251.jpg

greddy large intercooler pipes is too short

greddy Large side pulley kit is too big and will not be compatible with ATI damper

so these are for sale if anyone wants

more comming soon :)

hey look

first my water hose dont fit due to the extra block height

now my turbo is too big !!

check it out....its not even bolted down to the manifold yet and it's already hitting the shock tower

IMG_0256.jpg

IMG_0254.jpg

IMG_0257.jpg

IMG_0253.jpg

IMG_0252.jpg

and here is a New battery try "keep lab special" and relocated from back of the passenger seat to the trunk.

IMG_0271.jpg

IMG_0273.jpg

IMG_0274.jpg

everything is still in the mock up stage...going to get it plated and anodize next week

so more progress today

made the apexi EVC into the test pipe

IMG_0926.jpg

IMG_0925.jpg

remember my turbo clearence issue ?

well instead of bangging out the shock tower, we modifided the exhaust manifold so it's more to the left

IMG_0961.jpg

IMG_0969.jpg

IMG_0971.jpg

IMG_0973.jpg

IMG_0957.jpg

as you can see there are more clearence to the shock tower and less to the engine cover.

i also told u before that the water tube on the rb30 block is higher so the exhaust manifold needed to be ground inorder for it to fit

IMG_0978.jpg

then we decided instead of having the waste gate vent back into the exhaust, like how it was before, we are going to externaly dump it, so we cut + patch the down pipe, later i am going to warp it with black heat warp

IMG_1013.jpg

IMG_1029.jpg

some random pictures

my clutch master (from EK9)

IMG_0999.jpg

IMG_0941.jpg

twin fuel filters

IMG_0955.jpg

the guys working hard

IMG_0943.jpg

some artistic stuff

IMG_0949.jpg

aeromotive fpr

IMG_0937.jpg

others

IMG_0936.jpg

IMG_0931.jpg

some pic of my fit

IMG_0980.jpg

IMG_0981.jpg

ok here is the end of the week update !

IMGP1465-1.jpg

wow i have a spoon part on my nissan gtr.

it is a spoon low temp thermal switch

IMGP1461.jpg

FAL fan for Supra

IMGP1455-1.jpg

with custom mount to the rad welded

IMGP1459.jpg

custom mounted fuse box

IMGP1457.jpg

IMGP1456.jpg

heat wrap wires

IMGP1447-1.jpg

clutch lines finished

IMGP1441.jpg

Ti exhaust mounted

IMGP1436.jpg

this is something tricky

because the engine is taller, all the pipes needs to be longer, and because i have a greddy manifold, the intake pipe needs to be 4" instead of 3"

so we cut and weld + extended the intake pipe from the IC, also made it 4"-3"

IMGP1449.jpg

IMGP1452.jpg

IMGP1435.jpg

some hose clamps

IMGP1432.jpg

I NEED TO SELL MY GREDDY 272/10.8CAMS ! $450CND...i got BIGGER !

IMGP1467-1.jpg

IMGP1469-1.jpg

IMGP1471.jpg

IMGP1472-1.jpg

here u go

rb30 dib stick tube was remove and replaced by the oem rb26 one. as in the picture you will see the height difference between the two, so with using rb26 dip stick, i have to use rb26 tube.

-oil pick up finially finished

here are the pictures

IMG_0862.jpg

IMG_0864.jpg

IMG_0836.jpg

IMG_0855.jpg

IMG_0847.jpg

IMG_0842.jpg

IMG_0841.jpg

IMG_0843.jpg

random shots with 4wd adapter bolted to the block

IMG_0859.jpg

IMG_0857.jpg

thx more to come !

Create an account or sign in to comment

You need to be a member in order to leave a comment

Create an account

Sign up for a new account in our community. It's easy!

Register a new account

Sign in

Already have an account? Sign in here.

Sign In Now


  • Similar Content

  • Latest Posts

    • Thanks for that.... If only I could do something once and be happy with that, like some people do....
    • I had no transmission at all so I managed to find a big box manual gearbox from an R34 GTT for an insanely good price in EU. I converted it to push type which cost more than the transmission almost, with parts from Amayama! These engines are very strong and can put out decent power with a properly sized turbo. You can save on money from parts like pistons and rods, and invest those in the transmission and other parts. I suggest you join the RB20 Enthusiasts facebook group, plenty of info and almost daily posts there about 20DE/DET/Neo+T builds. (I hope I'm not breaking any forum rules by mentioning third party platforms, just trying to help the buddy out)
    • Yeah, having tried all of those methods including BBQ+recipro/hacksaw, I ended up buying a bush press kit under $150 that works well, like this: https://www.ebay.com.au/itm/355967727167?mkcid=16&mkevt=1&mkrid=705-154756-20017-0&ssspo=sfmmuhxgqhm&sssrc=2047675&ssuid=dJvnaZ11TB-&widget_ver=artemis&media=COPY It basically has a range of pushers and cups with threaded rods between to press out a range of large bushes. The problem with any sawing solution is minimising damage to the subframe side, although it probably needs a quick sand afterwards no matter what solution you try due to damage
    • Hi. Thanks for the answer. I do not have instagram 😄 I too considering turbo the RB20DE NEO 🙂 But i think i upgrade the gearbox first or at least buy new.  
    • Just pulled the passenger apart so got a good idea, also the side bracket that pivots the top half is completely cooked.. how I don’t know.. haha and paid $400 also included a photo of the passenger seat! She is mint
×
×
  • Create New...