Jump to content
SAU Community

Recommended Posts

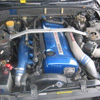
Someone asked how to do this from another topic, so here goes, i'll add pics 4 most of the way

19pics all up, everything was done in Photoshop, i'll add the original pics to this post if any1 else wants 2 try :D

When i did this in Photoshop, i was being kind of lazy, i didn't zoom in to get the edges perfect, i'm not fussed as i'm just messing around, if you want it to look really good, take the time and zoom in as much as you can on the area your working on.

Finished Photo

post-48759-1212499531_thumb.jpg

Originals: open the pics, then right click on them and click 'Save Image As'

post-48759-1212503707_thumb.jpg

post-48759-1212503731_thumb.jpg

you need 2 get 2 shots, lock your camera off on a tripod or something stable so it won't move.

Get the 1st shot, doesn't matter which 1 first (bonnet up or down)

DO NOT MOVE THE CAMERA AT ALL DURING THIS TIME, OR YOU"LL JUST GIVE YOURSELF MORE WORK FOR LATER

2nd shot is just the opposite to the 1st (with the bonnets)

use any program that can edit with layers and masks (good old Photoshop)

open both

post-48759-1212499667_thumb.jpg

if you want to be lazy, hold down SHIFT & drag one on top of the other (ends up with one file and two layers)

holding down the SHIFT key centers the image

post-48759-1212499713_thumb.jpg

Here you want to SAVE the file but with a different name (downside of being lazy ^^) if you don't change the file name, and you mess up the bottom layer and save, you would have just destroyed the original and it's not that easy to get back (esp if it's ur only copy, had this happen a few times :( )

so SAVE AS, call it what ever you like

I've got the bonnets open as the top layer

add a layer mask to the top layer

post-48759-1212499879_thumb.jpg

should look something like this

post-48759-1212500271_thumb.jpg

Select the Brush Tool

post-48759-1212500372_thumb.jpg

change brush size

post-48759-1212500499_thumb.jpg

change the brush opacity, if it's to strong, you might get a bit trigger happy and erase to much (you can always go back)

anywhere around 75% - 80%

post-48759-1212500587_thumb.jpg

make sure the layer mask is still selected (i've missed this a few times, CTRL Z :blink: )

post-48759-1212500732_thumb.jpg

down the bottom of the TOOLS window, make sure the foreground colour is set to Black, if it's set to White, you'll just paint nothing

post-48759-1212500953_thumb.jpg

now with the brush tool, start painting out the parts you don't want

post-48759-1212501018_thumb.jpg

now that you have discovered that this is all you really have to do, you might notice that you got a bit excited and erased to much, you see on the closest cars bonnet. ooopps :D now to fix that, back down the bottom of the TOOLS pallet, you'll need to change the foreground colour to white

post-48759-1212501270_thumb.jpg

you might want to make the brush size a bit smaller, or not, then just paint out CAREFULLY the bad bits

post-48759-1212501599_thumb.jpg

so that could b an easier way to get a photo of your car with the bonnet off

post-48759-1212501704_thumb.jpg

if you want that smoked bonnet look, heres how, back down to the bottom of the TOOLS pallet, make sure the colour is set to black

post-48759-1212502168_thumb.jpg

turn your brush OPACITY down, if it's to high, then when you try to paint your bonnet back on, it will look to dark, and you'll lose the effect your going for

post-48759-1212502312_thumb.jpg

then just paint over where the bonnets should be, try and use the BRUSH tool like a brush, pick 2 points and paint for one to the other, should give you a more even look

post-48759-1212502448_thumb.jpg

Finished Pic is at the TOP :D

Now i can stop typing this, as it taken me longer to type this post than the Photoshop work :wave:

Anyone wants to add, feel free, this is just a very quick example

Once you do this a few times, it will get real easy

Enjoy :)

Link to comment
https://www.sau.com.au/forums/topic/222230-how-to-remove-your-bonnet/
Share on other sites

sssshhh steve, your giving away all the good secrets :D

haha, yeah twisty, gotta share the wealth :)

thought i should give something back as i've learned a lot about my car from these forums

  • 3 weeks later...

i tried this quick whilst watching a movie, its a bit hard using the laptop thumbpad lol instead of a mouse but ill refine it later,

its my brothers r33,

post-21307-1214374620_thumb.jpg

Edited by Silver_R34_GT-T
i tried this quick whilst watching a movie, its a bit hard using the laptop thumbpad lol instead of a mouse but ill refine it later,

its my brothers r33,

post-21307-1214374620_thumb.jpg

lol damn thumb pads, but u got the right idea, might i suggest (assuming ur using p/shop) use the eraser tool, set it to a quite large setting, about 1/8th the size of the bonnet, and change the eraser type to the one that fades around the edges, that should give you a nice even fade in/out between the bonnet and the engine:D

Create an account or sign in to comment

You need to be a member in order to leave a comment

Create an account

Sign up for a new account in our community. It's easy!

Register a new account

Sign in

Already have an account? Sign in here.

Sign In Now


  • Similar Content

  • Latest Posts

    • I used the radium thing, makes the whole parallel assembly a lot more compact compared to any other way of doing it 
    • Racetronix also sells those ethanol content sensor bypass blocks. Adapter, Flex-Fuel E85 Sensor High-Flow Bypass, In-line No Sensor (ADF-FLEX-NS): Adapters - Flex Fuel | Racetronix Ethanol content sensor are originally designed to be on the feed line. These bypass blocks are meant to be ran in the feed line and not return. The continental ethanol content sensors have a 3/8" ID and not 5/16". This is why they are ran on the return line directly in conjunction with a low threshold sampling value VS in the feed with one of these blocks.    Haha we think alike, I used both original feed/return for 8AN feed, and one of the Hicas lines as a 6AN return. I also capped off and left the other Hicas line as a spare. 
    • Interesting, I haven't read about the issue with oil getting into the speedo in the cluster before. I'll have to take more notice with mine. The speedo on my R32's when I've run factory diff and tyre size have never been accurate as far as I can remember. The non Type-M GTS-t did come with 15" 5 stud wheels and smaller brakes, but that's less than 5% of them.
    • Good to hear the condenser you picked up off my brother worked all good. Do you think there could be an issue with your AC compressor itself or the clutch on it then? I don't know a lot about them so I can't really help but keen to hear what it ends up being. Keep the build thread going man, it's nice to look back on over time.
    • This is a story of my life things, I learned eventually (thanks to someone calling me out) that my enthusiasm for discussing and sharing ideas that it came across as arrogance and I'm like... WTF?!    One thing I'm pretty sure I justifiably pride myself on is knowing that everyone will have things they can teach you, and you're always going to find out that something you think you know turns out wrong - you just don't know what it is until you get there.   Just the bursting enthusiasm that comes with ADHD when you hit something that gives you dopamine dumps can come across like you think everyone else is wrong or don't matter. But yeah, I'm a software engineer by trade and also do tuning in weekends and 100% have long had a reputation for  quickly making connections when resolving problems or forming solutions that I've sometimes had to take people form a long walk from start to end to explain how I ended up where I did when it's seemed "too simple" when I've stated my initial case, and had the "WTF" type reaction when they've realised how much was actually considered haha.   My reward is that I get all the curly problems thrown at me.
×
×
  • Create New...