Jump to content
SAU Community

Recommended Posts

Hey Guys

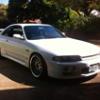
I always loved 32 4 doors, so i decided to finally get one. Picked this on up fairly cheap, but needed some love. My plans are to keep it street regestered and tralor it to drift events. Anyway Mods listed below;

MODS

Manual Conversion

3 Puk ceramic cusco clutch

JIC Coilovers - 8kg front, 6kg rear.

RB25 Neo turbo

AM peformance Stainless Front/Dump pipe with Screemer

3" Cat back exhaust

600x300x76 Bar and plate cooler (will change to tube and fin eventually)

Generic Cooler piping

Apexi Boost guage

R33 GTR Rims 17x9 +30 all around with 215/45/r17 rubber

Future Mods

Shimm up the stock LSD

White Line Sway Bars fornt and rear

Front and rear strut braces

Adj Rear Camber arms

Adj Front camber arms

Adj Carster Rods

Oil Pressure, Water temp and Boost guages

GTR Front bar with N1 Slots

Full Re-Spray

and................................RIP SOME SKIDS!!!!!

The only pics that i have at the moment are shitty phone pics, but ill take some better ones later this week.

Image013.jpg

Image011.jpg

Image010.jpg

Image012.jpg

Hope you's enjoy

Edited by Lock_to_lock
Link to comment
https://www.sau.com.au/forums/topic/224953-my-r32-4-door-build-thread/
Share on other sites

  • Replies 74
  • Created
  • Last Reply

Top Posters In This Topic

Ok not much of an update but meh.

In order to be a hekitc drifter you need to be part of a heckitc group of friends. So i got some stickers made up, purely for heckitc reasons. It fairly self explanatory.

BuiltnotBought.jpg

BuiltnotBought1.jpg

Edited by Lock_to_lock

Yeah same here, i wont be putting a kit on mine. Just GTR front. keeping it nice and simple

Well it doesn't look like ill be making it out to drift prac on July the 6th. Hopfully in the next few weeks ill get replacing the front seal, water pump and timing belt as well as shimming up the diff.

Ill keep this updated with any progress.

Cheers for the comments!

  • 3 weeks later...

Ok, bit of an update. Finally found a genuine gtr front bar, lip and reo :D

Image033.jpg

Image029.jpg

Image036.jpg

Hopefully will have the front seal, water pump and timing belt done in the next few weeks. Also got to pick up a few small things, order some sway bars and keep saving for re-spray!

Edited by Lock_to_lock

once again, thanks for the comments! I really need to stop taking pics with pov phone camera. might take some nicer ones tomorrow. Not to sure where to mount the number plate, was thinking about passenger side above the vent?

Damn you your cars looking good, Making me want to spend money on mine. Which I'm trying not to do atm, apart from the essentials. Would like to know how much your respray costs when you get it done, as I'm looking at getting mine resprayed in bayside blue again, as the paint could be a bit better.

Paid the deposit on the 25 last night, should pick it up in a week. 75,000kms, motor is clean as. Comes with everything. Loom, ecu, afm, stock cooler and piping. cant wait! Keep your lids peeled back for updates!

Create an account or sign in to comment

You need to be a member in order to leave a comment

Create an account

Sign up for a new account in our community. It's easy!

Register a new account

Sign in

Already have an account? Sign in here.

Sign In Now


  • Similar Content

  • Latest Posts

    • The Frenchy's kit is the way to go forward. A modern compressor that weighs about 1/2 as much, is at least twice as efficient, and will do a good job on R134a. And of course the kit has everything else you need to connect it up and have it work properly.
    • Hey all , I am in the process of having the AC system in my r32 GTST converted from r12 to r134a and I’m being told my compressor has gone bad and I will need a new one. I was wondering if anybody has any suggestions for what is the best route to go aside from dropping $1500 on a new oem one? I did see that Frenchy’s performance garage offers a kit to mount a Toyota compressor, has anybody actually used this kit on their car? Or is there anywhere I could purchase just a clutch? Any help is appreciated.
    • Well, your RB20 ECU loom won't have wires for the boost solenoid, that boost sensor, and possibly one or two other things. There could be differences in seemingly random things like the charcoal canister purge solenoid, because the 25DET has to handle boost in the vacuum system and the 20DE does not. I don't know - I haven't looked. It is very likely that all the most important things are same-same, being the main sensors like AFM, CAS, etc, and the injectors and ignition. Not that you'll need the AFM for the Haltech anyway. I would suggest that you would seriously want to sit down with the pinouts for both ECUs and just go through them and highlight green what is the same, orange what is different/missing, and make a plan from there. It's not going to be difficult. It will either be the same or need to be fixed.
    • yeaaa that's why I haven't done any wiring to the stock ecu harness because I have the haltech, but then that leads me to the other question of "is the pnp harness really plug and play?" or would I have to still switch some pins/wires over because the pnp is for the rb25det neo harness, and not for the rb20de neo harness. was really hoping to find something to spoon feed me since so many people have done rb20neo + t conversions, but man this is rough.
    • Temu raptor, lol. At least the owner isn't your typical ranger danger lot
×
×
  • Create New...