
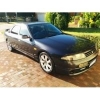
Nissan Skyline Gtr 34 Paint Correction One Day !

Announcements
-
Similar Content
-
-
Latest Posts
-
 I take it that you bought the centre to suit the GTR axles? As in there was a plan, not just somehow lucky that it worked? It all looks excellent, by the way.
 -

By joshuaho96 · Posted
New engine block time. Up to you whether you want to keep going down this road with this project. Unfortunately a lot of these cars are like this. The road to getting these cars into decent shape is long and not fun for reasons that you're discovering. -
Essay time. First things first, an RB running stock turbo and boost levels shouldn't get so bad as to stall from reversion if the recirc valve has been deleted. Should get a little fluffy and annoying, but in my experience, not so bad as to stall. Of course, every car is a bit different, so it remains possible that stalling will happen. So, running with no recirc valve is somewhat of an option, for otherwise stock stuff. Atmo BOVs cause all sorts of shit, even on an otherwise stock setup. Only gets worse the higher the boost and the bigger the turbo. At that point you really need to go for a different ECU and no AFM. Rebuilding the stock recirc valve configuration is not hard. You just need a stock or aftermarket BOV with the appropriate adapter for the 2 bolt flange on the back of the J pipe, and to get/make an appropriate ~1" pipe to get the air back to the turbo inlet, and to possibly modify the inlet (if it is not stock) to take the recirc pipe back in. Not hard. Just takes some cutting and welding. Putting an R35 type AFM into the car anywhere is not as simple as just buying the AFM and throwing it in. You will also need to buy the appropriate boss that will then need to be welded onto the pipe where you're installing it. You can clearly see why by looking at the photo posted above. They are not a "simple" swap for a stocker. You can't put on in place of the stock AFM. You can put one in place of the stock AFM, if you get the mounting boss and weld it to some pipe and otherwise make that pipe piece work like the stock AFM housing. Or you can buy such an adapter, either complete with the 4 bolt flange for the air box, or without, for varying degrees of work needed to then make it fit your stock airbox or some pod filter or whatever you have going on. Oh, and the R35 AFM is not plug and play. The wiring is different, but changing that is trivial. The plug is also different so you either end up repinning the original wires onto the new plug, or you just use a short adapter. If you weld a boss to the cold side pipe, the cold side pipe really wants to be 3", otherwise the scaling on the meter can get a bit weird, but whatever the pipe size, it's not as easy as just using the (fully documented in the Nistune doco) simple method for choosing R35 AFM in X" pipe size in the software, because the scaling will already be a bit different. Anyway, all of this has been comprehensively worked through on the Nistune forums, so there is full knowledge available. I would use a Link/Haltech before I would bother putting an AFM into a cold side pipe. That's a lot of effort for a bodge. Nistune is great, can work well even at fairly high power levels, but you are stuck with the limitations of it being the stock ECU, which includes needing to use an AFM, which is not always convenient for every set of modifications. You have to have a think about what you already have, what you want to have, and decide early if you'd be better off jumping ship to an aftermarket ECU. This so you don't waste time and money doing things 2 or 3 times. Never heard of ECUmaster. Sounds like a backyard operation. If there are good tuners for it where you are, and it is a solid product, then it will be fine. We're only talking about an R engine here. Back in the day they all ran on crude nasty early 90s ECUs and they were fine. You don't need a rocket surgeon's ECU to run one.
-

By robbo_rb180 · Posted
So left off with high hopes of having a gearbox in pretty quickly........ Got the adapter plate that week and had to chase a few threads and work out how/where everything goes as no instructions. Got the adapter fitted, test fitted gearbox and found had to cut and shave a few things. Tunnel required some hits with a decent hammer to give some clearance on passenger side but it fits with no problems, could fit a 8hp70 with a little more work. For a cross member I wasn't going to spend $1100 on so shiny machined piece. Went through a few designs and remembered I had a gktech s chassis to cd00# cross member. Fitted that and found its close enough with a few extra bits welded so have gone that way and still a work in progress. After this got into modifying the intercooler with some bends and clamps. I was procrastinating on this as was not keen to cut up and weld it myself but happy with the outcome. Onto the radiator shroud and oil cooler mount. This thing took way longer than I thought it would but having to add an extra oil cooler for the trans and wanting everything within the chassis rails its good enough for now. It mounts to the chassis and gives plenty of room for lines and pipes. All the coolers are rubber mounted and sealed the shroud on the top and sides, will use some tape to seal the bottom gap of about 10mm. 20250508_111500.mp4 Next job was to build the new diff and after a delay with a friend got built this week. I ended up putting it all together with supervision and was good to learn how to set one up correctly. I ended up going a 3.69 ratio, nismo 1.5 way gt pro with gtr Axel's. Stripped it all down, gave all the parts a good clean, pressed on new bearings and set backlash. Was good working in a clean assembly room with all the gear. Once got home wire wheeled the case and hit it with some rollbar/chassis black paint. Got a few more bits done but will leave them for the next update. -
That could be drilled, ground and welded. Would stop it progressing and leaking. But that block shouldn't be pushed very hard, as what you see there is a massive warning sign. But that fix also isn't going to happen properly with the engine in the car, and assembled. So you're looking at anew block if you're doing all that work anyway.
-


Recommended Posts
Create an account or sign in to comment
You need to be a member in order to leave a comment
Create an account
Sign up for a new account in our community. It's easy!
Register a new accountSign in
Already have an account? Sign in here.
Sign In Now