Jump to content
SAU Community

Recommended Posts

  • 3 weeks later...
  • Replies 244
  • Created
  • Last Reply

Top Posters In This Topic

his new head is still being ported...no rush...these mega builds take time, a lot of care and also patience. Simon will have a good long engine to impress Santa with when he calls into the Buckley house this christmas.

Sorry Simon...i know you want pics...ive been very busy...will get some more up this weekend.

Edited by DiRTgarage
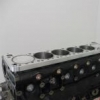
new 1mm oversize inconnel valves...nice...very nice

img0989wq0.jpg

titanium retainers...these are so light they almost feel like they are plastic

img0993dk1.jpg

dual valve springs

img0994iu8.jpg

Tomei 270 deg 10.8mm cams and Tomei bronze guides are ordered and on their way...combined with a stage 2 port job this is going to be one awesome head.

whats the go with these double valve springs?

HAHAHAHA yeh that table cloth looks quite tough.

its cost me a fair bit round the 14 15k range... but dont 4get its the ducknuts of bits inluding being a stroker motor. its not just a rods and pistons build.

santa be having a hard time loading the sucka into his sled he had to go buy a gantry to load and offload... thank f*k i aint got a chimney lol

Edited by skylinekid
hows the build going?

just waiting on the head to be finished (something thats out of my control)

getting things done by others is an unfortunate reality for me as head porting is white mans magic that i don't have a clue about.

Simon has been very patient which makes it less stressful for all concerned.

wont be too much longer guys and it will be down to Godzilla Motorsport for tuning...then the streets of Hervey Bay will never be the same.

with the size housing ive got i cant see nemore then 620rwhp on98 pump .... safely.... but will be fairly responsive considering ive got a stroker bottom end largish cams and a nicely ported head.... should see full boost hopefully by 4.2 4.5 all the way to 9..... WOO

Edited by skylinekid
i know exactly what it will make...

a mess of his rear tyres!

BAHAHAHAH yeh i know this.... can hurt to try a few things and see how we go... might have to run sum semi slicks on the street. do a burnout b4 i leave the yard so i got grip hahahahaha

and belo i think the first time i hit boost in it i will be quite scared but im used to sliding around ive had abit of practice so we'll just see how it acts. im thinking diff may start to have issues.

Edited by skylinekid

Create an account or sign in to comment

You need to be a member in order to leave a comment

Create an account

Sign up for a new account in our community. It's easy!

Register a new account

Sign in

Already have an account? Sign in here.

Sign In Now


  • Similar Content

  • Latest Posts

    • I would again like too thank Matt for his help in me sourcing the detachable hard top for the little red car, without Matt's assistance in inspecting it and locking it down, I can guarantee it would have sold before I could get up to see it,  and as that was the only available NC hardtop in Australia, I consider myself extremely lucky on multiple levels To say I'm more that happy would be an understatement And, it is 100% water tight, I drove through torrential rain coming back south, and by torrential, they type of rain that doing 40kph in a 110kph zone was a real thing, and even then, the standing water on the Hwy was deep enough to throw waves I'm also more than happy that the huge "BEASTS" that Matt calls dogs didn't eat me for lunch, I'm sure the sniffs and licks were more to "taste test" me, over being to friendly Now to work out what colour to get it painted, panel match, or gloss black........first world problems are real
    • Actually I might have figured out. Looks like there is a tab according to google images but it's hidden. Silly me.
    • No clips on this one like the other connector. Only that red tab that I can push slightly up.
    • For any loom connector that has an obvious release that resists pushing far enough to unclip, just spray some silicone lube into it. You might also benefit from using a bent screwdriver or small pick to push in the right place at the right angle.
    • Hey all, I went to try and fix my indicator not canceling, but I couldn't remove the clockspring cable under the column so I could twist that green thin. Anyone know how to remove this cable? I see this red tab but didn't have any luck. I was thinking of unscrewing it but wasn't sure if it would cause issues. I did notice for my indicator stalk, 2 out of 3 cables were plugged in but the last cable wouldn't fit in the stalk. I'm getting it's for fog lights. It was like this when I originally pulled it off.  
×
×
  • Create New...