Jump to content
SAU Community

Recommended Posts

  • 2 weeks later...
  • Replies 244
  • Created
  • Last Reply

Top Posters In This Topic

about time lol j/k I bet you cant wait to get it in and running :P

yeh very true.... just concerned about the defect action thats goin on round here...

but its gonna be a while yet neways... waiting till i finally have a decent job and pay coming in... as i explained the other day.

  • 3 weeks later...

time to kickstart this thread again...

the head...this thing has been a painstaking effort almost 60 hours alone invested here...but it was worth it...its the best head we have produced to date. Its actually better than the one in my car.

img1075c.jpg

exhaust port work...all hand finished and swirled.

img1076.jpg

inlets...apoligies for the poor camera work guys

img1078.jpg

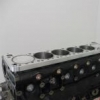
bottom end must have been wondering if it was ever going to see any head!...head studs in.

img1083.jpg

Edited by DiRTgarage

Trust 'drag' grommet type head gasket...these are now discontinued and if you can get hold of them they command big $$

img1087.jpg

head gasket fitted.

img1088.jpg

she's on and JUN cam cap studs fitted

img1093.jpg

reliefs machined for cam lobe clearance

img1104z.jpg

Edited by DiRTgarage
skylinekid kid check your pm, I've got something you might be interested in

gday mate i dont have ur pm might wanna send it again ey.......

im in south australia working atm so i dont get on here much so yeh sorry guys and thnx paul pics look good mate dont 4get to quote on the wings for that sump mate.... thnx buddy

some more...

cams are in

img1110.jpg

backing plate and Tomei vernier cam gears

img1111.jpg

starting to look the part

img1113x.jpg

new idler and tensioner complete with new stud and bolt.

img1114.jpg

cam belt on...keen eyes will notice the finish on the inlet ports (it didn't come up real well in the 1st lot of shots)

img1116.jpg

The sump is off to the fabricator for some enlargement...once its back i can seal it, crate it up and send it off.

Edited by DiRTgarage
obviously that engine is in a proper building room, but what conditions does a building room require apart from being extremely kleen. and how long can u leave a bottom end unsealed for??

A clean well set out environment that is dust free and temperature controlled is required. But more important is the cleanlines and preparation of parts as they are being assembled. We seal the engines in clear toughened plastic at the end of each day to ensure no particles can contaminate the build. A well oiled bottom end if sealed in plastic and kept in a dry moist free area could be stored for months.

  • 2 weeks later...

Create an account or sign in to comment

You need to be a member in order to leave a comment

Create an account

Sign up for a new account in our community. It's easy!

Register a new account

Sign in

Already have an account? Sign in here.

Sign In Now


  • Similar Content

  • Latest Posts

    • I would again like too thank Matt for his help in me sourcing the detachable hard top for the little red car, without Matt's assistance in inspecting it and locking it down, I can guarantee it would have sold before I could get up to see it,  and as that was the only available NC hardtop in Australia, I consider myself extremely lucky on multiple levels To say I'm more that happy would be an understatement And, it is 100% water tight, I drove through torrential rain coming back south, and by torrential, they type of rain that doing 40kph in a 110kph zone was a real thing, and even then, the standing water on the Hwy was deep enough to throw waves I'm also more than happy that the huge "BEASTS" that Matt calls dogs didn't eat me for lunch, I'm sure the sniffs and licks were more to "taste test" me, over being to friendly Now to work out what colour to get it painted, panel match, or gloss black........first world problems are real
    • Actually I might have figured out. Looks like there is a tab according to google images but it's hidden. Silly me.
    • No clips on this one like the other connector. Only that red tab that I can push slightly up.
    • For any loom connector that has an obvious release that resists pushing far enough to unclip, just spray some silicone lube into it. You might also benefit from using a bent screwdriver or small pick to push in the right place at the right angle.
    • Hey all, I went to try and fix my indicator not canceling, but I couldn't remove the clockspring cable under the column so I could twist that green thin. Anyone know how to remove this cable? I see this red tab but didn't have any luck. I was thinking of unscrewing it but wasn't sure if it would cause issues. I did notice for my indicator stalk, 2 out of 3 cables were plugged in but the last cable wouldn't fit in the stalk. I'm getting it's for fog lights. It was like this when I originally pulled it off.  
×
×
  • Create New...