
Announcements
-
Similar Content
-
-
Latest Posts
-
 What can't be done with a little bit of decking board or similar timber bolted to a hub flange via 2 wheel nuts is not worth talking about.
 -
 I noticed something. On the tps sensor and the sensor behind the adjustment screw is adjusted towards the far left. Are these screws supposed to be centered? (this sensor was in the same position before the tune as well) Also attached a photo of where my car usually idles at when warm (sometimes a tiny bit above that). I think I might have screwed up the calculation and it might have better than I thought lol at 750rpm still not 650rpm though.
 -
 So for both general interest of engine health, and to rule out any coolant/oil issues, I organised an oil analysis done on the 125,000klm oil Results below, all good, just a bit of fuel dilution which I'm not too worried about
 -
 This is actually a really good way of measuring what wheels fit. If only there was a similar measurement between hub face and suspension :p That said, it's probably pretty simple to actually measure it all with the wheel off the car for the rear. The front is a bit more complex but..
 -
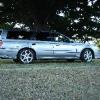
 Being the top Google search result for R34 wheel-related inquiries, lemme throw down my experience. I calculated that 100mm from hub face to wheel face is about the perfect fitment for my ENR34 sedan. I've been running 18x8.5s, ET35, with a 1" spacer. So, 8.5in to mm = 216mm. 216/2 = 108mm. 108-35 = 73mm. 73+ 25 (1" to mm) = 98mm. If you wanna get close to this on dif widths, here are the offsets you'll want: 9" - ET around 15mm 9.5" - ET around 20mm 10" - you're crazy, but ET around 30mm All these should fit perfectly on a non-widebody, non-GTR Skyline. Note that it's probably the absolute max, and you're probably better off running a couple degrees of camber in this config, but it looks great, super flush.
-


Recommended Posts
Create an account or sign in to comment
You need to be a member in order to leave a comment
Create an account
Sign up for a new account in our community. It's easy!
Register a new accountSign in
Already have an account? Sign in here.
Sign In Now