Jump to content
SAU Community

K O N E C T ' S C E F I R O


konect
 Share

Recommended Posts

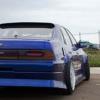
Looks fat dude, fits the guards well, wat tyres u using? 235s?

215/45 all round.

They are pretty stretched but I've had them on the fronts for almost a year and haven't had any issues with the tire popping off the bead ;)

Link to comment
Share on other sites

  • Replies 69
  • Created
  • Last Reply

Top Posters In This Topic

Top Posters In This Topic

Posted Images

^so this means ur keeping the old girl?

:)

If you sell me your rear bumper! ;)

Nah I got a new job so I might hold onto it for now and see how things progress. If I get EPA'd though I'm going to crack it lol

Link to comment
Share on other sites

Hokay so...its time to fix the catch can as I found enough oil in the intake for it to be dripping out the pod :thumbsup:

Hate to think what the cooler and turbo are going to look like!

Scored myself a Greddy can and going to set it up like this...

catchcan.jpg

What do we think? I want to keep it away from the intake and I'm pretty sure (after some research) that this is a suitable config.

Thanks!

Edited by konect
Link to comment
Share on other sites

stick it where ur tennis ball is .....

lol

just noticed the s13 overflow bottle with milk bottle cap?

there's a thread on the catch can piping/flow somewhere if your still not certain

Edited by Dan_J
Link to comment
Share on other sites

there's a thread on the catch can piping/flow somewhere if your still not certain

Yeh man, that's where I got this setup from (the 50% plumb back option).

FYI that's not my engine bay, mines much more messy lol

Link to comment
Share on other sites

If you sell me your rear bumper! :D

Nah I got a new job so I might hold onto it for now and see how things progress. If I get EPA'd though I'm going to crack it lol

Yeeeeh turns out I'm not going to keep it.

Car is for sale for 13k without the kit :D

Do it. Buy it now. It's a whole lot of car for 13!

Link to comment
Share on other sites

Cleaned the car inside and out yesterday (my gf actually did most of it hahaha) and fixed the catch can piping and fitted new 90deg hose to intake and it runs A LOT better now there isn't a hole in it. Also gave the boot a coat of matte black as it was looking very scratched.

Thinking about going low mount so if anyone is keen on my HKS manifold gimma a shout :ninja:

And yes, I forgot to take interior / engine pics...AGAIN! lol

post-18824-1255944845_thumb.jpg post-18824-1255944885_thumb.jpg post-18824-1255944919_thumb.jpg

Edited by konect
Link to comment
Share on other sites

Create an account or sign in to comment

You need to be a member in order to leave a comment

Create an account

Sign up for a new account in our community. It's easy!

Register a new account

Sign in

Already have an account? Sign in here.

Sign In Now
 Share


  • Latest Posts

    • From what I've seen and experienced first hand with those powder extinguishers, they're good to use to break a window and escape the car, and half the time then do f**k all to stop a fire. You just need much more than 1KG worth of powder. Not to mention, half the time it's an engine bay fire, and you can't easily, and do not want to completely open the bonnet, so you're left pretending to be an American Infantry... Spray and Pray baby!   And then 100% that shit is really destructive afterwards!   Realistically, those little ones at a race track might help you keep the fire from growing and give the fire marshal / truck a chance to actually get to you with their multiple large bottles.   For a road car, these days, prepare to deboard as quickly as humanly possible, and move to safety. Allow insurance to fix replace it (unless it's like a rare classic etc, then do nearly everything possible to save it!) Keep the little extinguisher with you to help protect other things around you from burning while you stand there singing "How can we sleep while our beds are burning?"   Secondly, powder extinguishers I freaking hate for indoor use, (this isn't really relevant to a car) as you will get a powder fog around you, and it can be disorientating.   When I did fire training when at BlueScope Steel, they have (had?) their own fire brigade on site. We did all the training, and at the end we were told, "If it's an indoor fire, and you need to use a powder extinguisher, we as the fire brigade would rather you just exit the building, you're more likely to get lost in the smoke and powder fog than do much help, so just GTFO" And pretty much that was what they said for most other fires too, grab extinguisher, if it's much more than paper in a bin fire, use extinguisher to get you and others out of the building to safety...   Part of me wishes when my Skyline caught alight many moons ago, I let insurance sort it out, instead of putting the fire out... part of me now says "But I've saved a classic before it was a classic!"
    • Hi all,  I have a older model of the Greddy Front facing intake on an RB25DET NEO Head. I've bought aeroflows fuel rail and injector kit (1000cc Bosche injectors) and I'm unsure if the fitment is correct. The injector o-rings fit in the intake hole but it's not snug. I can very easily rotate the injectors even when the fuel rail is mounted. The kit also came with multiple adaptors, they dont make it any more snug and using them raises the injectors up and i cant mount the fuel rail. I hope this makes sense I've asses a few photos.    Thanks so much guys. 
    • So, to run the 4g aerials to the booster, I had to get access to the rear bulkhead....bit of a mission. Hot tip, don't offer to help change the rear shocks for a mate with a v37.... Remove seat base, 2 clips that slide forward to release it the it lifts straight out Fold down rear seat (pull in from boot) The side bolster of the rear seat is not connected to the middle parts that fold. To remove unbolt at the bottom bolt then push it up off the top hook Then there is a plastic surround behind the seat back, 2 pop out clips, 2 bastard clips, some swearing at it is out Pop the rear seat latch surround off Remove door surround lower trim then side trim  Remove c pillar trim - 4 clips, pull inwards not forwards Remove metal brace - 5 bolts 1 nut Then you have got to the rear strut top...what a pain!
    • If you really want squish back, you can have it put on the piston (at least to some extent).
    • Impressive. He's very very smooth.
×
×
  • Create New...