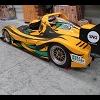
Surge Tank Enclosure
Announcements
-
Similar Content
-
Latest Posts
-
I'm hoping I just don't have to do an engine rebuild NOW. Doesn't mean I won't do it at some point. I think a plus point is that the car presumably ran on or close to stock power nearly all it's life so far. Only the Owner I bought it from actually increased power with a standalone ECU and blew the OEM turbos. And after it got thee 2860s it wasn't driven an awful lot either. That is what I meant. With the twins coming on so late (4500-5000rpm) I hope the rods won't want to exit the block prematurely. And it still being a 26 means the torque curve isn't gonna hike up all that much. It didn't blow up on the dyno when they tuned it to 500ish crank. So I suppose it'll be okay for now. They did put a Tomei head gasket on first though which did not seal at all, and they redid it with a Cometic one. Which I hope won't be my water leak. Mainly anything oil. So far all it has is the N1 pump, oil restrictor and a filter relocation kit with a cooler.
-
15000? ish? Something like that anyway. It wasn;t so much a wear as a tear that then spread. Might have lasted a lot longer if not bothered by just one incident, whatever it was. I took a punt. They are really comfortable and do a good job of holding. My daughter HATED it when I first put them in, and probably still does now. She has sensory issues and hates the way they are all up your business. I'm 197cm and 95kg. Not fat or particularly wide, and the XL size seat is the rigth fit. If I was any fatter it would start to get too snug. Any skinnier and you'd possibly want the smaller width.
-
Mrs rs focus came factory with recaro cs sportsters in it and they a pain in the ass to get in and out of with the really high bolsters, once you were in them they were one of the most comfortable seats I have ever sat in
-
The NA 2.5 has very little torque. You won't feel much. Those trannies are also a million years old now and it could well be f**ked. First generation electronically controlled autos will often refuse to kick down, ete, etc, depending on what's wrong with them.
-
Yes, but no but yes but no. Those "it's fine up to 500HP" rules and everything else like it were all determined back when the cars were 10 years old. As they are now 30 years old.....what do you reckon the chances of something shitting the bed are? I'd say they are much higher now than they used to be. You might be lucky. You might be unlucky. Spin the wheel and find out. Yeah, nah. It's actually exactly the opposite. Making boost early and having heaps of torque able to be generated right in the middle of the rev range will do more to damage an engine than having to rev it high to make the power. Think about the load on the conrods, bearings, etc, to make 400HP at 4000 rpm, vs 400 HP at 6500 rpm. So someone has already "let the Nissan out" which is how we describe the increased chance of a fiddled with engine to have had something done wrongly. Many more engines that have been opened die than stock ones do - even if you into consideration how they are treated wrt power levels and the like. Again, not saying that yours will definitely have been put back together by a moron. But the possibility does exist. It's still a lottery. Spin the wheel. What weakspots?
-


Recommended Posts
Create an account or sign in to comment
You need to be a member in order to leave a comment
Create an account
Sign up for a new account in our community. It's easy!
Register a new accountSign in
Already have an account? Sign in here.
Sign In Now