Jump to content
SAU Community

Noob Advice - R34 GT-T


Guest DiMarzio
 Share

Recommended Posts

Guest DiMarzio

Hi All,

Now from what I can tell and have read on the forums so far, I probably will be flamed as another bandwagoner and disliked because I'm coming from the WRX to the Skyline as I have seen the light.

So be it.

Here's what I'm after and if anyone has any better ideas for me, don't hesitate to flame away or offer some actual useful info for me.

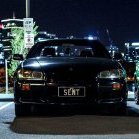
I have seen an awesome Skyline R34 GT-T at a dealership for an asking price of $42k with 24,000kms on the clock. Now as I said I've got an MY01 Rex, but it MUST be traded as part of the deal coz I aint wasting the time to sell the bitch privately. Now is $42k a decent price for such a car or should I be looking at other dealerships for a better deal? And if so, where should I go that still accepts trade-ins?

Thanks in advance

Dave

Link to comment
Share on other sites

Hi, and wlecome to SAU.

Nobody will flame you for thinking about trading your Rex on a Skyline. Infact we Skyline folks oftem mix with Rex owners. We're all pretty friendly, most of the time.

AS for your question : I've seen R34 GTTs for 35K-55K - it really depends on condition, modes, colour preference, etc. I'd be saying that $42 K wwas average - Factoring in some negotiation, you might get it for $40K -

Having said all that - I saw a White R34 GTT on Geoff Risbey's site the other day for $28K plus ORC (Prestige Motorsport) This one was a tiptronic.

Link to comment
Share on other sites

Welcome to SAU.

I have only recently rejoined the ranks of Skyline owners myself having just purchased an R34 GTT. I paid $35500 (asking price $39990) for a lightly modded specimen. For that price I got an immaculate metallic black R34 kitted with a full Nismo body kit, full set of Nismo gauges, Nismo exhaust from the dump pipe back, HKS FMIC, Turbosmart plumb back BOV and numerous other little things to sweeten the deal.

As B-man says, use the Prestige site as a guide and then start negotiating. Having a trade makes things that little bit trickier but not impossible. Depending on the mods to the R34 you should be able to drive a fairly good deal. Get a mate to see how low they will go for a cash deal and then work from there.

Cheers

Link to comment
Share on other sites

put in mind though the actual buy value of the rex is higher, for lets say 42K for the R34 gtt in the question. the dealer/importer may have only paid 30K for it.

so DiMarzio you may not have to payany dole at all.(or minimal)

like said earlier, approach like you know imports like the back of your hand and negotiate.

ron

Link to comment
Share on other sites

Create an account or sign in to comment

You need to be a member in order to leave a comment

Create an account

Sign up for a new account in our community. It's easy!

Register a new account

Sign in

Already have an account? Sign in here.

Sign In Now
 Share


  • Similar Content

  • Latest Posts

    • Oh also, looks like it will be 3-4 weeks before they arrive - so no coolant change until then 😕
    • @soviet_merlin Managed to find my part and get it off Amayama. While I was at it and paying 9.75 AUD shipping for a $1 piece, I thought I may as well get some other plastic clips I broke 🙈  Thanks a lot for this link
    • The point of all that for me was to get to the PDM (yes, v37 is as fancy as a haltech) which is between the battery and the front inner guard.  In there, pins 80 and 81 on connector E125 are for hi beam according to the USDM manuals. I chose to intercept the high beam signal there as it is next to the battery and firewall so it is a good place to mount the fuse/relay for the LEDs. Unfortunately because you can't access the PDM with the battery in the car, it is difficult to test those wires are correct. The fuses for Left and Right high beam are marked on the PDM cover, so I checked continuity from the fuses to those pins with a multimeter, and it seems to be right. From here I need to splice a wire into one of those 2, and run it into the cabin for a switch, then run the trigger wire back to that general location for the relay. So, I removed the driver's side guard liner to check out where the wiring leaves the engine bay and enters the cabin.  Turns out, that does not happen behind in guard liner at all....waste of time, nothing is routed through there, so that was another 5 pin clips, 4 screws and a bolt of wasted effort All of the wiring is actually run across the separate compartment between the engine bay and the cabin under the cowling...so off with the windscreen wipers after all....
    • So....the good news is you don't have to remove the windscreen wipers to replace the 12v battery in a v37 (just). You do however have to remove: 1. Battery area cover (un clips) 2. Battery area trim (pin clips) 3. Nav side windscreen cowling (more pin clips, plus the trim between the cowling and the front guard, and half of the cowling to bonnet seal All of that gets you to here, with clear access to the battery While there, it is worth clearing out the leaves and dirt that run from the cowling into that well, my car had a lot of crap there and it is a guaranteed future rust hotspot
    • Onto trickier matters....this time of year a LED light bar makes a massive difference to avoid skippies etc, so that was the first main priority. Unfortunately unlike both the Cima and the Fuga, there is no chance for a large central light bar inside the grille due to all of the redsport bits already there (intercooler radiator, extra water pump, sonar stuff). So this time I've gone a pair of 8" light bars which does have the benefit that they can be angled outwards a little as well. First, bumper needs to come off as there is no way to access the space behind the grill with it in place. Unlike the R32 which is (now) held on with 2 screws, the v37 had about 30 pin clips, 20 bolts and also 6 clips holding the damn thing on. Basically you remove the intake (clips), the top side covers (nasty clips) to get at 2 bolts, the front of the undertray (about 15 bolts and 3 clips), the front side inner guard covers (3 bolts and a couple of clips each) to get at the bolts at the rear of the bump in the wheel well, and then 3 clips near the headlight (outside, then under headlight, then above headlight) As part of that process the car got its first "race" mod so you can get at the top bumper bolts without removing the trim. There are also about 8 different electrical connectors which are in grave danger of being cut and replaced by one multi pin deutsch connector one day. On the bright side it is clear the bumper had never been off by how tight the connectors were. Once off, you can see there is very little space to work with. The lower section was not an option as the angle to the road would suck, plus the sonar module would push everything too far to the centre So I mounted the left side bracket to just clear the water pump (a miss is as good as a mile, they say) and the horn has been moved backwards too. The brackets on these Narva lights were a nice height to clear the front reo, and I just drilled and rivnut-ed into the reo (angle drills suck, but at least it made the job possible) With both mounted Minor adjustments to horn locations but everything else cleared. Those horns may well get moved / one deleted depending on how the cooling is on hot days, they were moved well to the side in the R32 Next, onto the wiring which will be a pain...
×
×
  • Create New...