Jump to content
SAU Community

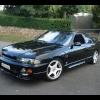
How To: Bosch 040 Fuel Pump In R33 Skyline Si / Sii


DRFT33

Recommended Posts

Just did this to my car using all the stock hoses and wiring (just used crimped eyelets to get onto the terminals), but I am soo paranoid that when I start the car it will go kaboom. Am I being stupid or are there things I should double check?

Also is it just me or was the black cover an absolute bastard to take off AND put back on for anyone else?

Link to comment
Share on other sites

  • 2 weeks later...

hi, could someone please tell me a walbro GSS341 is the same as this diy?, or does it need other mods to the braket?.. i got a walbro GSS341 skyline version with all the bits and pieces.. thanx

Link to comment
Share on other sites

wiring would be identical...

as for attatching it to the bracket i dont see why it would be that much different - looks like ull need smaller hose clamps tho... that pump looks tiny

fuel pump? - http://www.nissansilvia.com/forums/index.p...howtopic=343794

Edited by gumflapper
Link to comment
Share on other sites

hey. thanx for the advice.. yeah they are small.. ive heared alot of people say that.. but seem to run well. i think.. wow.. i checked the link.. that is small. there is a pen next to it.. hope it works.. i got all the lamps and wiring in a walbro nissan kit..

Link to comment
Share on other sites

just wanted to add some props and say thanx for the diy.. helped alot.. and worked well.. i poped a walbro 341 in. pritty easy, and sites in the cradle with no cutting or mods to the cradle, even sits nice at the bottom with the rubber thing that goes on the bottom of the pump.. thanx... been wanting to do this for a year..

i used the stock nissan fuel filter.. so much longer for god sake.. lol.. would have to be silly to put that small walbro filter in.. anyone know were i can buy a nissan r33 fuel filter for the pump?, i would like to replace the old one.. alot of cash for one?..

Edited by seriesII
Link to comment
Share on other sites

I got one thing to say - get a Walbro 255 l/hr.

I just purchased one brand new for $130 i.e. half the price of a Bosch!

It comes with a kit to fit the car (R33 etc) fits straight in - no cutting, no hose clamps.

Cheap and easy - these Walbro pumps are good quality items and will do the job unless you are chasing mega-kw

Hey mate, where did you get the kit from?

Link to comment
Share on other sites

  • 3 weeks later...
  • 2 months later...
  • 2 weeks later...

Damn this was a bitch of a job. Never again! (well it might be easier now that I know all the correct lengths and methods to use for it).

You need thin arms and a good sense of touch cause you can't see shit inside the tank while you've got your arm in there installing the modified cradle back in. And positioning a 2kg pump at arm's length to sit in the right spot, sucks ass! Surprised I didn't smack my fuel gauge sender or damage the pump with the amount of banging around inside the tank it did.

Everyone in this thread threw me off when they started saying the OP's positioning of the pump on the cradle is too far down...it's actually about perfect when you're trying to get the pump as close to the bottom of the tank as possible. Still, I took the precautionary measure of cutting abut 3cm off the metal bundy pipe on the cradle, so that I could start the rubber joining hose further up and have the fuel pump hanging only 2cm or so off the hacksawed end of the cradle. The way I saw it, I could always just add more rubber hose if it was too short. Then I hoseclamped the pump to the cradle. I spent about 45 minutes trying to position this inside the tank, thinking the hoseclamps were getting in the way...so I took it out and repositioned them, only to find this did nothing. Just a bunch of false hopes (how annoying is it when you think the cradle is on the bracket and it's NOT?!?).

Finally I saw what was happening - fuel pump wasn't sitting low enough inside the tank and this wasn't allowing me the distance to clip the cradle forks back onto the bracket properly (hard to explain unless you've done this job). So I changed the fuel pump to sit in a similar position to OP's pictures...took about 5 minutes to get it on. It won't sit all the way down on the bracket, but as has been said already, you don't need it all the way down on the bracket, there is plenty of bracket to hold it on - more important is that the pump is sitting at the bottom of the tank. And it is: after installing the pump and driving very nervously to a servo (I know, should have had a jerry can on hand), I filled up with 56 litres :down:

Link to comment
Share on other sites

Damn this was a bitch of a job. Never again! (well it might be easier now that I know all the correct lengths and methods to use for it).

You need thin arms and a good sense of touch cause you can't see shit inside the tank while you've got your arm in there installing the modified cradle back in. And positioning a 2kg pump at arm's length to sit in the right spot, sucks ass! Surprised I didn't smack my fuel gauge sender or damage the pump with the amount of banging around inside the tank it did.

Everyone in this thread threw me off when they started saying the OP's positioning of the pump on the cradle is too far down...it's actually about perfect when you're trying to get the pump as close to the bottom of the tank as possible. Still, I took the precautionary measure of cutting abut 3cm off the metal bundy pipe on the cradle, so that I could start the rubber joining hose further up and have the fuel pump hanging only 2cm or so off the hacksawed end of the cradle. The way I saw it, I could always just add more rubber hose if it was too short. Then I hoseclamped the pump to the cradle. I spent about 45 minutes trying to position this inside the tank, thinking the hoseclamps were getting in the way...so I took it out and repositioned them, only to find this did nothing. Just a bunch of false hopes (how annoying is it when you think the cradle is on the bracket and it's NOT?!?).

Finally I saw what was happening - fuel pump wasn't sitting low enough inside the tank and this wasn't allowing me the distance to clip the cradle forks back onto the bracket properly (hard to explain unless you've done this job). So I changed the fuel pump to sit in a similar position to OP's pictures...took about 5 minutes to get it on. It won't sit all the way down on the bracket, but as has been said already, you don't need it all the way down on the bracket, there is plenty of bracket to hold it on - more important is that the pump is sitting at the bottom of the tank. And it is: after installing the pump and driving very nervously to a servo (I know, should have had a jerry can on hand), I filled up with 56 litres :down:

ooh, you're gonna help me when i change mine RIGHT?

Link to comment
Share on other sites

  • 4 months later...

Create an account or sign in to comment

You need to be a member in order to leave a comment

Create an account

Sign up for a new account in our community. It's easy!

Register a new account

Sign in

Already have an account? Sign in here.

Sign In Now


  • Similar Content

  • Latest Posts

    • Anything for a 2003-2005 G35 will fit an M35. Just be mindful about clearance if you're running a plenum spacer or runner spacer.
    • You know how I know I'm getting old? Because I feel this quote jells with me and SAU Forums, ha ha ha. I've gotten lost a few times as I had muscle memory to scroll to where I wanted on my phone and just click, now I'm lost... Ha ha ha     "I used to be with ‘it’, but then they changed what ‘it’ was. Now what I’m with isn’t ‘it’ anymore and what’s ‘it’ seems weird and scary."
    • You don't lose spark if your battery isolator isn't wired correctly and the ECU still has power from the alternator.   Car has an epic wiring problem. Sounds like power connected really really badly in places. Possibly a power pin on a ground pin for the ECU, and constant power in locations that should be switched ignition.   It needs someone good at diagnosing electrical, a good multimeter, and someone with the wiring diagrams to match the engine loom that has been put into the car, and wiring diagrams for the body side of things from the car.
    • Hi folks, what options exist for PNM35 or what models share the same dimensions and fitment for the front top of tower strut brace. I have seen a few options pop up through Google, the Ultra Racing Australia for one. I have seen some eBay ones that claim they fit C34 and M35 but can't find details if to work out if its true. Also found Taiko / TEMA4x4 claim the one type fits: - Nissan Stagea (2-nd gen; M35) 2001 - 2007, - Nissan Skyline (V35, HV35, NV35, V35, PV35) 2001 - 2007 - Infiniti G35, G35X (3-rd gen; V35) 2002 - 2006 But not sure how true that is. Anyone fitted one or know of someone using one and can confirm what does fit?
    • I got the full kit.   The compressor as above is much smaller and lighter.  Also quieter. Bracket is visually mint and much lighter. The dryer and heat exchanger(rad) are one unit. Also smaller and lighter.  Much more room for an oil cooler. The fan I got was a bit Meh and I might change it.   And above all else it is more efficient, tested a good 3-4 degree's cooler than the old system, which is a lot. Disclaimer though - It wasn't a back to back test given different days. It really does feel colder though(always).  And this example is in my car with that crusty looking old compressor, not new vs new
×
×
  • Create New...