Jump to content
SAU Community

Recommended Posts

As some of you might know, this is my trade. Even though I have changed professions i still do some work on weekends.

I have been trimming some historic racecars lately and thought u guys might like to see what goes into a basic race seat. These are new seats that are built to a weight so no extras that might weigh anything goes in. The seat rtimmed in the pic is a drivers seat and is heavier than a passenger seat. In the Historic class they have to have a passenger seat that looks the same, and they do, but havn't been made with the intention for any1 to sit in. Did I mention wieght? I remember 1 day when Matt was beaming ear to ear proclaming to have found 65grams hiding in an integral part of the engine.

Anyway, to start with you will will need an open space to work in with something on the work surface so the gelcoat/paint doesn't get scratched up.

02032009_005.jpg

then a shell that needs trimming

02032009_001.jpg

02032009_002.jpg

02032009_003.jpg

02032009_004.jpg

Some padding cut to the shape of the seat

02032009_006.jpg

Spray some contact glue on it

02032009_007.jpg

And in the shell

02032009_008.jpg

Just flop the foam in the shell...

02032009_009.jpg

...and trim it up.

02032009_010.jpg

I do a few of these so I have made some patterns for the fabric.

02032009_011.jpg

mark out and cut out the material

02032009_012.jpg

Sew the quilting in all the parts together.

02032009_014.jpg

Now you just need to glue both parts, flop it in the shell, secure all the edges and trim it all up neatly.

02032009_016.jpg

trim up the seat belt holes so the raw edges are neatly hidden.

03032009.jpg

and last of all you will need to make up a cusion that matches, and fit it of course so it wont slip out unterbrakes.

03032009_001.jpg

last of all it needs to be dropped off so the guys can put it in the #7 car. Yes the all have my interiors in them, and this is the last seat.... YAY! Job done.

03032009_002.jpg

Link to comment
https://www.sau.com.au/forums/topic/259394-recovering-race-seats/
Share on other sites

GTR seats are a bit different though to fibreglass race seats as they are just a wire frame wrapped in foam then trimmed. would be much more $$$ and the hard bit is getting fabric to match the passenger seat and door trims etc. the only easy way to cure them is buy a generally less worn passenger seat and use the fabric off that. still not easy though.

I didnt intend for this to go this way but I have found a very good match for GTR seats. And as you say, new material does stand-out somewhat. The biggest headache with skyline seats in general is that the cover is glued on. Normaly there is a short sock on the inside with a spring/hardened wire insert that is clipped to another wire set into the foam. Gluing the cover on makes them a real pain in the botbot. And yes the price is much higher if not for the extra time spent but the AGRO tax that goes with it.

As a side note if you are serious about getting a seat covered, pm me. Might take a while though, it is realy only a hobby these days to help fund my own racing.

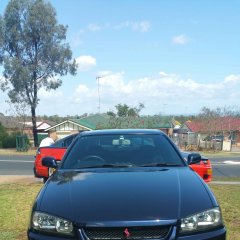
No the Astra does not have 1 of my race interiors in it. It was just in the way this morning. It's not often most of the RX2's are all together like that. Just made a good snapshot.

Stuart i've been meaning to come round get you to look at the Recaro's in my GTR, and generally say hi.

Sorry to hear about how the new manifold and throttles went, what you reckon manifold leak, or flow problem??

Rhys

  • 4 weeks later...
last of all it needs to be dropped off so the guys can put it in the #7 car. Yes the all have my interiors in them, and this is the last seat.... YAY! Job done.

03032009_002.jpg

My god, look at all those RX2's :):cheers:

Good to see them put to good use, not just sik maccas cruisers or 9 second 13BT street sleepers

Ah,,,don't you all love a garage full of rotors. Come on,,,after a Skyline,,,what other tin-top would you own.

I'd like my Radicals seat done mate,,,pm me if you are interested. Yes it's full fibreglass.

Toyota's by the way are for poofs.

Neil.

depending on the materials you chose and embroidery, I shouldn't think it would be much if any more than the $300ish mark for a normal Vello seat. the wrap around seats will be abit more in materials and to be honest there a bit of a pain in the butt.

Niel, PM sent.

Create an account or sign in to comment

You need to be a member in order to leave a comment

Create an account

Sign up for a new account in our community. It's easy!

Register a new account

Sign in

Already have an account? Sign in here.

Sign In Now


  • Similar Content

  • Latest Posts

    • Starting with issues 1 - 5, we have already run into a problem...!  Issue #4 contained 2x front brake calipers, instead of 1 caliper and 1x steering knuckle. Will have to call DeAgostini on Monday to sort it out. Anyway here's some photos.  Issue #1 is the front bumper, headlights and number plate. Issue #2 is the front wheel (with "We produced with spartan air." text on the centre cap!) and tyre, the front lip spoiler and cylinder head cover with ignition coils under the centre cover... which will never be seen again. Issue #3 is the bonnet and cylinder head. Issue #4 is the front strut, brake disc (with laser etched metal discs) and brake caliper. I stopped here because of the issue with the missing steering knuckle.  Next update will be #5 - #10 in a few weeks.
    • DeAgostini is one of a few companies that release quite large (the largest commonly available size actually) 1/8 scale models in a series of weekly issues over 100 - 110 instalments.  They release different models for different markets and DeAgostini Japan have release the BNR32 Skyline GT-R Nismo last month. I've made two of these 1/8 scale sized cars (one an R35 GT-R from 2012 - 2014, the other I'm just about halfway through, a BNR34 Skyline GT-R from the 2Fast 2Furious movie) so when this R32 was announced there was no way I could ignore it as it's my favourite out of all Nissans.  Each issue costs around $20 so it costs about $2.2K when completed. I suppose it is very expensive for what it is, but the quality and details are really very good, and there are many "gimmicks" like fully functioning exterior and interior lights operated with a remote control, working steering, all doors/bonnet/boot/fuel lid open and close, the side mirrors fold in and it even has a speaker for the engine revving sounds when you turn the lights on.  Each issue comes with a magazine that tells the story of the BNR32 Skyline GT-R Nismo from the first design stages of the BNR32 to Group A homologation and the various racing version that were run in the Japanese Group A and JGTC, and Australian Group A.  So I plan to update the build in this thread 5 issues at a time.  https://deagostini.jp/r32/?srsltid=AfmBOooKjxDc4EUK2rmXqMBPgyHfFJ24s4oEPJBNpnF-lFlsRoW0PE6P
    • As per title.. has anyone used so far? Keen to hear results, comparisons. In the market for a new mani for my new turbo. Any issues cracking?
    • Re read everything that has been written about this in this thread.. Let us know if you're still confused.
    • This would be a new pump with new gears. I'm just unclear on whether it's a good idea to run more oil pump flow if you don't actually need said flow. Oil level is set a minute or so after shutting off a warm engine so wouldn't the high RPM oil level in the sump end up lower all things equal? Plan is OEM clearances, main concern in my mind is whether the OEM pump can keep up with the flow requirements of any additional oil coolers.
×
×
  • Create New...