Jump to content
SAU Community

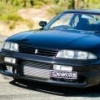
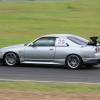
Yellow R33 Gtst 1996 Series 2 Skyline. Ultimate Mod List.


Recommended Posts

This car is extremely clean inside and out. Would be the perfect package for someone who does not want to waste a ton of time and money building an ultimate street car out of a r33 gtst.

Item: 1996 series 2, R33 GTS-T Skyline

Location: Gold Coast, QLD

Condition: Exceptional - inside and out

Reason for selling: Now its back from the workshop I have no where to keep it

Odo: 96****

ENGINE

engine rebuilt 3000km ago (just run in and tuned)

balanced crank

pressure tested block

wiseco forged pistons

eagle rods

arp rod bolts

arp head studs

big end oil mod (for better big end lubrication)

blue printed engine

jhh ported head

jhh valve springs

port matched head to manifolds

1.2mm 3 layer cometic headgasket

g ready style plenum

80mm billet throttle body

garett 35/40 with .82 rear housing

42mm External wastegate (plumbed back into the exhast for legality)

stainless steele high mount exhaust manifold (modified for better wastegate flow)

tomie poncams 256/256 8.8mm lift

adjustable exhaust cam gear

os giken twin plate clutch

red line gear box oil

stelth plumb back blow off valve (legal)

custom intercooler piping

600x300x76mm front mount intercooler

oil cooler (mounted behing front bar)

speedflow fittings

braided lines

550cc Nismo Injectors

Splitfire Coil packs (brand new)

N1 OIL PUMP

Genuine Nissan Water Pump

New idle'r bearing

BLITZ SBC ID iii D SPEC Boost Controler

Power FC & hand controller

fuel pressure regulator

bosch 040 fuel pump

gates pro series timing belt

custom 3" turbo back exhaust in stainless steele

3" high flow cat

Z32 air flow meter

K&N pod filter (mounted in front guard for cold air, bolted in for legality)

full s2 mspec body kit with rear pods still intact

iridium spark plugs

blitz oil catch can

95,000 km's on dash now

gearbox has OS 4th and 5th gear set, fitted by Diff Laping at kedron

RDA slotted rotors all round

piston kits on all calipers

paduate race pads all round

dot 5 race fluids in the brake system

reconditioned master cylinder with bored out piston for greater response and feeling

only ever driven with 98ron fuels

Engine built and tuned at 101 motorcafe, springwood. Tuned by Rob.

Made a very safe 408.8HP @ 19PSI ATW. Could easily push another 50-100HP out of this setup.

WHEELS AND SUSPENSION

Rims - 17" volk te37 rims powder coasted silver

Tyres - Kumo 255 rear, 235 front 95% tread (new apart from a few dyno tuning and 500kms)

1" lowered king springs all round ( sits a very legal 150mm from the ground)

bilstein shocks all round

whiteline sway bars front and rear

tomie electric HICAS lock kit with shims

INTERIOR

G-tech on dash apexi turbo timer

blitz exhaust temp gauge

blitz boost gauge

pioneer cd/mp3 head unit

pioneer 6 1/2" splits

power fc hand controller

piller mount for blitz gauges

clarion a class 12" subwoofer in boot (straped down to prevent movement)

phenix gold amplifier

mongoose 3 point battery backup alarm

driver and passenger airbags

EXTRAS

HID headlamp conversion

custom ferrari candy yellow paint job

custom front bar mods to suit intercooler

remote for head unit

1/2 breaker bar and sockets and extensions for the wheels

locking nuts

full set of nissan skyline floor mats ($400)

rear adjustable castor rods

rust free

6months rego

Mobile: 0431430153

Email: aulay AT marvelig DOT com

Price: 22K

Will take some better pictures when the sun comes out, and also post the dyno graph.

post-44294-1241235943_thumb.jpg

post-44294-1241235767_thumb.jpg

post-44294-1241236168_thumb.jpg

post-44294-1241236407_thumb.jpg

Link to comment
Share on other sites

The owner of this car is a good mate of mine and ive moved overseas now but i drive a 400HP bluebird. Before he went to town on the engine i had the pleasure to go for a drive in this car and i thought there wouldn't be too many skylines that would impress me after driving my own car. - however this thing is a weapon and i wish i had the money to take it off his hands. I just want to post this up as i know first hand how much effort has gone into this car and stupid amounts of money.

The person who buys it will love it, that im sure of.

Gareth

Link to comment
Share on other sites

  • 2 weeks later...
  • 3 weeks later...
  • 4 weeks later...

Create an account or sign in to comment

You need to be a member in order to leave a comment

Create an account

Sign up for a new account in our community. It's easy!

Register a new account

Sign in

Already have an account? Sign in here.

Sign In Now
 Share


  • Similar Content

  • Latest Posts

    • Much less twat-tastic. CF wheels are too garish for civilised use.
    • From there, as the manual says....assembly is the reverse of disassembly, no tricks worth mentioning Much better (for me)
    • In my case, the standard wheel I had was in good condition but the buttons had more wear, so I swapped them across from the original wheel from the car. The plastic rear cover is held on by 4 tabs, and once the wiring is removed you can get access to 2 screws on each side the hold the buttons in From there I just swapped the wiring over. What was interesting is the standard style wheel is 2.0kg but the carbon fibre one is 50% heavier at 2.9kg. It even has a weight inside the wheel at the top to make up for some sort of imbalance in the design. weird
    • Once the airbag is off, to remove the steering wheel.... Undo the 2 plugs into the clock spring, and the horn connector from it's clip. Hit the 19mm nut with a rattle gun (preferably) or if you don't' have one, you probably want an assistant to hold the wheel in place while you use a breaker bar to undo the nut Then, screw the nut back on 3 turns, and pull the wheel sharply towards you. If that doesn't work hit it medium force with a rubber mallet on either side, or possible behind if you can get there. If that all fails (it shouldn't!) you might need a steering wheel puller
    • So, to next task....the carbon fibre steering wheel was either an expensive factory option or a chinesium special. Either way, I don't like either the flat bottom or thick ring style, so it had to go So...to remove the steering wheel.... First, disconnect battery negative and stomp on the brake pedal for a few seconds. Then, remove the small circular covers on each side of the wheel's rear surround to uncover the airbag clips. You need to push something like a flat bladed screw driver through, to push the steel clip inwards and pull the side of the airbag forward. Once you've done the easy side, same on the centre console side. You can see the tab you are shooting for circled in red Then, disconnect the horn spade connector and for the yellow airbag plug you need to get something small under the black locking tab to pop it out, then the connector releases......airbag is off  
×
×
  • Create New...