Jump to content
SAU Community

Diy Fibreglass Splitter


jeffworld2
 Share

Recommended Posts

Hey guys, I had fibreglass laying around and wanted to learn how to use it, i want to make fenders and rear guards and a new front bar, but i had never used it before so i gave this a go instead.

Basically removed the front bar, traced around it and added an inch copying the shape of the r34 jgtc cars. I then cut this shape out of thin board and layered fibreglass over the top with a large overlap.

Then this morning i flipped it and did the same on the other side, to make a wood sandwich. Jigsawed the shape back out to get rid of the excess and viola. I dabbed the resin on with a brush, then used a roller to smooth it out and I must say im pretty happy with the result, bit of a sand and its smooth enough to paint.

I figure I installed it on a horizontal plane so it cant offer significantly more drag at low speed, hopefully it does something at high speed. Will have to give it a test at OP.

post-26632-1242458445_thumb.jpg

I have never used fibreglass before, but it was not that messy and I will definitely use it more in the future. I have a question though, what am i supposed to do with the front guards? currently the front bar has no liners in it, i have trayed off the underside but i am unsure of what to do around the wheel. I understand if you guys think this is all pointless aero, but i'm basically having fun spending time doing it.

Link to comment
Share on other sites

looks good, only thing is those bits on either side that stick out, cops with definatley appreciate them though.

hard to tell in teh picsture, but is the front edge square or rounded?

Link to comment
Share on other sites

  • 4 weeks later...

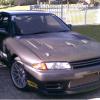
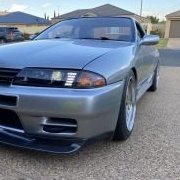
ok new pic, its painted and tested as i had an off at oran park lol. im quite happy it definitely works, i will however remake it as i want it a bit further out, and i will incorporate the undertray so its all smooth

post-26632-1245587005_thumb.jpgpost-26632-1245587023_thumb.jpg

and the undertray

post-26632-1245587128_thumb.jpg

Link to comment
Share on other sites

  • 2 weeks later...

+1 angle up the sides as well would look clean and no cop probz

Other than that you've done a topz job with the lip...

Edited by ShyBoi
Link to comment
Share on other sites

  • 2 months later...
  • 2 months later...
  • 2 weeks later...

Create an account or sign in to comment

You need to be a member in order to leave a comment

Create an account

Sign up for a new account in our community. It's easy!

Register a new account

Sign in

Already have an account? Sign in here.

Sign In Now
 Share


  • Similar Content

  • Latest Posts

    • I have a radium fuel rail on my Greddy manifold and used the supplied radium fuel injector to manifold adapters (The round green things pictured). I did always wonder if you could just go ahead and use the second lower hole like you're doing... Wouldn't thicker o-rings solve your issue?    
    • From what I've seen and experienced first hand with those powder extinguishers, they're good to use to break a window and escape the car, and half the time then do f**k all to stop a fire. You just need much more than 1KG worth of powder. Not to mention, half the time it's an engine bay fire, and you can't easily, and do not want to completely open the bonnet, so you're left pretending to be an American Infantry... Spray and Pray baby!   And then 100% that shit is really destructive afterwards!   Realistically, those little ones at a race track might help you keep the fire from growing and give the fire marshal / truck a chance to actually get to you with their multiple large bottles.   For a road car, these days, prepare to deboard as quickly as humanly possible, and move to safety. Allow insurance to fix replace it (unless it's like a rare classic etc, then do nearly everything possible to save it!) Keep the little extinguisher with you to help protect other things around you from burning while you stand there singing "How can we sleep while our beds are burning?"   Secondly, powder extinguishers I freaking hate for indoor use, (this isn't really relevant to a car) as you will get a powder fog around you, and it can be disorientating.   When I did fire training when at BlueScope Steel, they have (had?) their own fire brigade on site. We did all the training, and at the end we were told, "If it's an indoor fire, and you need to use a powder extinguisher, we as the fire brigade would rather you just exit the building, you're more likely to get lost in the smoke and powder fog than do much help, so just GTFO" And pretty much that was what they said for most other fires too, grab extinguisher, if it's much more than paper in a bin fire, use extinguisher to get you and others out of the building to safety...   Part of me wishes when my Skyline caught alight many moons ago, I let insurance sort it out, instead of putting the fire out... part of me now says "But I've saved a classic before it was a classic!"
    • Hi all,  I have a older model of the Greddy Front facing intake on an RB25DET NEO Head. I've bought aeroflows fuel rail and injector kit (1000cc Bosche injectors) and I'm unsure if the fitment is correct. The injector o-rings fit in the intake hole but it's not snug. I can very easily rotate the injectors even when the fuel rail is mounted. The kit also came with multiple adaptors, they dont make it any more snug and using them raises the injectors up and i cant mount the fuel rail. I hope this makes sense I've asses a few photos.    Thanks so much guys. 
    • So, to run the 4g aerials to the booster, I had to get access to the rear bulkhead....bit of a mission. Hot tip, don't offer to help change the rear shocks for a mate with a v37.... Remove seat base, 2 clips that slide forward to release it the it lifts straight out Fold down rear seat (pull in from boot) The side bolster of the rear seat is not connected to the middle parts that fold. To remove unbolt at the bottom bolt then push it up off the top hook Then there is a plastic surround behind the seat back, 2 pop out clips, 2 bastard clips, some swearing at it is out Pop the rear seat latch surround off Remove door surround lower trim then side trim  Remove c pillar trim - 4 clips, pull inwards not forwards Remove metal brace - 5 bolts 1 nut Then you have got to the rear strut top...what a pain!
×
×
  • Create New...