Jump to content
SAU Community

Recommended Posts

this is a beautifullllllll set up i will also try it on my rb20, i was thinking of the conversion for some time now :)

Thanks for the props, I can't believe my pics have made it around the world that quick :)

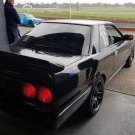
Heres how it looks as of now, although I am still waiting to finish the wiring before I fire it up.

pandaexpress3013.jpg

pandaexpress3010.jpg

And here's a link to my build thread that covers every step of the way to do it yourself:

http://forums.nicoclub.com/zerothread/4236...b26-itbs-thread

I'll keep everyone updated on the final results.

  • Replies 41
  • Created
  • Last Reply

Top Posters In This Topic

sci2000tech, that's similar to what I have done minus the ITB's as I'm going Q45 t/b.

We found the RB20 runners and the GTR plenum runners didn't line up too well so #1 and #6 were were heated and bent slightly and then a happy medium was found. The good thing was the GTR runner are significantly smaller than the RB20 runners which helped when lining them up.

gday mate, can you show me what you have done for the dump pipe flange on the K27, I have the same turbo and cant find a flange for it.

P.s Sorry to hi jack the thread back OT now :laugh:

I was going to PM you my response, but my post count is too low. I'll make a Intro and build thread later.

Anyway,

I spent a good ammount of time searching for a flange as well, impossible to find :laugh:

I ended up taking my turbo to a waterjet place and they cut a flange to match the exhaust housing. It would have been even easier if I had a gasket. If I remember correct, it cost me $35USD. If you want pics, just let me know. I still have the downpipe off.

On a side note:

I was told it is a k26 frame. Its a K3t 3070 MGA, the same that comes in the blitz/sard turbo kit. I have had absolutly no luck finding anything about this turbo, if you know much about these turbo's any info you could share would be appreciated :laugh:

sci2000tech, that's similar to what I have done minus the ITB's as I'm going Q45 t/b.

We found the RB20 runners and the GTR plenum runners didn't line up too well so #1 and #6 were were heated and bent slightly and then a happy medium was found. The good thing was the GTR runner are significantly smaller than the RB20 runners which helped when lining them up.

yup, we found out the same thing

I wish I had thought to heat and bend them, that makes sense. Instead, we ported them.

Here's a close up of the runner that lined up the worst, after porting.

IMG_1061.jpg

I'm not sure how far back you cut yours, but we thought this length lined up the best. And in theory, longer runners should work better with the gtr itb's, or so I'm told at least.

Another cool thing about going this route; If the ITB'S don't work out, I can just take them off and get shorter studs to mount the pletnum directly to the runners.

I'll make a thread here on how we built the manifold in a bit.

Edited by sci2000tech

We cut them back a little bit shorter than yours, a 25 plenum would have been a bit nicer to line up but the 20 plenum has the runners (particularly the last two) come out at funny angles. I haven't bothered to clean it up too much yet as the overlap is on the plenum side so there's no real restriction in the runners.

When I eventually decide to go bigger cams and do some headwork, I'll make the inside of the runners all nice like and match the ports to the head.

Only thing left to figure out is what angle to bring the water outlet out on.. gotta wait for my throttlebody to arrive though so I can make sure I miss it :laugh:

sci2000tech I would love to see a graph of the manifold vs the previous setup. If it improves response (which from all accounts I have heard it will not, however I am hoping it will) I may very well go down the same route.

Update on my situation.

Crack 1: Looks to be caused by the after market fuel rail being an extremely tight fit and causing a crack from vibrations or something else. This is now sorted, and I will be putting some spacer to allow the fit of the rail \ injectors to sit nicer. (more like factory)

Crack 2. The surface of the plenum against the head was not square, however it did not leak due to me using a gizzmo gasket. However, the flex on the manifold caused a crack near the ends of the manifold near #6. This crack has grown too far and some weld needs to be put in the injector hole.

I will then have to machine this so the injector \ o ring seals, then machine the surface of the manifold that sits against the head square.

Should be happy days after that...I hope :pirate:

We cut them back a little bit shorter than yours, a 25 plenum would have been a bit nicer to line up but the 20 plenum has the runners (particularly the last two) come out at funny angles. I haven't bothered to clean it up too much yet as the overlap is on the plenum side so there's no real restriction in the runners.

When I eventually decide to go bigger cams and do some headwork, I'll make the inside of the runners all nice like and match the ports to the head.

Only thing left to figure out is what angle to bring the water outlet out on.. gotta wait for my throttlebody to arrive though so I can make sure I miss it :)

The water outlet was a pain to get to fit on my setup, I can only imaging what's going to have to be done with where your pletnum sits :laugh:

Ahhhh...but yours isn't in an S chassis, huh. You probably have a bit more room to play between your radiator and pletnum. You can see how close mine is. There's about 1/2" inbetween my radiator and power steering pulley.

sci2000tech I would love to see a graph of the manifold vs the previous setup. If it improves response (which from all accounts I have heard it will not, however I am hoping it will) I may very well go down the same route.

Unfortunently, the previous setup was a completely stock engine :laugh: So with the new turbo/manifold/intercooler/etc... it will be impossible to tell exactly what gains are attributed to the ITB's.

Being in the U.S., I can't just find someone with a stock RB20(or any RB for that matter) to swap it out on and do a comparison on a dyno either :laugh::(

My only other option is to grab the intake off my spare engine and throw that on. But new I/C piping + dyno time = $$$.

I'll still get a dyno graph of the current setup. But unless it completely kills my powerband and forces me to switch back to a stock manifold or weld a TB to the front of this setup, I don't think I'll spend the money to see a "before" graph. If that makes any sence.

I too have read that on the RB20, it actually hinders response. But I'm the type that just has to find out for myself :laugh:

So the welds are done (pics coming when I pick the manifold up.) I just need the face that sits against the head machined as it is slightly warped.

Does anyone know \ reccomend a workshop to do this in SE Melbourne? I understand its a bit tricky to actually hold the manifold to machine the surface, but does anyone have any suggestions?

The water outlet was a pain to get to fit on my setup, I can only imaging what's going to have to be done with where your pletnum sits :)

Ahhhh...but yours isn't in an S chassis, huh. You probably have a bit more room to play between your radiator and pletnum. You can see how close mine is. There's about 1/2" inbetween my radiator and power steering pulley.

It's in an R32 GTSt on an RB30DET, I've got more room to the radiator but I'm also putting a Q45 t/b on the front of the plenum so I'm quite pushed for room.. when the t/b actually gets here I'll know exactly how bad it's going to be! Might have to put another bend in and mount the t/b vertically..

Will that plenum arrangement clear everything in a right hand drive car? I have my doubts so be careful with the length you cut back the std plenum/flange

My setup clears everything (thought I might need to use a 33gtst clutch master cyl. but everything fits with the 32 one) but I measured and made sure of how much to cut back from each side.

  • 1 month later...
  • 1 month later...

top work mate, this looks so much better than the giagantic smooth and shiny ones.. they dont suit the rb20 at all.. this look nice and factory almost.

cant wait to do something like this on mine.

Did any thought go into the runner length or did you just have it welded on wherever?

Only as far as making sure it fits in the engine bay. If mine was going on an RB20 I would be more concerned.

I've been trying to find out what people do about the Idle Air Control Valve/chamber and Auxilary Air Valve (cold idle up bypass) with these RB20 or RB25 to GTR throttles conversions .

I gather that with the GTR ones under the manifold they foul on the RB25DET's oil cooler somehow , the 26 oil cooler must be different .

Cheers A .

depends on the ecu, any good map based ecu doesnt need it, it just needs more time tuning. Im pretty sure jarrods (wheezy) does not run one... i cant remmeber its been awhile since we tuned it.

Im pretty the manifold is all good now too as had to get it cnc'd flat for him and tune it for the classic skylines event last month.

Create an account or sign in to comment

You need to be a member in order to leave a comment

Create an account

Sign up for a new account in our community. It's easy!

Register a new account

Sign in

Already have an account? Sign in here.

Sign In Now


  • Similar Content

  • Latest Posts

    • My hold point for future mods is that I want a OEM detachable hard top first, but, finding one is a pain, MX5 Mania are looking for one for me, but, as hens teeth are more common, finding one in Australia is proving problematic  I can get a OEM one from overseas, hell, you can still get new ones in 'Merica, but, shipping is a absolute killer and I cannot justify the cost, or the risk of it being damaged during transport As for the aftermarket hardtops, whilst they do the job of being a hard top, and are fine for a track car, they don't seal well (read: leak like a sieve in the rain), and you need a plastic/poly rear window, plus they are a bolt in option only and not made to be easily removed I liked how the hard top on my NB could be fitted, and removed, by myself, in less than 5 minutes I know it sounds bad, but I'm waiting for someone to write off a car with one so I can swoop in on their pain, it will go to a good home though, so my guilt of this is tempered
    • I’ve got one on mine and it’s fine, 
    • No, you don't want to plug the vacuum line, as that will turn that side of the booster into an air spring and probably make it feel worse. I'm not saying that the GTR master itself doesn't need a booster. I haven't paid attention to the GTR one to know what size it is cf the non-GTR ones. But when you think about it - they have to do the same job, which is to move a little slave piston a few mm to do what it is supposed to do, and that final action is the same on all the cars. So, it is very unlikely that the GTR MC is any different than the others, because it has the same pedal stroke and the same output requirement. The booster just makes it feel easier. I'd suggest you probably have an actual hydraulic problem. It's totally common on these old shitboxes.
    • Ye, in terms of bolting up the "Conversion" from a GT to a GTT is effectively "Use GTT parts for everything" Except the subframe itself, because you won't want a HICAS/4WS subframe. Remember your ABS system will be different too, thanks to GT being the S15 3 sensor system, instead of the R34 4 sensor system for wheel speed. I do not know how people get this to work given R34 diffs do not have a provision for an ABS sensor (they are on the tone wheels of the axles). I assume***** people use S15 gear/R34NA forever when they realize this - Or they convert it to a rear diff/axles that are R33 style which I presume has the singular speed sensor on the diff itself, but then you have to wire it all in and...and... and...
    • Foreshadowing was never so easy.
×
×
  • Create New...