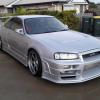
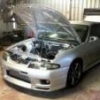
Jump to content
SAU Community

Recommended Posts

  • Replies 114
  • Created
  • Last Reply

Top Posters In This Topic

Well after power cruise and my engine bay looking ever so jap mat and stock from the top i had the silly idea of pulling out my motor.

So for the last 2 nights i started with the kit the entire front end came off ever so easy,The kit from the front bar guards sides skirts are so easy to put on and take off.

The engine and gearbox came out of the car tonight and the long road of smoothing the engine bay begins.

I am a glutton for punishment i tell ya but i love my cars and enjoy doing these things.

Had some suprises tho i found more performance parts i was unsure of

Koyo radiator in perfect condition

Koyo oil cooler and hks relocation kit with 5 meters of braided lines and fittings

koyo fmic rather large

Hks intercooler kit

While the motor is out and im working on the engine bay i may upgrade my fuel lines as the car is up on stands and off the deck.

Pictures to come from start to end.

Thank you to Ant aka john barry i could not have taken the motor out without you mate cheers.

Edited by Gtir-keiron

Pictures of my engine out.

So we droped the fluids out and low and behold when we droped the gearbox fluid i found some clips that im sure are ment to be in the gearbox now hanging off the magnet!

yayclips.jpg

On stands

carup.jpg

Thanks to ANT man who looks like a black fella here

antmanz.jpg

oilcoolerm.jpg

frontoff.jpg

frontoff.jpg

enginebaycm.jpg

motorout.jpg

We were cheering after the first night at how easy it was to get it to the point we could lift the motor out.

Basicaly broke one engine mount only and the side shaft gave us some grief to get out but other then that it was a 2 night afair the second night we spent a little longer then we wanted too.

Next steps are clean up shed !! what a fing mess,Then clean down parts and engine bay ready to be smoothed.

While motor is out ill get a few things polished and a few things painted to bring the engine bay up to scratch with the rest of the car as its a massive let down looking at the out side then opening the hood.

More pictures to come off the engine bay after the loom is tidy up.

Edited by Gtir-keiron

good to see you getting stuck in mate. I'd be a bit worried about the random clips coming out of the gearbox drain though. that could spell problems!

the car has grown on me a little I have to admit. ;)

The gear box will be pulled apart by my mechanic who is a performance mechanic localy and knows skylines and there gearboxes like the back of his hand.

Not worried about the box at all to be honest but there is no way id put it back in the car knowing theres some clips off not doing there job.

Turns out i do have Mines sporst division dump pipes that lead into a tune length veilside front pipes then into a 5 inch balistic cat then into a twin hks exaust system.

I dont think i could possibly get a more miss matched exaust if i tried hahah but it sounds great and its all stainless and it works and thats what matters.

Just spent the last hour cleaning my shed up and my landlord is not going to be happy jan if they saw the floor lol,More stains then a hookers undies i tell ya.

Hope they come out when the cars moved the degresser i had shifted some but i thinks ill be up for a acid wash.

Time to deloom the engine bay to get ready for prep work.

P.S I work with my old man we are half partners,Floor sanders so dad if your reading this i really am sick! and dont come around my house till tomorrow.

Edited by Gtir-keiron

Started seem welding the engine bay today,After seeing the time spent on Johnbarrys engine bay and being a part of that i was sorta discouraged from the whole seem welding engine bay side of things but once the motor was out and i scraped back some of the salastic on the seems i hit a good mate up whos a welder by trade and had him come around with his tig gas/electic welder and im happy with it so far.

No regrets other then having to put the motor back in lol.

My good mate mic in his work boots

micinboots.jpg

micweld.jpgbay1to.jpg

Befor and after strut tops

beforz.jpgseemless.jpg

bayq.jpg

I figure if i am going to the trouble of pulling out the motor and painting the engine bay i may aswell weld it all up.

If all goes well there should be no filler used on the welded parts,Mic is pretty handy with the welder plus its a decent one worth about 7 to 8 grand.

  • 2 weeks later...
  • 2 weeks later...
  • 5 weeks later...

Yep Bee R really know what they are doing when it comes to fit and quality of the product,I have had 3 spray shops look at my kit and all said the fit and quality is second to none its perfect.

I am not really a flare kit kinda guy i always think it looks slightly off,But when i saw this car for the first time it just blew my mind how well the kit fitted the car and looked like it was ment to be there.

Back to the topic at hand,After 8 weeks off due to a 8 year relationship breakdown and unable to live under the same room she finaly moved out of my house and first week end back im strait in to the swing of things and here is what i am up to now.

Engine bay primed and ready to go.

primerq.jpg

Now onto the paint side of things.

strutt.jpg

topwy.jpg

sidefs.jpg

frontwp.jpg

Really happy with the end product after the welding and what not.

Few days time ill be able to start to place things back in the engine bay ready for the motor to go in.

I have yet to do my cam covers i am going for a really clean and tidy look i almost did them in the silver of the car but stilll undicided on what to do.

Brake booster is silver tho.

Any ideas guys?

I was looking at the aurion ice melt blue as i have some from my hilux resto its really clean looking blue,Every one does candy red for a good reason as it looks so damn nice but i like to be a little diffrent.

More to come i guess now im back at it.

Cheers keiron

Got my cam covers all prep up this week end and painted them,Here are a few pics i took tonight.

56895520.jpg

28224301.jpg

14729905.jpg

55710668.jpg

14430676.jpg

Love this color icemelt metalic blue :P

More to come just check in here !

cheers keiron

  • 2 weeks later...

Back at it again this week working on cleaning up my engine bay.

This week i sandblasted and etch primed all my custom brackets for the 34 Bee-R conversion and various other items from the engine bay.

Had my radiator shroud plastic welded and then preped it up for paint,These things are so flimsy be carfull when playing with these they are so very easy to break,Also preped up my koyo radiator for paint.

I preped up my twin turbo pipe and plenum im going away from polishing this one as i want a diffrent look from my last engine bay that was all polished up.

Any way here are the pic's from this weekends painting adventures its a black metalic mica look.

Radiator shroud and radiator

38721026.jpg

70982652.jpg

Turbo pipe and plenum

71614985.jpg

18406066.jpg

50819044.jpg

Pictures don t do it justice the paint on the plenum and twin turbo pipe came out like glass and the metalic will look shit hot in the sun for sure.Theres alot of work in cutting down the cast to get these to look like this.

Cheers keiron and thank you for the help anthony ;)

P.s excuse the beer cans and thongs in the pictures we must look like real boguns hahahahah

Edited by Gtir-keiron

I see in your mods list that you say those are R34 GTR headlights, noticed they were non-HID units. I have read you guys have to deal with the removing of HID for compliance reasons. Is this the case for your car. I never really noticed the difference in between GTR lights and mine, other than the GTR guys keep theirs cleaner. :cool:

Create an account or sign in to comment

You need to be a member in order to leave a comment

Create an account

Sign up for a new account in our community. It's easy!

Register a new account

Sign in

Already have an account? Sign in here.

Sign In Now


  • Similar Content

  • Latest Posts

    • Something to note, on an aftermarket BOV, it's quite possible to end up with the worst of both worlds, where on light throttle, there isn't enough force to open the BOV so you get small reversion and driveability issues, and with the venting to atmosphere, it dumps a lot of fuel on shifts. Realistically, dumping to atmosphere under power isn't a major driveability issues, compared to the issues of stalling from reversion. If you're getting up the throttle, then putting the clutch in, say on a shift up, but then don't release the clutch, yes, the engine can and will stall, but, just drive around it, and that's easy, let the clutch out in the next gear and the car rolling will keep it all running / going.who wants a hard hit of throttle and then to just let the motor idle anyway?   Main issue for driveability is blipping throttle and it wanting to stall, like when parking or trying to move in slow traffic.
    • As in they quoted one price, you mentioned the exhaust, and they promptly added $200 on top? Interesting.
    • Note that I'm not suggesting this is a great idea. Just saying that it is something that could be done to achieve a better outcome than the more shit ideas will provide.
    • I'd try removing it, connecting hoses and see if that helps. Depending on specs, it could actually be restricting the flow(it also might be helping).
    • Yes, that's a hybrid BOV. The adjustable spring load ones are about making teh pressure build up higher before venting, so you get a more agressive whoosh. That is not what I meant or what you want. By "restricting", I don't mean "keep it closed until the pressure is higher, then open it fully". I mean "open it as soon as it is required, but only have a small port area, so that the flow rate out of it is slowed down". The pressure will rise to be higher than a bigger ported BOV would provide, but it would do while it is venting. The idea is to slow down the rate at which the replacement eair is flowing past the AFM, to reduce the magnitude of the air flow signal peak, to reduce the amount of fuel that is added per revolution.
×
×
  • Create New...