Jump to content
SAU Community

Recommended Posts

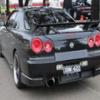
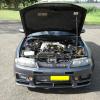
Hey Guys i just got this photo of my Car and im in love with it, except the fact that the car was dirty, is it possible that anyone could remove the dirt from my Car and keep it the same good looking picture?? If you can Then i would be very Grateful!!

post-60999-1252937673_thumb.jpg

post-60999-1252937795_thumb.jpg

Edited by Zaver
Link to comment
https://www.sau.com.au/forums/topic/287998-photoshop-the-dirt-off-my-car/
Share on other sites

I haven't contributed to the Computer art section for a while, take a look and let me know what you think of my 30mins work

the file on its own after being re-touched

post-40562-1253079191_thumb.jpg

and a comparison before and after

post-40562-1253079175_thumb.jpg

Hey Turk,

For this job, i created a duplicate layer and hid the original (just so i don't ruin the original in case i need to start over).

I used the Clone stamp tool as opposed to the healing brush, and sampled cleaner areas of the car that had similar color to the area that i was using it on.

I adjusted the Flow down until i got a level that wasn't sampling too much of the other parts of the car, but enough for the darker clean black to show up and just dotted the dirty areas slowly, some more than others.

Once i was done sampling, some of the lines between the panels (ie: skirt to door, front quarter to door) were very difficult to make out, on a new layer i used the brush tool, set to 100% flow, using pure black color and a very fine point(maybe 3px or so but with feathered edges) and drew in the lines for the creases that seemed to have been sampled over or were just hard to see, i then duplicated the layer, changed the lightness of the layer to +100 in the hue and saturation menu to make it white, and moved it one pixel right/left/up or down depending on the direction of the light.

Then just used the eraser on a large size (something like 50px with a feathered edge and flow down around 16% to rub away at the white and black lines i had drawn until they blended in enough to look like the actual lines of the car should.

Finally i merged all of those layers once i was happy with it and duplicated the resulting layer, set the layer style to multiply to bring out the dark tones, decreased the opacity of that layer until i got a nice smooth black that wasn't too dark (just looking at the paint and not the rest of the image).

Then used the eraser again on quite a large size, around 70px or so with a feathered edge, and on 100% flow to remove the majority of the out side of the image leaving just the car (keep in mind the original merged layer is still back there).

And to finish, i decreased the eraser size to a few different sizes using around 30% flow, depending on the area i wanted to erase, and started rubbing the paint sections back where there were reflections, as well as through the window and on the driver, the rims, headlights, tail lights, just anywhere that should be shiny.

And that is is for the most part, i probably made some alterations here and there, i think i added a gradient down the bottom to create the shadow you would see going under the car, but that is the gist of it.

-Steve

Hey Rush, that was actually a really good retouch, I'm guessing you used the healing brush? Mind taking me through how you got it so clean? I tryed to retouch it but had no luck on getting it as clean as you did!
  • 1 month later...
I haven't contributed to the Computer art section for a while, take a look and let me know what you think of my 30mins work

the file on its own after being re-touched

post-40562-1253079191_thumb.jpg

and a comparison before and after

post-40562-1253079175_thumb.jpg

Haha the wonders of photoshop :thumbsup:

And here i was coming into this thread to have a laugh why you wouldnt just clean the car and take more photos. :thumbsup:

They are some good action shots. Some good touch ups as well. Shame im not on my own comp or id have a go as well.

shh, i couldnt b bothered using the pen tool to neaten up those edges, no1 would have noticed if you didnt point it out, damn youuu

Create an account or sign in to comment

You need to be a member in order to leave a comment

Create an account

Sign up for a new account in our community. It's easy!

Register a new account

Sign in

Already have an account? Sign in here.

Sign In Now


  • Similar Content

  • Latest Posts

    • Update for the sake of closure   Ended up getting the intercooler piping all sorted, new plugs and yellow jacket coils, and she was idling mint until it warmed up while I was bleeding the cooling system. Found the misfire to be localised to cyl 3 by unplugging coilpacks, ran a compression test, that checked out, then decided to get a mate to check if that spark plug was firing out of the motor. Upon cranking it over, with the injectors disconnected, the car actually fired and ran on a couple cylinders and heaps of fuel came out the top of cyl 3 I'd say that injector's either spraying incorrectly or spraying far too much, which is fine as I'm planning on replacing them anyway I'm planning on making about 250kW on flex fuel, and have a set of 1000cc injectors from ozautosport, obviously overkill but I'm planning on building the motor and running more boost further down the line, do you reckon they'd be too big for a smooth idle on 98? Thanks for the replies gents, much appreciated
    • I'm confused. You said you want to "remove the clear coat from most panels" but it sounds like you are actually doing a full respray? Few random things to add -  If you chase the blistered paint with 120 grit, I can almost guarantee you'll chase it down to bare metal (that's fine). But if you paint the car from here, you'll have nice little indents where ever the blistered paint was. The new paint won't magically level out the low areas, you need to fill them. Which leads me to the main point I wanted to add, make sure the whole car is flat before you paint it. All those areas with blistered paint you sanded out, make sure to fill them and triple check they are flat with a block guide coat. I'd also check the whole car is flat with a large block and guide coat but yeah up to you if you want to go that far.   
    • 300hp (225kw) is barely outside the standard turbo's range with a bit of extra boost in it (200ish). If you are going to change the turbo you should aim for 250-300kw (330-400hp) to make the expense worthwhile
    • A couple of things, firstly omg that turbo is expensive! $3,000 USD for dinosaur technology is robbery. You could buy a G series turbo and have a good amount of change instead.  If you want a good budget option, have a look here - https://hypergearturbos.com/product/rb25dethighflow/ If you are keen to spend more, have look at the modern turbos, Garrett G series, Borgwarner EFR, etc. Have a look at the RB25 dyno results thread for inspiration.  If you upgrade your turbo to something that will support the 300hp you want and only "probably" have Haltech ECU, your car will only "probably" run. Actually, no it won't run. You are going to need the ECU and injectors at the time you do the turbo upgrade.  No thoughts on "this much boost" as you didn't say how much boost that actually is. Having said that, plenty of unopened RB25's making even more power then what you are chasing.   
×
×
  • Create New...