Jump to content
SAU Community

Recommended Posts

Hello All,

I had a billet coil pack cover made up for my CA18 last year and there has been a bit of interest in getting them made up for other engines. My brother has finally had got around to designing them for RB's and SR's and has got a few businesses that have ordered some batches in the last couple weeks, since he is already doing some batches i asked if he would do a cheaper price if i could get enough orders to warrant him making another batch, So here we are.

1 Month time span (14/10/09 > 14/11/09)

10 orders needed

GrowlyLogo.jpg

GROWLY CUSTOM BILLET COIL PACK COVERS

CNC Machined from 6mm Billet Aluminium

Supplied with Stainless Screws needed

CNC Machined Finish with a Choice of Engraved Designs,

  • RB 25 COIL COVER :- GROUP BUY = $120; RRP = $160
  • RB 20 COIL COVER :- GROUP BUY = $120; RRP = $160
  • CA 18 COIL COVER :- GROUP BUY = $90; RRP = $120
  • SR 20 COIL COVER :- GROUP BUY = $80; RRP = $110 (non-VTC only)
  • RB26 CENTRE BADGE :- GROUP BUY = $50; RRP = $70 (Pictures up by next week)

Postage & handling $20 Aust'' Wide

ENGRAVINGS :-

  • Choose from the Logo's shown below, or;
  • Custom engraving using a Microsoft Font i.e. Number Plate, e.t.c

ACCOUNT DETAILS

BSB: 124001

Account number: 20470454

Account name: M L Stirling

Bank: Bank of Queensland

Once the payment has been sent through an email MUST be sent to [email protected] with;

  • SAU User Name
  • Address
  • Contact Number
  • Engine Type
  • Design Wanted

coilcovers002.jpg

coilcovers008.jpg

coilcover3003.jpg

SAUGROUPBUYLOGOS.jpg

coilcover2007.jpg

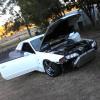
My CA Cover;

Image800.jpg

Image618.jpg

Edited by D_Stirls
Link to comment
https://www.sau.com.au/forums/topic/291973-coil-pack-covers-rb2025-sr20-ca18/
Share on other sites

So nothing for Rb26...

What he is doing for the RB26 is a billet decal that replaces the factory decal in teh centre of the coil pack cover. (pictures will be up in a couple days)

He can do the coil pack covers for an RB26 but not for that price.

For him to make a 26 cover that would suit the cam cover profile (because it's quite raised) you'd be looking at $140 in material cost alone and more that that in machine time .

Edited by D_Stirls
on r33 s1 there's a ignitor at back will this fit back in stock position with these?

how long after group buy finishes we can expect delivery?

Hey Mate,

You'll notice that on the rear of the plate in the first picture that there are 4 holes, these are tapped and are there so the ignitor can be re fitted. As for the date of delivery, they will all be sent within a week of the group buy closing.

Dale

Can I get one without the 4 holes tapped in the rear? As I do not have an igniter pack.

No problem, Just put it in the email that you send after the payment has been sent.

Here is an example of the decal for the centre of the RB26 Coil Pack Cover;

rb26coilcoverbadge004-1.jpg

rb26coilcoverbadge003.jpg

Here is one that was done for a customer of my brothers, it's more complicated than the one being offered in the GB as it has raised lettering was black anodised and then rubbed back; but it gives you an idea of what they will look like fitted.

p1020268.JPG

Edited by D_Stirls
Count me in...

Though I'm holding off on sending the money through until 10 people have confirmed, so I know it will go ahead.

Cheers

same applies to me, count me in and let me know wen u find a 10th and I'll forward an email with wat I want plus the money... Cheers

Ok so this is where we are at;

1. Ryno

2. rhys-

3. 08r3308

4.

5.

6.

7.

8.

9.

10.

awaiting next GB due to cash :thumbsup: is there gonna be another one ???? :s

Not sure, this one is a bit slow to start so it depends how this one goes in the end.

Edited by D_Stirls
Is it possibly he could do the tommy kaira logo??

PM Sent;

1. Ryno

2. rhys-

3. 08r3308

4. gwholxc

5. FIRE BREATHER

6.

7.

8.

9.

10.

Edited by D_Stirls

4 days left, and by the way this GB is going it'll probably be the last.

I have spoken to Matt and whoever has stated that they want one he will do one for even though i didn't get the numbers needed.

Guest
This topic is now closed to further replies.


  • Similar Content

  • Latest Posts

    • No. The ECU's hose is for a connetcion between the plenum (assuming single throttle body, not ITBs) and the ECU's internal MAP sensor. This is the primary load measurement of the ECU - so you need to get this one right. This has NOTHING to do with the boost contol. The wastegate also needs to see a boost signal - but it is actually far better for it NOT TO COME FROM THE PLENUM (again, assuming single TB, and not ITBs). This should come from the turbo's compressor housing (assuming there is a nipple on there, which there might well not be), or on the boost pipe somewhere between the turbo and the TB. On the pipe from the turbo to the intercooler is usually most convenient. The boost controller is then located between that boost source and the wastegate, ACCORDING TO THE CORRECT PLUMBING DRAWING FOR THAT BOOST CONTROLLER. There is no general diagram or instruction that will be correct for every case. Then the other ports on the plenum are for purposes such as Duncan described. If the boost controller has an internal MAP sensor, for a boost display, etc, then it will want to be hooked up there, alongside the ECU and the FPR.
    • Ok gotcha, so one post to fpr  another to bov  and I have the mishimoto boost controller and a link g4+ so I’d just have the tuner set it up properly. For the last two from plenum post throttle to  ecu/ boost controller, I know that I have a hose coming from the ecu that I was confused about so I assume that’s what connect to the boost controller from the ecu? And then the last is just from plenum to boost controller then to wastegate?
    • From there, it was just a quick electrical check, prime the oil and start her up Which, is not what happened. 1. Bloody seppo Aeropro battery holder. Not only was it too tall for the battery (which I'll forgive them for, I have another battery the same nominal size that is taller than Neil's one, but the bracket is a fixed height so the battery was spaced up) But the thing that really shits me is the hardware to hold it on requires a 7/32 Hex key. WTF. No-one will ever be able to remove or install the damn thing without a hex key they don't own 2. Kill switch no longer worked once the console was installed. Neil mentioned above he had to adjust the length but it no longer cleared the console once installed. Sorted. 3. Suspiciously, the brake light holders were hanging in the boot with no globes. Sure enough the stopper on the brake pedal was missing so they are always on unless the kill switch is activated. Will pick one up tomorrow (turns out 32 and 33 don't use the same stopper) 4. All that sorted, I turned on the kill switch, turned the key to ACC. Nothing. Turned it to IGN. Nothing. Checked some fuses and found the main IGN in the boot was missing which improved things once it was replaced. Now ECU and dash lights turn on with IGN but still no fuel pump. 5. Turned it to Start....ECU on, no fuel pump, no starter. Plus the voltage dropped straight to 9v.  I suspect the starter is f**ked but am going to have to work through it all and see what is happening, really looks like more than one issue. Does anyone have the R33 fuse box key with the circuit it sources from (eg BAT, ACC, IGN, SRT etc) and supplies? I can find a translated list showing Amps and circuit without supply circuit, and I can find supply circuit without Amps and target circuit.
    • 3rd time lucky, the AAC is now all plumbed up after getting some final fittings All set up under the plenum of maximum access
×
×
  • Create New...