Jump to content
SAU Community

Recommended Posts

Hey guys and gals.

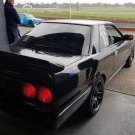
Thought after all this time i better post some details on my car and where it is upto. I know its not upto the standard of many cars on here. But thats why it was bought several years ago as a project :P

General theme im looking for is "my take on stealth". The initial glanse of the outside should be fairly clean and sutle nothing "out there" jumps out at you. But as you look carefully, more and more things will poke out at you. (hence why the intercooler is matte black)

List of Mods

Engine/Performance: 3" Blitz Nur Spec R Cat back exhaust, MetalCat, Custom Frontpipe, Front Mount Intercooler, Splitfire Coilpacks, Power FC (tuned by Racepace), Air Bleed Boost (Fabricated by Racepace - gave much better results then the previous Blitz EBC), Drift Oil Catch Can, K&N Panel Filter, Nismo Fuel Pump, some braided and silicon lines, Exedy Button Clutch.

Hypergear ATR43i on order at the moment, and Nismo 550cc injectors and Z32 A/F meter already in shed awaiting turbo install.

Suspension: Tein Super Street Coilovers (J spec), Whiteline front and rear swaybays (adj), Cusco front Strut brace.

Wheels/Tires Enkei GTC01 18"x8.5" with Toyo Proxes tyres, 2x 15" steelies with MT streets for drag work.

Bodywork Nismo Clear indicators, Nismo style front lip, GTR style rear wing, some debadging.

Interior Pioneer DVD player, Digital designs rear speakers. (Used to be 2 DD 12" subs, 2 DD amps and 2 front Splits. But they weighed too much and were delegated back to the shed). Nismo Gear Knob, Drift Guages (Boost, A/F, Oil Temp and Volts), Display Unit off Blitz EBC, Stripped Back seat / all visible sound deadening.

I'm sure there's a few bits and pieces missing off that list but its a start. Future plans involve installing the new turbo which is already on the way. Redoing the engine bay with upgraded color scheme, much more polishing whilst turbo is out. Bit more interior dress-up (gear boot, door trims etc), Half cage, Seats and Harnesses.

Pics - lol couldn't be bothered cleaning car before taking these

sky01.jpg

sky02.jpg

sky03.jpg

sky04.jpg

Comments are welcome. Please keep it constructive. More pics will come as updates occur.

Cheers. Luke

Link to comment
https://www.sau.com.au/forums/topic/297274-my-r33-project/
Share on other sites

  • 2 weeks later...
  • Replies 51
  • Created
  • Last Reply

Top Posters In This Topic

i love R33s without wings but that's just personal.

that front end is sex tho, i love it!

good work with the stealth work too.

not a huuge fan of those wheels, maybe something with a little more surface area like drifteks or TE37s

i dont really think meshies look good on skylines, but again, that's just me!

impressive list of mods there too! good choice in hypergear snail!

(maybe lower it a tad more?)

good luck bro!

Link to comment
https://www.sau.com.au/forums/topic/297274-my-r33-project/#findComment-4969908
Share on other sites

Thanks for comments guys. Yeah at first i wasnt 100% sure on the rims. But they have really grown on me. My only regret is not going for wider rears (Just for the sake of it).

It also used to be lower. But after a defect i always keep it at a steady 105 mm with no passengers. Can barely get out the driveway as it is. Used to be hell before i raised it back up a bit. But yeah it did look the part (bout 90-95mm off the ground back then).

Hypergear turbo arrived last night. Looks fast sitting on the floor of the lounge room :D . Going to start ripping the engine bay apart again this weekend. I'll get an engine bay photo before i pull it apart. Going for the same effect of polished with blue as major highlight color with a few touches of red on smaller items. Goal being a bit more "complete" and better quality job then my previous effort. Shall also try and get a few progress shots of the engine bay build whilst i put the new turbo in. May take a while being my first attempt at a turbo swap. But im not willing to pass jobs onto the mechanic anymore unless i cant get access to tools or equipment. The only bit i may handball could be plenum polishing (not something im looking forward to).

nice work, where and how did you get hold of the GTR wing? was it a mission to find?

Just jap is your friend for many a common part. (I think just about every bodykit supplier does a gtr wing though). I didnt use the supplied fixings for it. I opted for allen key bolt as i like them a bit more and felt they would last longer with repeated removals then a typical Phillips head.

More Photos as updates happen :blink: .

Cheers. Luke

Link to comment
https://www.sau.com.au/forums/topic/297274-my-r33-project/#findComment-4971288
Share on other sites

plenum polishing is a prick of a thing... i just gave up and painted the dam thing black, since matte black and matte silver is sorta a theme of my engine bay.

as for your RB, polished plenums look hot!

i rekon blue couplers and blue cam covers with a few red bits (cam gears?) will look the part. then when you need to get speedflow fittings (the red and blue braided ones) they will look the part!

sorta like this:

1027784_600.jpg

Link to comment
https://www.sau.com.au/forums/topic/297274-my-r33-project/#findComment-4971312
Share on other sites

HAHAHA looks like some kind of robotic Octopus is trying to eacape!!!!! but then again, that is 1 hell of an engine bay to aspire to.

good luck with the build, I like the wheels, the suit it.

Edited by Noddy
Link to comment
https://www.sau.com.au/forums/topic/297274-my-r33-project/#findComment-4981503
Share on other sites

Ok. New that is a scary looking engine bay. Robotic Octopus is correct.

Few new pictures to add for my build. Started pulling the engine bay down yesty.

Before Pic

enginebaystart.jpg

Stripdown pic 01

bayprogress01.jpg

Stripdown pic 02- (Car currently in this state)

bayprogress02.jpg

The main new parts being installed.

newparts.jpg

More to follow as becomes ready.

Link to comment
https://www.sau.com.au/forums/topic/297274-my-r33-project/#findComment-4981834
Share on other sites

Wow that's incredible! I love the look of the lip! Where'd you get it from?

Both the Front lip and Spoiler came from Just Jap. Just told the painter to paint the central section in a blackish color to blend with the window surrounds. The Wing Blade of the Spoiler is done in the same black

Edited by l_uk3y
Link to comment
https://www.sau.com.au/forums/topic/297274-my-r33-project/#findComment-4992049
Share on other sites

Another new photo. Comparing New and Old turbos. Overall dimensions fairly similar, new ones a bit bigger. Inlet is clearly bigger though.

Almost ready to whack it on the manifold and start doing things up. Just playing around with the waterlines still. Ive been recommended to join both ends of the water lines with fuel hose (only like 5 cm's or so). However its only rated to 125 degrees. So needless to say im quite concerned as to halting progress till this is delt with. So before i go further im looking into a really good heatwrap and position of the water line to get as much clearance from any hot parts as possible.

Today I did have a 15 second go at putting the Turbo on the manifold just for a look. It will be an extremely tight fit until i get it on the studs. Didnt get long to fiddle though as the wife came home and started telling me to get away from the car and get back to fixing up the house. (Why do i always take holidays when she isnt working :rant: )

Luke

2turbos.jpg

Link to comment
https://www.sau.com.au/forums/topic/297274-my-r33-project/#findComment-5000066
Share on other sites

Yeah. So far all painting and polishing is done by me. Although I'll be sanding back everything thats painted so far and redoing. And everything that is/will be polished I'm going to get done professionally for quality and time reasons.

Today I found a higher rated hose (150 degrees) to connect the water lines together as well as heat wrap to protect it. This arvo I'm hoping to get that done so i can continue on with the install.

Luke

Edited by l_uk3y
Link to comment
https://www.sau.com.au/forums/topic/297274-my-r33-project/#findComment-5001451
Share on other sites

  • 1 month later...

Well. progress has been going a bit slower then expected due to my lack of control on my spending ;)

I've completely bitten the bullet and am polishing everything I had planned myself. Progress is at a stand still whilst I wait for my delivery of buffs and compounds. Got all the Silicon joiners I need now. I'm saving the cam covers and plenum until last so I have a bit more experience to get it all done quicker due to leaving engine insides exposed. Also as a shock move I got some harnesses. (hence no money lmao). P.S before the comments start. I have no intention of actually using them on the standard seats. Once the turbo install and re tune is complete seats are next on the agenda. (GTR seats in mind ATM)

Whilst polishing I will be making up the new intake piping for turbo inlet and outlets out of 316 stainless which will also be getting polished. Hopefully that should get me over the line on what is by far the biggest DIY job I've ever attempted let alone will actually finish. Getting very toe'y to have the car back on the road though. Driving me insane. Although its just as fun working on it in the garage as it is driving it.

Some new photos.

- Some of the parts im working on

painted parts still need sanding the clearcoat and buffing up

metal parts are awaiting new buffs and compounds.

partprog01.jpg

- Interior Photos

(camera makes it look brighter then it actually is ;) )

jan1004.jpg

jan1002.jpg

- Engine Bay

lots of work still to go

jan1001.jpg

jan1003.jpg

- Lastly. Few of the fluids i've used in the car during the install/cleanup

fluids01.jpg

Link to comment
https://www.sau.com.au/forums/topic/297274-my-r33-project/#findComment-5058576
Share on other sites

Looking good mate!

What colour are you painting the plastics?

You also say you don't want to leave the engine uncovoured for a long time, you are going to cover it all with a rag while the rocker cover is off though, right?

That is the repainted blue. (1st photo in my last post) although the photos make it look lighter then it does in person (close though). Need to sand back the roughness and buff it up so it has a shine.

The idea of covering things with rags worry me. Dusty ol things that drop crap everywhere. Dont laugh but i intend on using something like a quick line of Al Foil or something similar as theres no risk of dust contamination. Then shutting the bonnet straight away. Only doing 1 piece at the time straight away. Then reinstalling before taking off the next bit. (just for those few more sensitive areas.

Buff wheels and compounds arrived today. So peace out for the weekend everybody as I'm off to start a marathon of a weekend.

Luke

Edited by l_uk3y
Link to comment
https://www.sau.com.au/forums/topic/297274-my-r33-project/#findComment-5060790
Share on other sites

New Updates.

Connection between turbo and AFM is completed out of PVC (guide only). Just need to mark out where I want the BOV return and breather fittings welded on before I take that to a stainless mob to get made up properly. Also the metal pipe that goes from turbo outlet to intercooler (blue in the following pics) will be getting remade in stainless as well. All a bit of a tight fit but has a little bit of play. Most importantly I get to keep the factory air box which was a priority of the build.

Next step after I get the Stainless pipework made up is to figure out what to do with the breather fittings on the Cam covers and what pipework to use on the BOV return line. After that I guess its getting close to time for me to bite the bullet and finally build up motivation to start work on that factory Plenum :D

Also need to conjure up some Fiberglass covers for the back of engine bay (Ugly) and an air guide to the air box (to hide most of the vacuum lines around the boost control)

Whilst I still have a fair a fair bulk of the parts out. I'd love to hear any suggestions of anything that stands out as being something I should do whilst its out to save pulling it apart again a month after its done.

Cheers. Luke

P1000762.jpg

P1000761.jpg

P1000760.jpg

P1000759.jpg

Link to comment
https://www.sau.com.au/forums/topic/297274-my-r33-project/#findComment-5071724
Share on other sites

  • 3 weeks later...

Stainless Intake for AFM to turbo is complete, just need to Polish up and connect up the breather fittings.

Turbo exit to Cooler Inlet pipe is spot welded for trial fit and fits like a glove. So that will be final welded on Monday.

Thanks to BBL stainless in Bendigo. Been a very good place to deal with so far and very happy with the work.

Also for the sake it of putting a photo of my workspace in the shed (bit messy. Couldn't be bothered cleaning it for a photo).

Needs some more additions to the wall but otherwise yeah..

And. After having a play with the Inlet Plenum. I have decided that there is too much swearing and anger involved in taking it off to polish. So I have bitten the bullet and will leave it until after the car is running and tuned and just get a workshop to do the work. The amount of hours involved as well as all the comments i've read on here about the hell involved in the job. Not going to be viable for my time structure atm.

Looks like all I need to do now is connect up all the braided breather hoses (looks like it wont be fun getting the fittings on), sort out the BOV return pipe whether to go braided or stainless hard pipe. Then reassemble the main pipework and its all done ready for tune. Woohoo. So close now to getting her back on the road.

021006.jpg

021003.jpg

021007.jpg

Cheers guys.

Luke

Link to comment
https://www.sau.com.au/forums/topic/297274-my-r33-project/#findComment-5107344
Share on other sites

Create an account or sign in to comment

You need to be a member in order to leave a comment

Create an account

Sign up for a new account in our community. It's easy!

Register a new account

Sign in

Already have an account? Sign in here.

Sign In Now


×
×
  • Create New...