Jump to content
SAU Community

Recommended Posts

Hi,

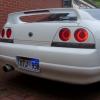
My mate gave me his R33 front bar.

But theres a couple of problems with it

Firstly it has a crack in the bottom of it

and also i want to insert some mesh in the two bottom corners of the bar. But hes chopped away at it and both sides have uneven sides.

What do you guys recommened to repair a crack?? I want something i can apply which will fill in the holea and i can sand it back?

Also what do you think i should use in terms of lasting and durability for the mesh?

And what do you recommened to keep it held in place?

thankyou

post-63140-1263522833_thumb.jpg

Link to comment
https://www.sau.com.au/forums/topic/304013-front-bar/
Share on other sites

that to me looks like a series 1 or 1.5 front bar.....best thing to do is contact a Japanese Import Wrecker and see if they have a front bar of same sort in stock in good condition....JIS have a shiatload of panels and kits.....that will be cheaper option for you mate.....

hope this helps :(

Link to comment
https://www.sau.com.au/forums/topic/304013-front-bar/#findComment-5036196
Share on other sites

well

first

take it to a

panel

beater.

then he will fix it, rub it back, and fibreglass in some metal tabs that can fold down to support the mesh.

go to autobarn

buy mesh (not blue)

then the rest is up to you

good

luck

Link to comment
https://www.sau.com.au/forums/topic/304013-front-bar/#findComment-5036220
Share on other sites

it holds a special place with me for the fond memories for the net sau vs ns.com battles that soon followed its arrival :D

Yes ... I had deeply apologised to NS.com for not fitting cheap chinese or ebay parts to my car ... warranting their slagging, so they attacked the blue mesh. Clearly my error was not consulting them on how I should have modified my car. Shame on me for doing what I wanted and looking up brand names like Nismo, HKS, Apexi, Sard, Gates, Walbro, Turbosmart, BBS, just to name a few. :P

Link to comment
https://www.sau.com.au/forums/topic/304013-front-bar/#findComment-5036686
Share on other sites

LOL you really need to ask!?

Would look better with my boot sunk into it :O

And on a serious note, I fully understand ns.com's lifetime ban just because you have blue mesh. :)

Take ya tractor and your rig, and move along old man :) We're perfectly capable of going OT without your assistance! :O

Link to comment
https://www.sau.com.au/forums/topic/304013-front-bar/#findComment-5037176
Share on other sites

don't listen to half the people on here man... no one does their own stuff these days. no point taking it to a pannel beater or buying another one as youre gonna get ripped off either way.

that's an easy fix and you can do it at home for next to nothing.

i bought same style bumper bar off a member on here which was completely ripped in the bottom section, had 3 cracks through it.

(sorry no pics of before)

tools i used,

soldering ion + zipties

bog

primer

paint

firstly, align the cracks to where they ripped. Get someone to hold it in place or simply use duct tape to hold it all together temporarily.

use the soldering ion to melt the cracks and use zipties as a plastic filler, work the plastic in to itself with the soldering ion untill its completely joined together, it should look something like this:

th_DSC00095.jpg

then grab bog, mix it and fill in the uneven surface till it covers everything, sand it and keep repeating till its the right shape...

th_DSC00195.jpg

primer n paint. presto.

th_blakfront.jpg

i did it matte coz i was gonna respray the whole car like that at the time. unfortunately i smashed and cracked the bar again a few times so ill be doing this myself again soon.

hope this helped :P

Edited by SkyHi_33
Link to comment
https://www.sau.com.au/forums/topic/304013-front-bar/#findComment-5038503
Share on other sites

Create an account or sign in to comment

You need to be a member in order to leave a comment

Create an account

Sign up for a new account in our community. It's easy!

Register a new account

Sign in

Already have an account? Sign in here.

Sign In Now


  • Similar Content

  • Latest Posts

    • Starting with issues 1 - 5, we have already run into a problem...!  Issue #4 contained 2x front brake calipers, instead of 1 caliper and 1x steering knuckle. Will have to call DeAgostini on Monday to sort it out. Anyway here's some photos.  Issue #1 is the front bumper, headlights and number plate. Issue #2 is the front wheel (with "We produced with spartan air." text on the centre cap!) and tyre, the front lip spoiler and cylinder head cover with ignition coils under the centre cover... which will never be seen again. Issue #3 is the bonnet and cylinder head. Issue #4 is the front strut, brake disc (with laser etched metal discs) and brake caliper. I stopped here because of the issue with the missing steering knuckle.  Next update will be #5 - #10 in a few weeks.
    • DeAgostini is one of a few companies that release quite large (the largest commonly available size actually) 1/8 scale models in a series of weekly issues over 100 - 110 instalments.  They release different models for different markets and DeAgostini Japan have release the BNR32 Skyline GT-R Nismo last month. I've made two of these 1/8 scale sized cars (one an R35 GT-R from 2012 - 2014, the other I'm just about halfway through, a BNR34 Skyline GT-R from the 2Fast 2Furious movie) so when this R32 was announced there was no way I could ignore it as it's my favourite out of all Nissans.  Each issue costs around $20 so it costs about $2.2K when completed. I suppose it is very expensive for what it is, but the quality and details are really very good, and there are many "gimmicks" like fully functioning exterior and interior lights operated with a remote control, working steering, all doors/bonnet/boot/fuel lid open and close, the side mirrors fold in and it even has a speaker for the engine revving sounds when you turn the lights on.  Each issue comes with a magazine that tells the story of the BNR32 Skyline GT-R Nismo from the first design stages of the BNR32 to Group A homologation and the various racing version that were run in the Japanese Group A and JGTC, and Australian Group A.  So I plan to update the build in this thread 5 issues at a time.  https://deagostini.jp/r32/?srsltid=AfmBOooKjxDc4EUK2rmXqMBPgyHfFJ24s4oEPJBNpnF-lFlsRoW0PE6P
    • As per title.. has anyone used so far? Keen to hear results, comparisons. In the market for a new mani for my new turbo. Any issues cracking?
    • Re read everything that has been written about this in this thread.. Let us know if you're still confused.
    • This would be a new pump with new gears. I'm just unclear on whether it's a good idea to run more oil pump flow if you don't actually need said flow. Oil level is set a minute or so after shutting off a warm engine so wouldn't the high RPM oil level in the sump end up lower all things equal? Plan is OEM clearances, main concern in my mind is whether the OEM pump can keep up with the flow requirements of any additional oil coolers.
×
×
  • Create New...