
Announcements
-
Similar Content
-
-
Latest Posts
-
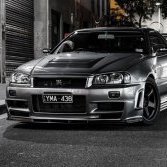
 Hi All, So my paint shop said that I cant use normal wax (Megauir gold) on the original water based paint on my R32 GTR. As its an original paint. They are saying that it is not suitable and makes the paint misty looking. I have polished the car in the past and it looks show level. My question is what does everyone use and if I can just use a simple Meguairs Gold Wash and then a GTec EXO coating - Ceramic serum coating. Or what does everyone recommend otherwise? Side note I just had to respray the rear bumper which is not original paint now due to installing new Muse spats. They have fuel stain ... what does everyone use to put on the rear bumper to protect the paint better from the fuel staining? Thanks
 -

-
 Just submitted my form and payment! Excited to become a club member 😁 Hoping I can get the 32 on club registration in time for the annual general meeting on the 17th.
 -
 I don't like the sound of that. No. I mean I actually don't like the way that they sound!
 -
 I'm rating the Michelin Pilot Sport 5's I currently have on my NC, they are great for throwing the thing around on the street, and handle great in the wet, the price is also reasonable They are not as good as something like a RS4 in the dry, but, as it is a street car, the 5's are alot better for inclement and cold weather I've found RE003's to be 5hit....
-


Recommended Posts
Create an account or sign in to comment
You need to be a member in order to leave a comment
Create an account
Sign up for a new account in our community. It's easy!
Register a new accountSign in
Already have an account? Sign in here.
Sign In Now