Jump to content
SAU Community

Recommended Posts

The same as HKS purple but with a pearl through it will have to check the exact name for it at work.

OK so bit of progress over the weekend. Fixed the thread on the LCA and bolted the knuckles up.

Picked up some ikeya formula tie rods, centered the rack and bolted them up with the spacers from JPP.

Seem to be getting slightly more lock to the right even with the wheel turning the exact same turns lock to lock. So thats doing my head in atm.

IMG_13631296x968.jpg

IMG_13641296x968.jpg

Also got some driftworks traction rods from Cartel to finish off my adjustable arms.

IMG_13621296x968.jpg

Took the boost controller out of the system and hooked up a boost gauge and went for a test drive. Gate opens at about 7psi and boost creeps to about 10-11 by redline. Wasnt cutting and drove smoothly. Didnt want to take it too far cause of the wheel alignment being way out. Have one booked for Saturday morning so more testing on the weekend, get to cruise around Lakeside on Sunday if the cars going well so should be able to sort some shit out. Matsuri is approaching fast!!

Link to comment
https://www.sau.com.au/forums/topic/323972-my-a31/page/3/#findComment-6034929
Share on other sites

  • 3 weeks later...
  • Replies 72
  • Created
  • Last Reply

Top Posters In This Topic

  • 2 weeks later...

Yeah the green is a bit more subtle, not real sure on the colour yet either. Did do a pretty rubbish job of spraying them though haha.

Teks are a strange wheel they have 2 good 'angles' but look nasty in general. Hope that made sense...

Starting to get really picky with this car. Think it will need a makeover soon or ill start getting bored with it :(

Link to comment
https://www.sau.com.au/forums/topic/323972-my-a31/page/3/#findComment-6087925
Share on other sites

  • 1 month later...

Wanted to test out Doomah's wheel alignment so got in on a skidpan day, couldnt wait for qr to reopen.

First time testing it on the pan with the 25 and lock. So much easier to drive :)

http://www.youtube.com/watch?feature=player_embedded&v=TpUyFlGnEwc#!

Edited by surfbum64
Link to comment
https://www.sau.com.au/forums/topic/323972-my-a31/page/3/#findComment-6151177
Share on other sites

  • 2 weeks later...
  • 1 month later...

Had to buy new shit to keep me happy. Finally found a new bonnet so looks alot cleaner at the front even though the fit isnt perfect.

IMG_16501296x968.jpg

And after almost two years of owning this shit tin found the taillights that I wanted. Now looks like a christmas tree so have to repaint the wheels. Was thinking red. Thoughts?

IMG_16521296x968.jpg

Link to comment
https://www.sau.com.au/forums/topic/323972-my-a31/page/3/#findComment-6210371
Share on other sites

Haha yeah that candy purple is not worth doing on these wheels :P

Gotta stick to the export quality range. Havnt done red or blue yet so they are the most likely choices.

Booked in for morning session in March and now have a GoPro 2 so will finally get some decent footage!

Link to comment
https://www.sau.com.au/forums/topic/323972-my-a31/page/3/#findComment-6212526
Share on other sites

So first week of having the car home has had a lot of progress. Cleaned up the engine bay- mounted oil cooler, remounted catch can and fuse box, tidied up the rest of the loom, painted wheels red and found why the boost controller wasn't working. Car had started toeing in at the front for some reason couldn't figure out why so did a quick alignment tonight. After a couple of turns of the lh tie rod fell out of the rack. Very lucky it happened then and not on the highway/track. Also put one of the euro lines on the front and seems to fit...

a6cf51b6.jpg

Need a small slip on and a slightly smaller tyre but should work.

Tomorrow involves 2-way, 25 turbo and degrease engine bay.

Link to comment
https://www.sau.com.au/forums/topic/323972-my-a31/page/3/#findComment-6230040
Share on other sites

Create an account or sign in to comment

You need to be a member in order to leave a comment

Create an account

Sign up for a new account in our community. It's easy!

Register a new account

Sign in

Already have an account? Sign in here.

Sign In Now


  • Similar Content

  • Latest Posts

    • @dbm7 and @GTSBoy thank you both very much! will give that a shot!
    • Sounds good. Provided the panel is flat/level I'd be happy to start the painting process.  While you are learning, for sure you could do this. Its only paint, you can always sand it all back and start again. Its only your time and money on materials, but while you're learning, really its time and money spent on your education.  Once you know how to do this bodywork and painting, you won't want to waste your time and money on frivolous activities lol. 
    • Yep I will use a guide coat after putting filler, I will do it on the whole panel as I'm a beginner so chances I've made quite a few errors. In that photo, I think that was a low spot, I just for example said to pretend it's flat but I will put filler + guide coat after to assess where I'm at. Yep with that picture, the panel is wet as it rained when I took the photo. But all those scratches are completely smooth, I went over it with 240 grit and can't feel it, even with my nail digging into it. I was legit thinking to buy a 2k can and spray primer to see how it turns out but then thought to myself it's going to be a mess doing it haha. Good mention there. Thanks for all that info I think I know what to do next.
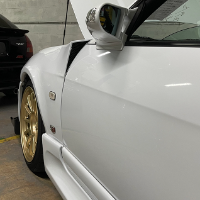
    • Prior to laying down the primer, you need to make sure the surface is completely level. For example, based on this picture, I strongly suspect that the areas marked in blue are higher then the area marked in green.  If you spray primer over this entire area, then paint and clear it, the finished result will 100% show the low area. It will stick out like dogs balls. Unfortunately the paint won't magically level out the low areas as you lay it down.  Without seeing it in person, I expect that the green area will need to be filled, then use a guide coat and check that the entire repair area is level with a large sanding block.  With this picture, are you saying that even though you can see the scratches, the panel is in fact completely smooth and flat? If this is the case sure you could prep and paint it as it is.     The picture with the paint you described as blistering, it's hard for me to comment on from the photo alone. It looks like the panel is wet? Dunno, looks strange. Does the panel feel as smooth as glass when you run your hand over it? **** Going back to your question again, generally you would only sand the primer if you made a mistake while laying down the primer.  If the panel is prepped properly and you lay the primer down properly, you should not need to sand the primer.  This wouldn't work - Don't prep the panel. Spray primer and see how it turns out. Sand the areas where the issues appear. Spray more primer and see how it turns out. Sand the areas....... Yeah you'd go round and round in circles getting no where. 
×
×
  • Create New...