Jump to content
SAU Community

Recommended Posts

  • 2 weeks later...
  • 2 months later...

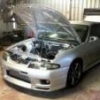
Update time!

My baby has been running sweet and smooth for the past few months (touch wood) but I am now ready to get rid of the twins and smash on a big single :)

Here are some parts ive just recently got my hands on:

Apexi EL gauges

4Ptm5l.jpg

6boob manifold (Had to get it sterilized before i could touch it :P)

0W8OJl.jpg

50mm wastegate provision

OJ7phl.jpg

tial 44mm wastegate with all spring combinations from 0.3bar to 1.5bar (currently has 1 bar spring combination in it - hopefully the gate flows enough for my setup and doesn't creep past 18psi! fringers crossed)

WxJZQl.jpg

tomei type b poncams

qwYQZl.jpg

PxTT4l.jpg

pXtiZl.jpg

Garrett GT35r

J7Pf8l.jpg

V-band 0.82 rear housing

heR3Wl.jpg

Plan is to remove the twin turbo setup on monday and trial fit the turbo setup on Monday arvo!

I have booked myself in for Clintons expertise welding services for tuesday so hopefully on wednesday i get to drive her home.

Once I'm happy with everything, I will install the poncams a few days before the tune date (21st of this month) and rocker covers will get a slight make over too :)

More pics on Monday night..

Thanks for reading!

Thanks for the comments guys.

Yeah what can you do.. I really dont care about yellows anymore, I just focus on enjoying the car.

I budget one yellow sticker per annum even though, quite surprisingly, its the first yellow sticker that the car has ever had!

If I do get a yellow sticker with the single turbo setup I will apply for mod permits and get it emissions tested.

OK so today i got into it, both turbos have been removed, first one took a few hours but i had the last one off within an hour since there was so much room to play with - may god help the mechanics who have to change these turbos over with the engine in the car..... LOL im sure its much harder to re-fit them as opposed to removing them.

Here are some pictures of the mani and turbo test fitted!

Vo3rol.jpg

IKNINl.jpg

oU6kFl.jpg

HiT53l.jpg

I am very happy with the design of the manifold.. the comp housing clears the rocker cover by 10mm and the power steering bracket by like 3-4mm !!

Clinton gets started on the welding and fabrication side of things tomorrow :cool:

Edited by snozzle

that looks so good oz, the 6boost manifolds are a nice piece. i really want one but cant justify putting the money into an rb20 project. ive found a white 33 gtr that i like just a matter if the numbers are right.

what do you need to fabricate? also what is reading the air volume if you have eliminated the mafs?

Thanks man, i eliminated the AFMs a while ago actually, im running an aftermarket ecu, Power FC DJ, which runs two MAP sensors on the intake side. Basically similar to how the falcons are but they only have 1 i think?

I need a dump pipe and an inter-cooler pipe fabricated, i also need to get the external gate flange welded onto the manifold and then a screamer pipe made up :) .

That looks tops mate, thats the difference with yours compared to the ETM manifold I had. I had to make a custom power steering canister as the comp housing fouled on the bracket pinch.gif

Looking good mate, should pull easy 320kw + on 16-18psi :cheers:

Yeah I was suprised i didnt have to mod the reservoir but it seems i am going to have to relocate it anyway since i have changed my mind on how the compressor housing is going to be orientated.

Heres a pic of how its going to sit now and also the intake pipe:

9PsDtl.jpg

Ive orientated the comp cover this way for a few reasons;

First being that its away from the manifold and having it further away increases the life of the silicone hoses connecting to it,

Secondly, its also easier and more straight forward to make a pipe from there down to below the air filter.

And last reason is.. i actually like the look of it like that haha, looks very mid-90s jap which is the look i quite dig.

Dump pipe is 95% finnished and i think Clinton has done a superb job on it, i am very happy with his work thus far :)

vBUxKl.jpg

Tomorrow the screamer pipe and intake pipe will be made and the 90 degree aluminium elbow will be welded onto the comp cover!

I am hoping i can take it for a spin on thursday :)

Oh and after i took my front bumper off, i found a nasty crack in my cross over pipe, behind my intercooler, which flows the air back to the intake side from the blow off valves so im thinking ive been losing power from there ever since ive owned the car, its still managed to pull good numbers though? Not running the bovs anymore so no bovs no problem :rofl2:

Edited by snozzle

Create an account or sign in to comment

You need to be a member in order to leave a comment

Create an account

Sign up for a new account in our community. It's easy!

Register a new account

Sign in

Already have an account? Sign in here.

Sign In Now


  • Similar Content

  • Latest Posts

    • who can tell me what this is and why my car talks to me? i think it's hilarious. it's on my r34 right above the drivers-side storage compartment. the characters under the wrench say "inspection". every 10 or 20 startups, a voice starts talking in japanese from some speaker in this area below the dashboard. it says a few sentences then shuts off. different from the ETC card reader voice that happens every time i start the car. I've never found the speaker, i've never been able to catch the voice and translate what it says, and i've never found a forum thread that tells me how to reset the warnings. the holes in between the symbols are NOT buttons you can press to reset the warnings. anyone else have this? has the demon lord from Hereditary infected my car?!
    • Would you ever vent this bonnet or will it be unnecessary?
    • Happy new years folks! Wishing you all a successful year of money pit ownership!  So the subframe bushes are out....   Ok, who else has done that job before??  What a C U Next Tuesday of a job that is!  Be glad to not do that again in a hurry! I think I explored every option available to chop the middle section of the bushes out, most of them unsuccessfully! I tried a holesaw, die grinder, normal drill bit, air chisel, etc, etc. The true success happened by accident when I'd decided to try a step drill I spotted on the bench on the way passed.  See, there are benefits to never cleaning up after yourself! It RIPPED through so so much better than the drill bit. It has to be the skinniest one available so its small enough to fit between the inner tube and outer casing but it made easy work of it.  First one i hammered the shit out of... New method- 20250102_185506.mp4   I did the other 5 in less time than I fluffed around with the first one. With the first couple I used the cut off saw (sawsall as the yanks love to call them) to cut a break in the outer casings. Even with that they're still a prick to hammer or air chisel out.  The last few i just went rambo with the air chisel without cutting them. I over cut one of the early ones so will hit the with the mig to fill the cut then sand it off smooth.  The carnage left over-   I've also been "nesting" ie, cleaning up my babies nursery,  ie cleaning the f**king pig sty of a shed. I've got that much shit laying around it's as cluttered as my head!  Getting things put away, in boxes, on shelves, hanging off walls, all to get some working space back again.  Hopefully that keeps me motivated....
    • AFAIK does the base map for Haltech even have the 4D compensation enabled? It's been a while but when I looked at it I remember it was actually using pure TPS as one load signal and MAP for another. Seemed workable but not ideal by any stretch. A lot of people have "make the event-itis" which leads to stuff like this happening.
    • https://www.youtube.com/watch?v=qHhWelSBppY
×
×
  • Create New...