Jump to content
SAU Community

Recommended Posts

Need to sus out a collapsible pole so i can transport it....

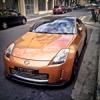
Just wasted some time getting used to the rig taking pics of my cars!

Planning on doing lots more photos this week once i get my gear unpacked hehe

Awesome stuff!! Can you post a pic of the setup when you get a chance, curious to see how these shots were taken.

I trust you've seen the recent Speedhunters auto photography features:

http://speedhunters.com/archive/2010/07/01...giou-gt-gt.aspx

http://speedhunters.com/archive/2010/07/05...xas-outlaw.aspx

http://speedhunters.com/archive/2010/07/02...-rusty-bmw.aspx

Especially the Costas work is crazy!

Link to comment
https://www.sau.com.au/forums/topic/328475-car-rig-shots/#findComment-5340359
Share on other sites

Awesome stuff!! Can you post a pic of the setup when you get a chance, curious to see how these shots were taken.

I trust you've seen the recent Speedhunters auto photography features:

http://speedhunters.com/archive/2010/07/01...giou-gt-gt.aspx

http://speedhunters.com/archive/2010/07/05...xas-outlaw.aspx

http://speedhunters.com/archive/2010/07/02...-rusty-bmw.aspx

Especially the Costas work is crazy!

Yeahhh costas work is awesome. I gotta go for a drive and find some locations as well. Really want to go to a carpark and take some photos.

Will make a new thread once it's setup.

Here's just a crappy fb pic of how it was setup haha

37003_441144436210_595726210_6197448_672816_n.jpg

Link to comment
https://www.sau.com.au/forums/topic/328475-car-rig-shots/#findComment-5340372
Share on other sites

I was reading up about these a while ago, but I dont think the website is working at the moment :banana: Had everything you needed to know, and you could buy everything you need from it as well.

I'm definately looking into buying everything I need sometime in the future when I have some more money to through around.

Link to comment
https://www.sau.com.au/forums/topic/328475-car-rig-shots/#findComment-5340424
Share on other sites

I was reading up about these a while ago, but I dont think the website is working at the moment :banana: Had everything you needed to know, and you could buy everything you need from it as well.

I'm definately looking into buying everything I need sometime in the future when I have some more money to through around.

Best/cheapest way to get it is from the US.

Just need two suction cups (Avenger F1000), three superclamps and the magic arm.

I paid ~$300AUD for it all, got my cousin to bring it down from the US so yeah i saved a bit on shipping from BH.

Link to comment
https://www.sau.com.au/forums/topic/328475-car-rig-shots/#findComment-5340436
Share on other sites

I've just ordered all my rig stuff. The main thing you need is a strong ass boom pole. Something that won't flex and besides that, getting good locations helps out.

Normal pole length is 3m to 4m. Besides that, get some mates and push the car (out of site of course) or drive extremely slowly, with a long shutter speed and enjoy processing.

You don't actually need the magic arm, but it helps alot if you want more creative angles and extension from the boom.

The australian site is www.rigshots.com.au they sell all this stuff, but the website has been down the last week, not sure whats going on there. Otherwise plenty of places sell this stuff, check out www.shopbot.com.au or any of the other comparison websites as well as www.bhphoto.com or www.adorama.com

Link to comment
https://www.sau.com.au/forums/topic/328475-car-rig-shots/#findComment-5341662
Share on other sites

Xmetal made his own rig about a year ago using suction caps I think he bought from B&H. He hasn't posted here on SAU for quite a while, but check out his website for some rig shots. Also on Facebook, but he's got no automotive shots there at all at the moment.

Link to comment
https://www.sau.com.au/forums/topic/328475-car-rig-shots/#findComment-5343005
Share on other sites

SO i built a little piece of crap rig from a few things laying around at work. it's fairly useless but i wanted to test the theory and find out about some of those little details you don't think about til give something a go.

first shot with a 400mm rig that didn't really stick to the car haha. guess i need to keep saving and try again with some useful parts.

DSC_1265.jpg

and here's one just dicking with the camera on the way home :whistling: I call it.... MONICAAAAAAAAAAA!!!!!!!!!!!!!!!!!!!!!

DSC_1269.jpg

Link to comment
https://www.sau.com.au/forums/topic/328475-car-rig-shots/#findComment-5346564
Share on other sites

Nice Mat!

With an extended rig, your car would look great at sunset being silver, the lines would show great. Try and head somewhere that is green as well because it will contrast with your car and make your car "pop" more. Or just put it in, in post.

Triple J listener :O

Link to comment
https://www.sau.com.au/forums/topic/328475-car-rig-shots/#findComment-5359073
Share on other sites

I have all the presets except one set on jjj.(which the gf hate)

I'm going to put some time into practicing with my new lighting potential. After that I should have some pennies and be able to make a really nice rig. I've got a good plan in my head for how to do one that's flexible and won't vibrate or sway to much. can't wait to get one sorted. I heart rig pics. they're awesome!

Link to comment
https://www.sau.com.au/forums/topic/328475-car-rig-shots/#findComment-5359580
Share on other sites

Yeah. What he said. Use an exposure of one second or more (roughly)

Camera is bolted on to car, so the car stays 100% static and clear. The background is moving, so the image is being overlapped on the sensor(film) and gives the blurriness.

If you were a sydneysider I'd let you be a guinea pig for when i get my rig finished.

Link to comment
https://www.sau.com.au/forums/topic/328475-car-rig-shots/#findComment-5371252
Share on other sites

Create an account or sign in to comment

You need to be a member in order to leave a comment

Create an account

Sign up for a new account in our community. It's easy!

Register a new account

Sign in

Already have an account? Sign in here.

Sign In Now


  • Similar Content

  • Latest Posts

    • For sure the later RB26 variants had a different setup (6 cam voltage sender?), but the RB25DE/DET share the same ECU pinout/PCB footprint, and at the ECU plug it ends up being 'throttle sensor in' & 'throttle sensor out' (to A/T TCU) ...you stick a multimeter on these pins and you'll find them directly connected (0 ohms) ; I had an pair of Nissan ECUs on the bench long ago, and I noticed this throttle sensor in/out link, actually linked to an op-amp ...which was unpopulated on the NA board, but present on the T board and I went 'ah-ha!' in some moment of clarity... ...it wouldn't surprise me if they changed strategy here though (in the software and actual monitoring of this signal), because they did with other stuff (A/T signals).. and 0.45v as a trigger point makes sense, as that's what the external TCU units expect at idle ; kudos, thanks for that insight...I suppose it boils down to whether or not Consult can display real time data of that signal's voltage... ...in any event, it presents the same target...ie; rotate TPS unit to achieve 0.45v to suit both ECU&TCU, and where do you goto from there? Just disconnect TPSwitch connector and/or that plus TPSensor connector....or do you go for the throat and disconnect IACV solenoid and see if it still stalls? (probably throws a recoverable fault code and goes for default idle strategy?)...
    • I’m also conscious that e85 is slowly being phased out. Not all United’s have them anymore. Can’t take the risk of being low on petrol and assuming the servo will have it. 
    • MR HAMMER has said his piece. Painted up to avoid Rusty Rusty. Actually lines up well. (i.e it lines up the same as the unmolested GTR guard). Turns out the GTR Strut brace does foul on the bonnet vents ever so slightly. May need a little bendy bendy if intended to keep using with a strut brace. So spacing it out to clear the FAST102 is not an option. Annoyingly, the bonnet vents also foul on the heater lines running over the engine. Given this engine does not EVER require a heater, a delete loop is going to be used. Don't worry, the defogger uses the AC. The heater is basically "Do not use the aircon and turn the fan on". It will still be effective, I promise.... once I get the system regassed... Will have to revisit with unvented bonnet I suppose, and suitable strut brace. There's plans to do this and other things tonight and bleed brakes (there was a weep) and put the bumper back on, and take Good Friday morning - Because troubleshooting on the side of the road limping it home at midnight tonight is ... not very smart.
    • Thank you all for you assistance. I contacted Nistune regarding the support for the RB20DE along with my ECU Code (23710-10U00). They do have a map for it and added the RB20DE as a purchasable option now as well. They also added Malta as a Billing and Delivery options as this was missing. I was honestly amazed at their quick response and action, it took less than 24 hours. I also looked again at direct fit options for injectors, just in case I were to replace them. DeatschWerks seem to use a Bosch EV14 base and makes ones that fit mine at 440cc lowest, but also have 550cc at the same price. I tried looking for other direct fit options and managed to find one (also Bosch EV14 based) which includes a plug and play adapter on ebay. Did a small test with a Noid Light on the troubled injectors and all seems good, so they are pulsing properly electrically. One weird part is that they are missing on the same two cylinders as before I got the injectors cleaned. Mechanic also found this weird as he did not label the injectors and it is unlikely to have the faulty injectors be installed in the same cylinders.  
×
×
  • Create New...