

Announcements
-
Similar Content
-
-
Latest Posts
-
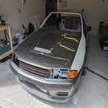
 I clean my wheels every time I was the car, I also clean the barrels, the only product I use on the wheels is truck wash, followed by wash and wax, cleaning the barrels is easy with one of these microfibre thingies on a stick from Sabco, there also great for getting in between the front guards and body, and tight spots in the engine bay
 -
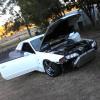
 An updated post here. Sounds to me like there's definitely a bit of sketchiness here. Old mate with 10 rusting Torana's in the front yard might be more who they're focussed on. (For right or wrong).
 -
Is this not just about people wrecking, and storing, multiple cars in their front yard? I now a tow truck driver that was contracted by the council to clean up housing commission front and rear yards in houses and unit car parks I'm all for working on, and doing maintenance on your car in your garage or driveway, but some people definitely take the piss There's one house locally to me that I walk past regularly where the front yard and driveway looks like a wreckers, multiple cars in various stages of being stripped, and the yard looks like all of fluids are basically dumped on the ground I may be wrong, but it seems that the initial reports, which I've seen nothing actually official about yet, may be getting taken out of context, like alot of the latest "the sky is falling" stuff found on the youtubes for clicks
-
 have they? Link appreciated. I live in Casey. I can see both sides of the argument in this case. There's a lot of sketchy stuff going on. There needs to be a clear definition of what this is supposed to be IMO. I wager the intent was to be a broad sweeping brush against people who have 4 cars up on blocks on their front lawn, not someone who services their own car behind their own gate on a weekend bothering probably nobody. But it'd be hard to legislate the difference there.
 -
Oh, the wheels were already off. I wouldn't normally take them off to clean them although it does make it easier with the ceramic, so I might take them off when reapplying. I don't drive much but now with the ceramic coat, when I do drive and they get dirty I can get most off with the pressure washer. I'll be switching to dirtier pads soon which was the motivation for the ceramic as I usually just clean them and sometimes use Autoglym wheel protector. Nah, f**k the barrels! Haha, I'll give them a quick scrub when they're off the car and a pressure wash, but even I draw the line with the barrels. Yes, dark coloured wheels allow you to get away with a lot!
-


Recommended Posts
Create an account or sign in to comment
You need to be a member in order to leave a comment
Create an account
Sign up for a new account in our community. It's easy!
Register a new accountSign in
Already have an account? Sign in here.
Sign In Now