Jump to content
SAU Community

Carbon Fibre S2 Front Foglight/indicator Surrounds Group Buy!


Recommended Posts

It's like the complete opposite of what I was expecting.

I went into it thinking I was going to have to trim and cut it to make it fit given it was the prototype and was amazed it fit without me needing to do anything.

Fellas keep in mind that mounting point locations are very hard to replicate within mm's without an expensive jig which would increase the price dramatically.

I hate saying it because we pride ourselves on positive feedback, but some minor alterations will be unavoidable with products with complex mounting points.

When these things coming

Oops just read the last page, I hope they come Monday now

Edited by ahh 33 s2

Fellas keep in mind that mounting point locations are very hard to replicate within mm's without an expensive jig which would increase the price dramatically.

I hate saying it because we pride ourselves on positive feedback, but some minor alterations will be unavoidable with products with complex mounting points.

Yeah I understand that 100%. Hence why I was counting on having to modify mine slightly. I must have just got the luck of the draw. At the end of the day, for the price they are and considering you don't really need to get all 6 fittings on (I had two snapped on my factory one and didn't even know) I still think they are damn decent.

I probably just got every one's hopes up when I said they were a perfect fit, sorry guys lol.

Fitted my set today, took a bit of effort to get them to fit although I am happy with the end result

Edited by Luke_GTS-T

Just got mine today, fairly happy with what I got, one visible blemish on the face side,

Any one else in Perth get a set of these, or am I going to be the only bad ass rolling around with a set?? Hope so!!!

Edited by ahh 33 s2

If some one knows somebody that wants a set please buy my spare ones, they are just sitting in a box doing nothing :(

Has anyone compared them against other carbon they have on their car?

Mine seem very blue in comparison to my bonnet, maybe I just need to polish up the covers?

DSC_1039.jpg

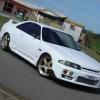
In any case, once I get them looking black (polish or tint) like carbon, they should look like this.

DSC_1035.jpg

Picked mine up today and got them on eventually.. I only had problems with one of the mounting points on each, along the slanted corner which I managed to snap off on one (which made it easier to saw about 5mm off!) and sawed the same off the other without snapping it off. happy.gif Also had to use different screws but not a problem really. My FMIC piping was the worst problem I had, trying to get a bolt off where it was right in the way. Oddly the bolts on one side were 10mm the other side were 8mm.. Hmmm.

post-74434-0-14555100-1297179395_thumb.jpg

i have a return flow blitz cooler and it was a massive pain in the ass to squeeze my hand between the piping and get the bolts undone

and then re do them

i have a return flow blitz cooler and it was a massive pain in the ass to squeeze my hand between the piping and get the bolts undone

and then re do them

Yeah it was just one of the bolts towards the middle of the car on mine.. Shocker.. But all done now they look awesome wub.gif

back in the bumper and ready to go on the car

IMG_0287.jpg

both done

IMG_0285.jpg

old and the new

IMG_0283.jpg

it took 4 attempts to get pictures in here but finally success

Edited by ahh 33 s2

next we need to get someone to cut the glass on those clear glass lenses so we can replace the orange indicators....

hmmm firstly I need some time to do all this stuff...

I accidentally smashed one when we moved to our new place, hence why I havn't really done anything new in that area :(

Create an account or sign in to comment

You need to be a member in order to leave a comment

Create an account

Sign up for a new account in our community. It's easy!

Register a new account

Sign in

Already have an account? Sign in here.

Sign In Now


  • Similar Content

  • Latest Posts

    • Thanks Duncan! Yeah it's street use for me only. Maybe occasional track day. Any difference in noise when running with the two pumps? I would expect the lift pump to be more quiet than the main pump so hopefully not? And yes, unfortunately quite a big price difference to the simple hanger setup. Though I'm usually willing to trade money for better reliability and future-proofing. Buy once, cry once and all that. I'd be very happy to never have to deal with fuel pump / wiring issues again  
    • The old manifold was quite under the GTR strut brace.  The new manifold is quite [unknown] the GTR strut brace. The GTR strut brace was needed to clear the bonnet vents. The Old strut brace will almost certainly clear the new manifold, but not the bonnet vents. The old strut brace will almost certainly clear the new manifold, and the new bonnet without vents. But I am hoping the GTR strut brace clears the new manifold :p
    • On the bright side, at least you knew that it happened and remedied before anything happened. A friend of mine just took his Fiat 124 to a shop for an oil change and they didn't tighten the oil filter housing properly. 4.5 quarts spewed out and even after refilling + tightening the cap the engine has a tick now.
    • So, more pain. The FAST manifold is a little larger than the stocker. This is problematic because there really wasn't much clearance to begin with, so going from 'barely enough' well into 'no' is sad based on the external dimensions of the thing, even though where it bolts to the head is the same. Result is the fuel rails sit a good 25mm higher, and this is a bit of an issue with the wiring that runs behind the motor, and the fuel lines, and everything else. When pushing the manifold on, it required a huge amount of force to crush wiring looms to fit it, sensors like the MAP sensor are about 1mm from the firewall, and the FPR just has to bend ABS lines to be forced into place. After some brainstorming and some sad drinking, the loom for some reason ran from the grommet behind the ABS sensor, then to the driver side head, then back to the passenger side head. So all of this was pulled back and stripped, a few wires cut and rejoined, so that the 'branch' was now on the passenger side's head as below: Before you basically couldn't see anything behind the driver head. This is much improved! The MAP sensor is now pointing up (instead of at the firewall) Brackets have been made up for the rail. The rails are for a LS1, the manifold is designed around a LS2 as it's base. Which of course has slightly different bracketry and water pump clearance, hence the mods people need to do. Should be hopefully mounted tonight. I spent money on a new FPR that is slightly more compact than my Turbosmart FPR1200. The gauge has also been moved to the rail. There's also apparently an ORB to AN Union instead of the adapter, because the ~25mm of the current adapter is going to make the difference. Provided this all goes together and arrives today, it'll be the totally not stressful attempt to start it.
×
×
  • Create New...