Jump to content
SAU Community

Recommended Posts

What's stock? From memory 3mm isn't it? And I didn't think Scotty modified that hole. Should I drill it out to 5mm?

Lol, no mate; don't drill the hole out.

Preload basically means that the arm will be too short to reach the pivot pin on the Wastegate arm. You'll need to pull against the actuator spring and stretch it into position. That extra stretch is preload.

Lol, no mate; don't drill the hole out.

Preload basically means that the arm will be too short to reach the pivot pin on the Wastegate arm. You'll need to pull against the actuator spring and stretch it into position. That extra stretch is preload.

Lol ok. Not sure how much preload I have, but it sounds like a stronger spring will give more preload?

I think sometimes when I weld the spring mounts on the actuator it may grow in length slightly, (don't get too excited Craig, dirty mind.) This can be counteracted by simply sliding a washer or two under each of the mounting points on the front housing. There should be 3-5mm of preload which means you should have to slide the shaft out of the actuator 5mm before it will clip on to the wastegate arm, it will take a bit of force as the springs are so strong. It sounds like yours needs more preload in any case Ryan.

I've replaced every vac line now I think. I can't see how that would be it.

There is a restrictor of some sort in one of those hoses (going to the wastegate?). Did you leave that in or remove it?

I think sometimes when I weld the spring mounts on the actuator it may grow in length slightly, (don't get too excited Craig, dirty mind.) This can be counteracted by simply sliding a washer or two under each of the mounting points on the front housing. There should be 3-5mm of preload which means you should have to slide the shaft out of the actuator 5mm before it will clip on to the wastegate arm, it will take a bit of force as the springs are so strong. It sounds like yours needs more preload in any case Ryan.

Wait... So you want my shaft to grow in length? :P

Cool, well washers sound like an easy solution. I'll give that a crack and see how I go. 1-2 washers should give me an extra 2-3mm preload.

There is a restrictor of some sort in one of those hoses (going to the wastegate?). Did you leave that in or remove it?

I was gonna suggest the same thing

Yeah there is a restrictor, but when I replaced the hoses I knew this was there and was cutting all the hoses apart to find them. Maybe I missed one, because I didn't find one.

If its in the hose from the boost solenoid to the wastegate, is it something I can go and get from Repco/Autobarn/SuperCheap and just replace?

The restrictor is in the stock bleed solenoid lines which I assume were removed to install the boost controller, either way the restrictor is only there to bleed the correct amount of boost off, if you remove it you will run almost unlimited boost, not have boost drop.

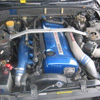
i dont this to mine yesterday. i steam blasted the top cover cause of the temp switch and other crap on it i didnt want to drop it in the tank over night. but the bottom cover got a tanking and ended up like this after the carbon build up.

Top cover
SA501699_zpscf12718e.jpg
Bottom
SA501700_zps44e14716.jpg

^^^ VQ25/30DD?

I washed mine today as I'm heading to the SAU NSW tech night tonight. I just love the way it looks after a wash, specifically standing back and looking at this, so I thought I'd share!

8677538210_96fcbd5eb9_c.jpg

^^^ VQ25/30DD?

I washed mine today as I'm heading to the SAU NSW tech night tonight. I just love the way it looks after a wash, specifically standing back and looking at this, so I thought I'd share!

8677538210_96fcbd5eb9_c.jpg

You have big snails in your front yard!!! WTF is with that??

finally ive been waiting to post this. :yes:

cars tuned, very happy with the results its been a long time( almost 3 months) with issue and constantly annoying the guys on here.. but first in WA :)

it is road tuned so no dyno results as yet guys but its a big improvement and im sitting at 19.5psi :)

id really like to thank Scotty, Craig, Ryan and of course all the others for imput for helping me through the tuning/ mehanical issues ive had. :cheers::cheers::cheers:

i will get dyno run for all you doubters eventually lol

  • Like 1

Had noble intentions today of fitting up the LSD rear end & the Scotty dump, front pipe & new Blitz Nür catback I got the other day...

Diff went in fine, but I was foiled utterly by the stock dump pipe... :(

I even called Scott to walk me through it, but couldn't for the life of me remove the O2 sensor with the tools I had - and as a result I couldn't get to the top centre nut to the dump pipe flange.

Fitted up the rest of the exhaust to the stock dump (will be forced to ask Craig to do it for me while I hang my head in shame) and I'm glad to report that its SUPER quiet. At idle, it's not much louder than the standard exhaust & probably just as loud as the induction roar on WOT.

Will be interesting to see if there's any change in noise levels once the factory dump/cat is swapped for the good one...

Edited by Mr 20Valve

Haha, its a ripper that bolt, and why I offset the o2 bung on my dump pipes. It will go together and come out again much easier once Craig fits it.

The dump makes the difference as it is the main exhaust restriction.

Create an account or sign in to comment

You need to be a member in order to leave a comment

Create an account

Sign up for a new account in our community. It's easy!

Register a new account

Sign in

Already have an account? Sign in here.

Sign In Now


  • Similar Content

  • Latest Posts

    • They see me rollin' they hatin'....... Took me most of the day to make the necessary mods to the mounts to make them fit the car.  Fortunately I was able to just use the mounts that came with the rotisserie. The rear ones are really secure, the front I feel i might reinforce a bit more as it doesn't seem like enough attachment to the vehicle. I'm sure it's fine but better to be safe than (extremely...) sorry.  I drilled and tapped thread into additional M12 holes to each car mount where it attaches to the rotisserie as an extra fail-safe. Without them the side to side movement is just restricted by the allen head pinch bolts, nothing actually goes though the beam. Does now! I still need to adjust the rotisserie to get the car centred in terms of centre of gravity. If it's too high or too low relative to the rotational centre line of the car, it will be like a turtle and roll onto its back or as it currently sits, I dont think I'd be able to rotate it as it sits as it needs to lift the whole car up as it rotates. Ain't happening... I'm going to be nervous as hell the first time I go to spin it on its side...    
    • Oh yes done this when the window started flopping around.  Turns out the guides that run along the rail chanel had crumbed way. Took off the door card and pulled out the window mech, then the window, which you have to pull out through the top. As said unbolt the guide rail and don't spend 30 minutes getting frustrated trying to find a way to slide it out upwards cause that don't frigging work. Drop it down and out through the door hole. All I did to repair it was slice some 10mm clear plastic tube, vertically, then screw it to the guide rail both sides. This tubing rolls inward on both sides and leaves a gap wide enough to hold the window. To finish all I did was lube the plastic tube with olive oil and Bob's your uncle . . . well if he has the operation he can be your Aunt ! !  10 bucks in plastic tube and another 5 minute job done again . . . . YEH BULLSH#T ! My love for Skylines knows no bounds !
    • So was there a solution to this problem? I’m having this issue now. 
    • not expensive, just irreplaceable if you don't go sub 60 at wakie in that thing people will start talking
    • I haven't replaced that, but I have had the doors apart on the r32 a couple of times The door skin will be held on by a combination of clips and bolts, just take it slowly and make sure all the sneaky hidden bolts are out Once the skin is off you should be able to pop that piece off pretty easily, looks like there are only 2 bolts holding it on
×
×
  • Create New...