
What Have You Done To Your Stagea Lately?

Announcements
-
Similar Content
-
-
Latest Posts
-
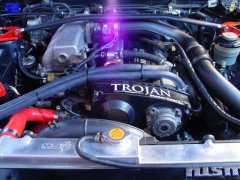
 The old manifold was quite under the GTR strut brace. The new manifold is quite [unknown] the GTR strut brace. The GTR strut brace was needed to clear the bonnet vents. The Old strut brace will almost certainly clear the new manifold, but not the bonnet vents. The old strut brace will almost certainly clear the new manifold, and the new bonnet without vents. But I am hoping the GTR strut brace clears the new manifold :p
 -

-

By joshuaho96 · Posted
On the bright side, at least you knew that it happened and remedied before anything happened. A friend of mine just took his Fiat 124 to a shop for an oil change and they didn't tighten the oil filter housing properly. 4.5 quarts spewed out and even after refilling + tightening the cap the engine has a tick now. -
So, more pain. The FAST manifold is a little larger than the stocker. This is problematic because there really wasn't much clearance to begin with, so going from 'barely enough' well into 'no' is sad based on the external dimensions of the thing, even though where it bolts to the head is the same. Result is the fuel rails sit a good 25mm higher, and this is a bit of an issue with the wiring that runs behind the motor, and the fuel lines, and everything else. When pushing the manifold on, it required a huge amount of force to crush wiring looms to fit it, sensors like the MAP sensor are about 1mm from the firewall, and the FPR just has to bend ABS lines to be forced into place. After some brainstorming and some sad drinking, the loom for some reason ran from the grommet behind the ABS sensor, then to the driver side head, then back to the passenger side head. So all of this was pulled back and stripped, a few wires cut and rejoined, so that the 'branch' was now on the passenger side's head as below: Before you basically couldn't see anything behind the driver head. This is much improved! The MAP sensor is now pointing up (instead of at the firewall) Brackets have been made up for the rail. The rails are for a LS1, the manifold is designed around a LS2 as it's base. Which of course has slightly different bracketry and water pump clearance, hence the mods people need to do. Should be hopefully mounted tonight. I spent money on a new FPR that is slightly more compact than my Turbosmart FPR1200. The gauge has also been moved to the rail. There's also apparently an ORB to AN Union instead of the adapter, because the ~25mm of the current adapter is going to make the difference. Provided this all goes together and arrives today, it'll be the totally not stressful attempt to start it.
-
 This seems like a pointless exercise. There is no E30 availability. Ongoing availability of E85 should not be assumed. Flex-fuel is the only sensible approach, so you can use E85 when and where you can get it, 98 when that's al you can get, and anything in between as you fill it up and drain it down. And if that means replacing the pumps, fitting a flex capable sensor/ECU/whatever has to be done to these Renault shitboxen, then.....so be it?
-


Recommended Posts
Create an account or sign in to comment
You need to be a member in order to leave a comment
Create an account
Sign up for a new account in our community. It's easy!
Register a new accountSign in
Already have an account? Sign in here.
Sign In Now