Jump to content
SAU Community

My R33 Gtr Rebuild Diary


Recommended Posts

Hey guys & girls,

Well it all started 5 years ago when I bought my first R33 Gtst. The mod bug bit and till today it hasnt stopped.

I had initially wanted to build a R33 RB26DETT RWD project but scrapped the idea of RWD and bought a R33 GTR with a blown motor instead. Here are a few pics from when I first bought the car in 08. It was pretty clean, only had a tiny bit of rust in the bay, 67,000kms, and generally was well looked after by its previous owner (Andrew who is a member on here).

I already had a motor which was rebuilt and prep'd by Red R Racing from the RWD project. Paul's advise, knowledge, experience and time was greatly appreciated!

Motor specs are:

Bottom end:

RIPS 9ltr baffled sump

Greddy Oil pump

N1 Water pump

CP pistons and rings

Eagle H beam rods with ARP rod bolts

ACL rod and main bearings calico coated

TRUST Greddy Strengthened Crank Cap

All balanced and blue printed

Head was fully rebuilt and serviced:

RIPS ITB custom intake plenum

Tomei Bronze Valve guides

Greddy Valve springs

Tomei Solid Valve Lifters

Titanium Valve Retainers

TRUST Greddy Strengthened Cam Cap

Trust Greddy Strengthened Head Bolts

Greddy cams 256 duration inlet 9.1 lift, 264 duration exhaust 9.1 lift

Greddy adjustable cam gears

HKS Valve Stem Seals

Tomei Gasket Combination Set with 1.2mm metal head gasket

Tomei oil restrictor

Hot side:

6boost low mount manifolds ceramic coasted

HKS 2530's with braided water lines, standard oil lines etc.

Greddy extended split dump pipes

Modified intake pipes

Custom enclosed airbox by ISL33P (Custom Plenum creations)

Fuel system:

SARD 700cc Fuel Injectors RB26DETT Skyline

SARD Standard FPR

SARD 5ltr surge tank with twin internal Bosch fuel pumps, 044 intank

Greddy 10.5 fuel rail twin entry

Replaced all lines with teflon braided and earls fittings

Other:

Tomei timing belt

ATI balancer

Mines Cam baffles

Cooling Pro 100mm cooler

Greddy 19row oil cooler and relocator

Now the engine build pics..

pistons and rods freshly balanced awaiting assembly

block with new welsh plugs, grouted, bored and strainer plate honed

just about to have a wash and scrub

fully reco'd head...more on it to come...

upside down inlet port...ported

around the right way...a lot of time patience and detail as you can see

exhaust side....its more of a stage 2.5 job than a stage 3

exhaust again looking onto the valve

couple more

highly polished combustion chambers

another of valves installed in freshly milled head deck

block oiled down after clean...ready for lots of good bits to be installed!

Almost done..

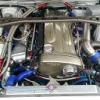
Now the work begins on the engine bay! we stripped the bay back till it was almost bare and Louie from Xclusive colours took care of the rest. The bay was smoothed, filled, and a fresh coat of QM1 white was applied. Louie and the boys spent months prep'ing the car on and off! I was extremely happy with the result. Louie even resurfaced the underneath of the car! its a shame he no longer runs XCM..

Heres a few pics, sorry phone camera quality isnt good.

More to come.. in the new year!

Cheers,

Johno

Link to comment
Share on other sites

Create an account or sign in to comment

You need to be a member in order to leave a comment

Create an account

Sign up for a new account in our community. It's easy!

Register a new account

Sign in

Already have an account? Sign in here.

Sign In Now
 Share


×
×
  • Create New...